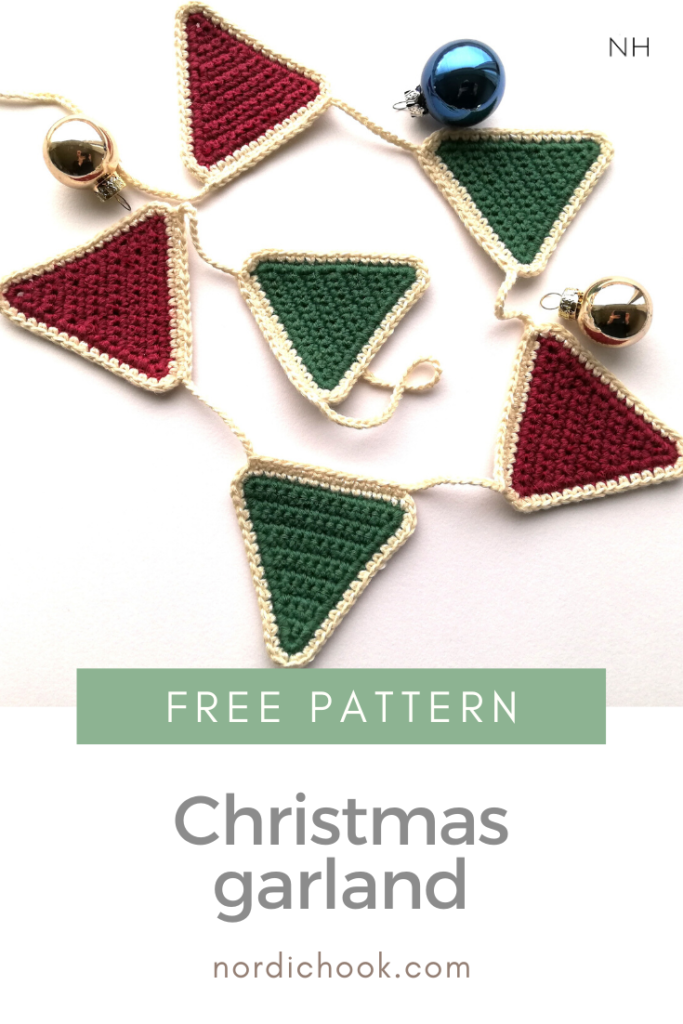
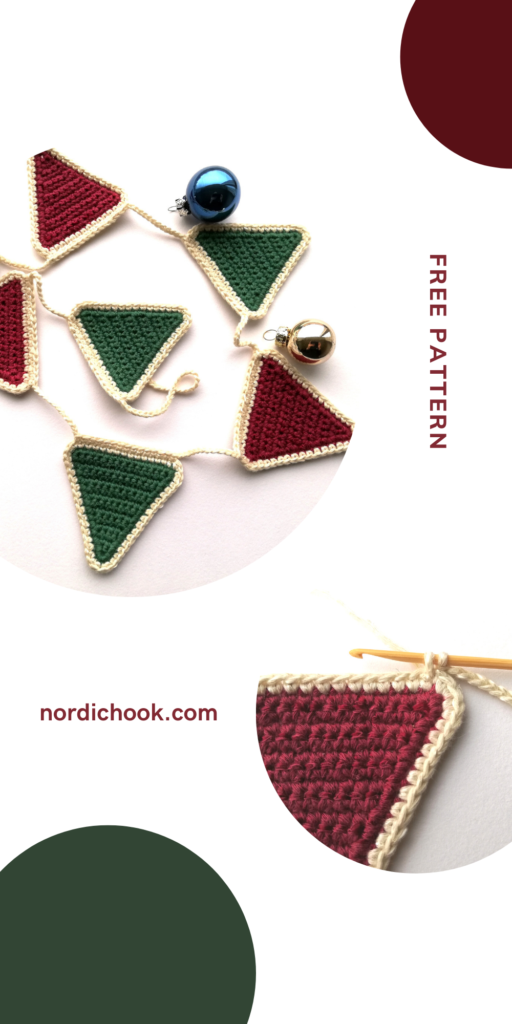
Here is a free crochet pattern for a very easy Christmas project. You don’t need much yarn for this Christmas garland or bunting (perhaps you have some leftover yarn?), and it is quick to make. Personally, I prefer to have just a few decorations for Christmas; I like the simplicity of this design, and I feel it is a “light” decoration.
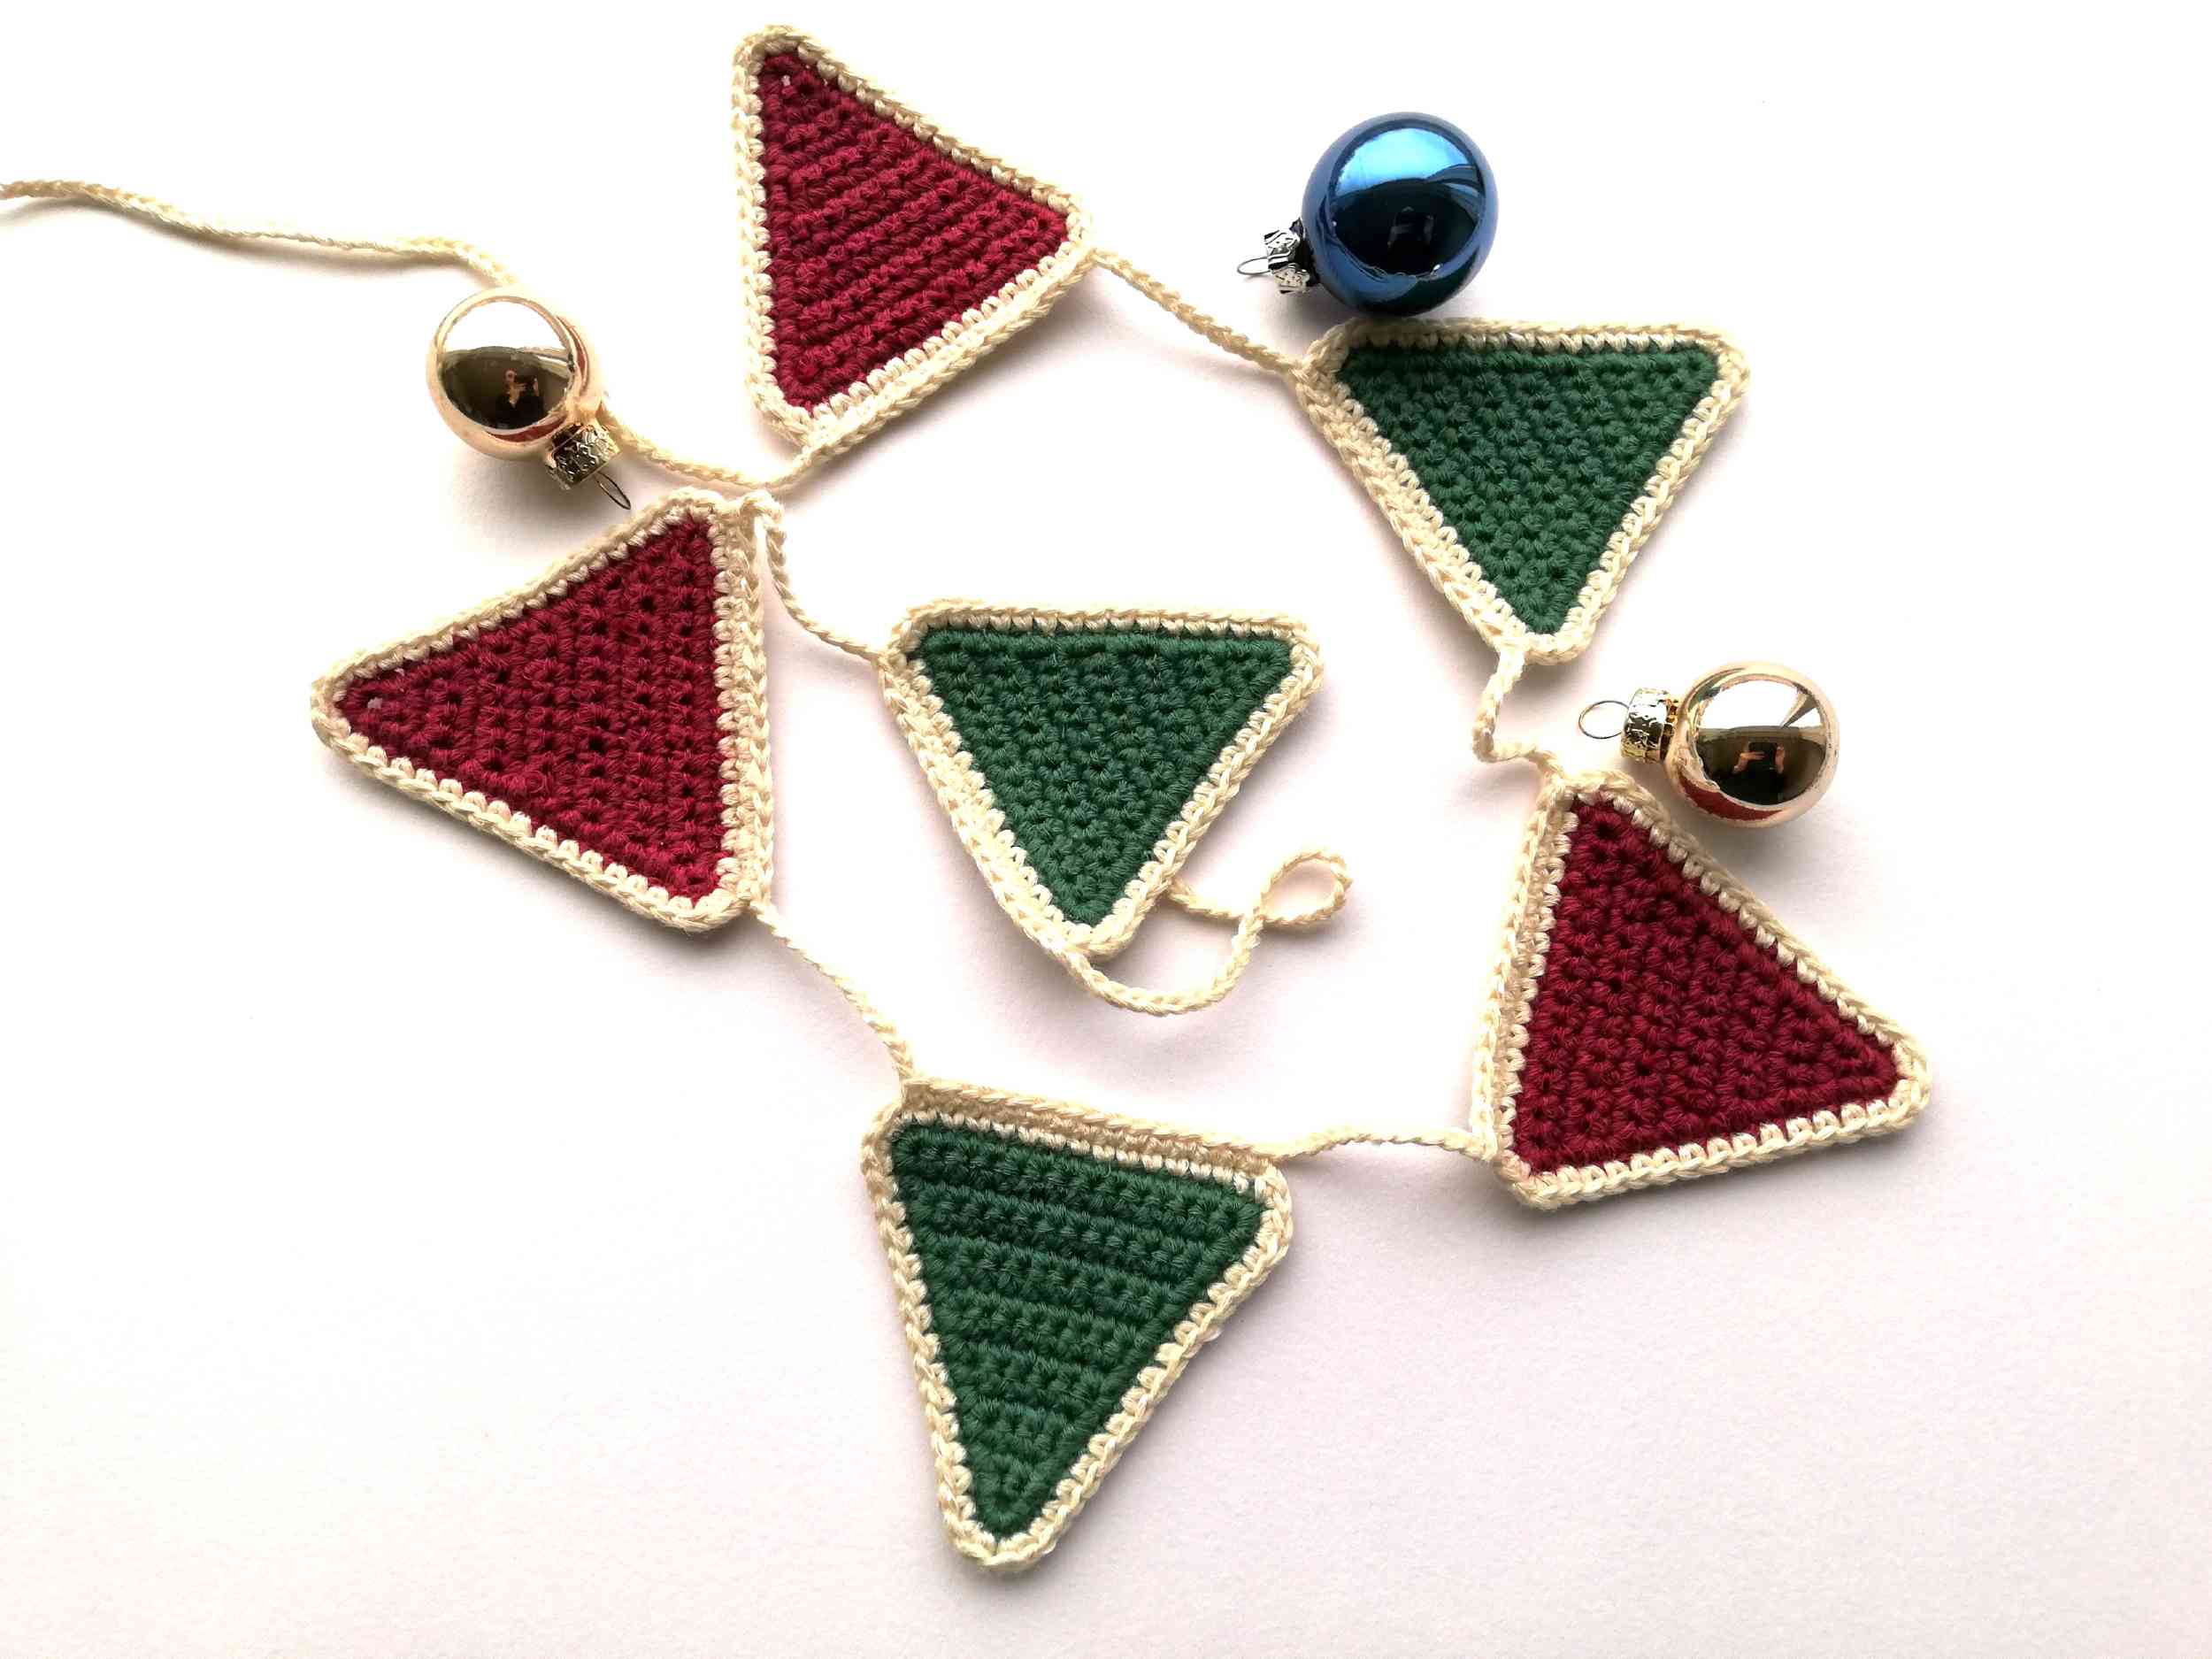
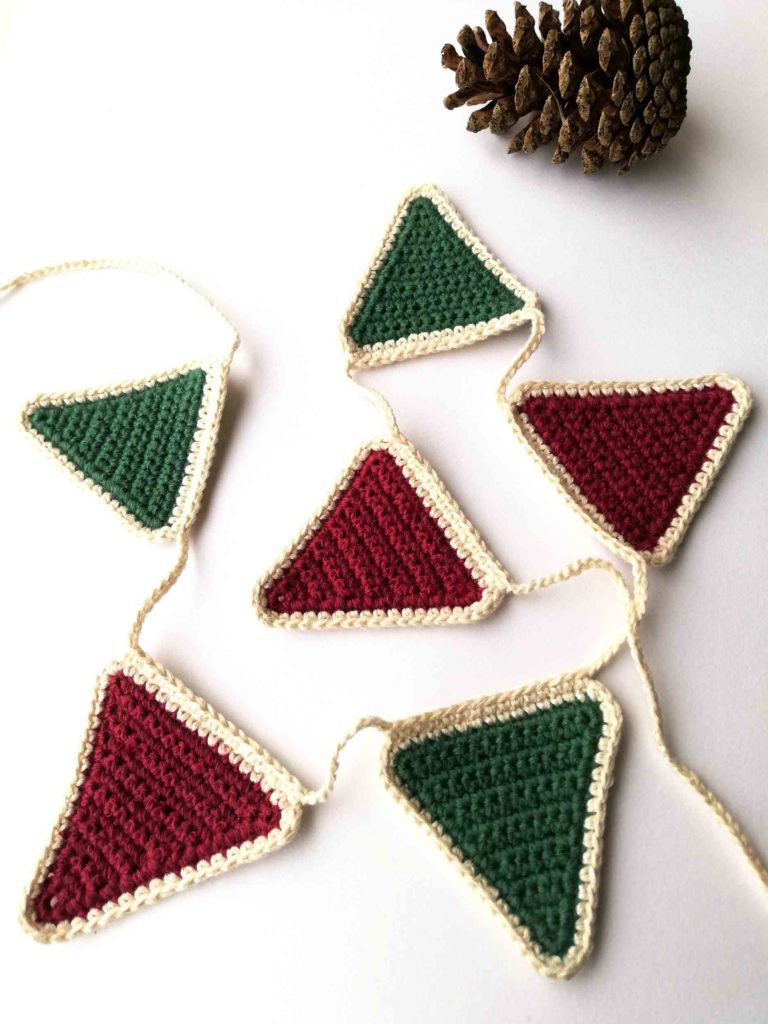
The pattern is simple and suitable for beginners. I also included a chart and some photo instructions to make it clearer how to change the yarn color and connect the triangles to the string. For my garland, I made six triangles, three green and three red, but you are free to make as many as you want. Also, you can play with colors, for example, you could make red edges for green triangles and green edges for red ones. In short, you are the boss of your garland.
The pattern includes a list of materials, abbreviations, notes, a written pattern, a chart and photo instructions. You can find my other free crochet patterns for Christmas here and more free crochet projects here.
Printable PDF
Join Nordic Hook Club and download the PDF pattern without ads for free! By joining the Club, you also get access to one of the largest crochet stitch libraries. There you will find hundreds of ad-free downloadable crochet stitch tutorials that include detailed step-by-step photo instructions, concise written patterns and member-exclusive charts. Plus, you can download all Nordic Hook patterns, stitches and e-books for free! Read more about all the membership benefits here and sign up today.
Read more and sign up!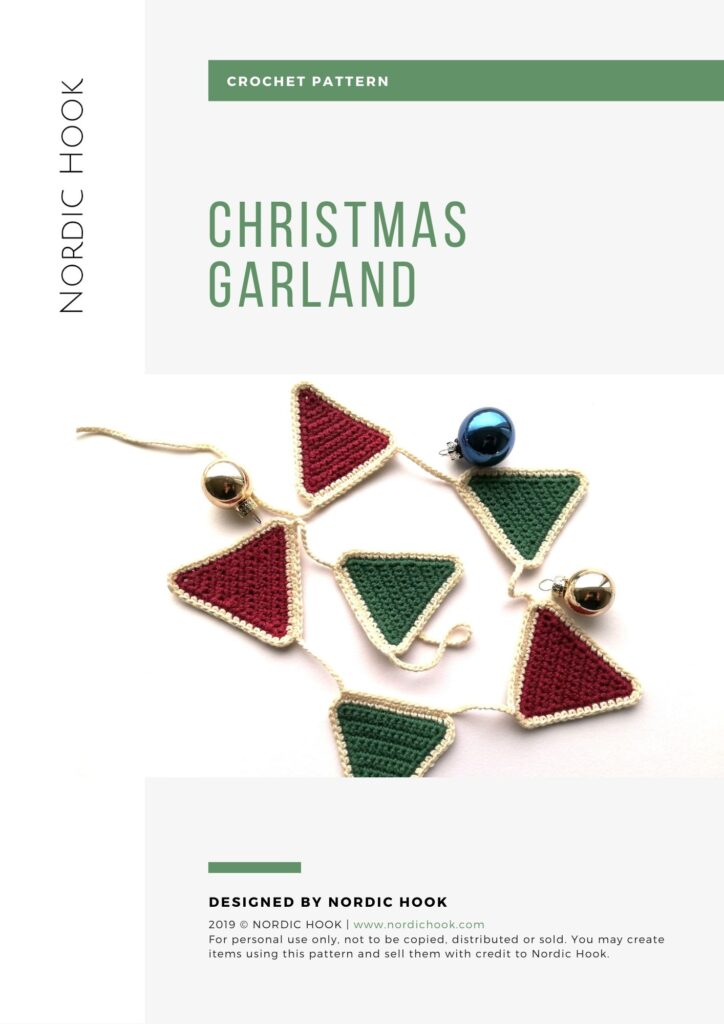
Christmas garland
Materials
- Yarn: I use red, green and white Somerset linen silk yarn 50 g from a local store. However, any thin cotton yarn will work.
- Hook: I use a 1.25 mm hook. If you are using a different yarn, choose the hook size that is recommended on your yarn label.
Abbreviations (US terms)
- ch: chain
- sc: single crochet
- sc inc: single crochet increase
- prev: previous
- st: stitch
- sl st: slip stitch
Notes
For the triangles: first you will be working in rows, then in rounds to make a nice edge. Next you will crochet a string to connect all the triangles. Turning chains for a triangle are not counted as stitches; start working in the first stitch of each previous row. The size of each triangle is 6.5 x 6.5 cm, and the length of the garland is 83 cm.
Pattern
Triangle
Take your green or red yarn and start by chaining 2.
Row 1: sc inc in the second ch from your hook.
Row 2: ch 1, sc, sc inc in the last st of the prev row.
Row 3: ch 1, 2 sc, sc inc.
Row 4: ch 1, 3 sc, sc inc.
Row 5: ch 1, 4 sc, sc inc.
Row 6: ch 1, 5 sc, sc inc.
Row 7: ch 1, 6 sc, sc inc.
Row 8: ch 1, 7 sc, sc inc.
Row 9: ch 1, 8 sc, sc inc.
Row 10: ch 1, 9 sc, sc inc.
Row 11: ch 1, 10 sc, sc inc.
Row 12: ch 1, 11 sc, sc inc.
Row 13: ch 1, 12 sc, sc inc.
Row 14: ch 1, 13 sc, sc inc.
Edge
Round 1:
- Ch 1, 14 sc, 3 sc in the last st of the row.
- Sc in every row of the triangle (14 sc).
- 4 sc in the corner, sc in every row of the triangle (14 sc).
- Sc inc in the corner, connect with a sl st.
Round 2: take your white yarn, then
- Ch 1, 15 sc, sc inc the next st, sc inc in the next stitch (this is the first corner).
- 15 sc, sc inc in the next st, sc inc in the next stitch (this is the second corner).
- 15 sc, sc inc in the next st, sc inc in the next st, connect with a sl st. Fasten off.
String
Take your white yarn, ch 50, sc in the top of the first triangle, sc in every st of the triangle top until the end of the row, ch 12, sc in the top of the second triangle and sc in every st until the end of row. Repeat until all your triangles are connected. After the last triangle, ch 50. Fasten off.
Chart

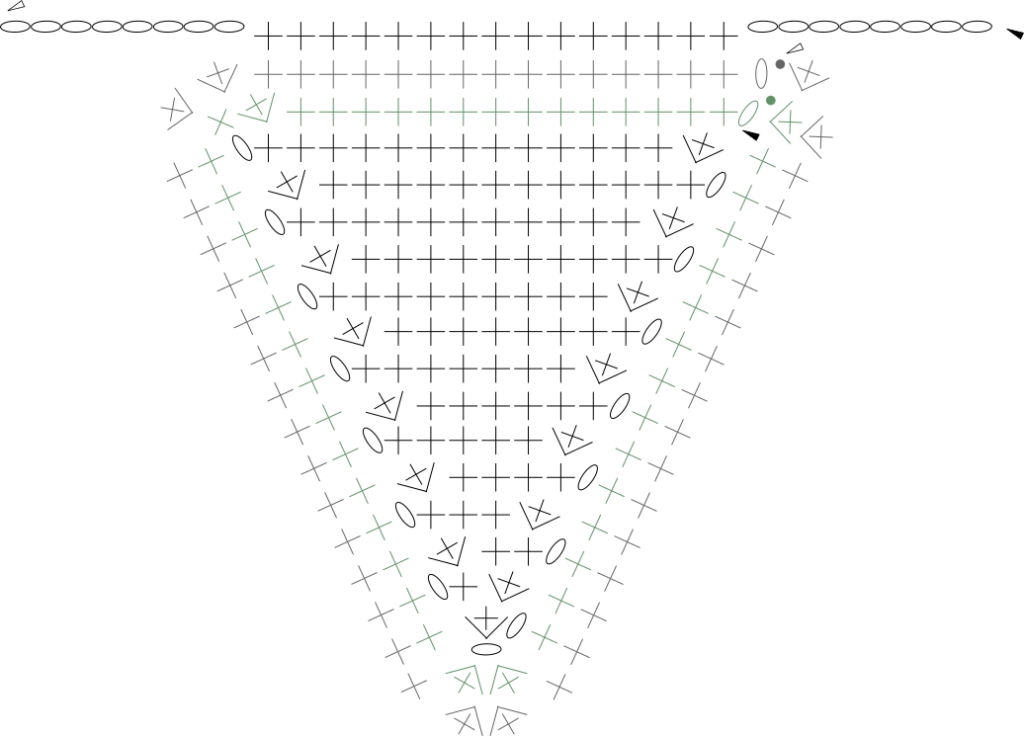
Symbols
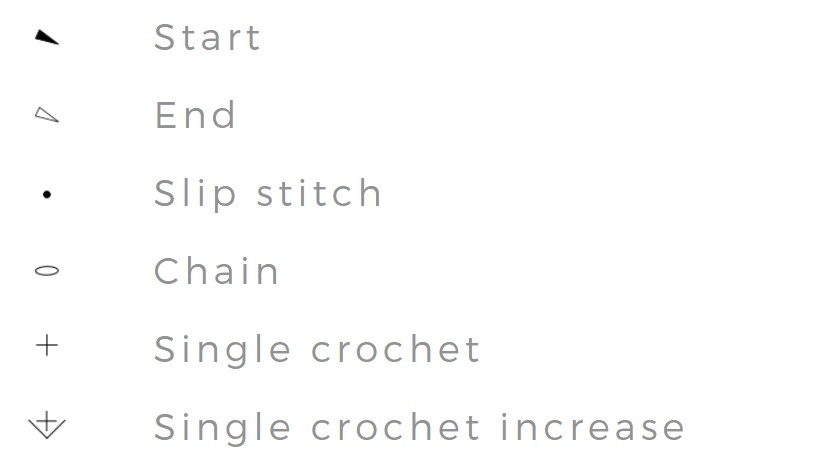
Photo instructions
Changing yarn color
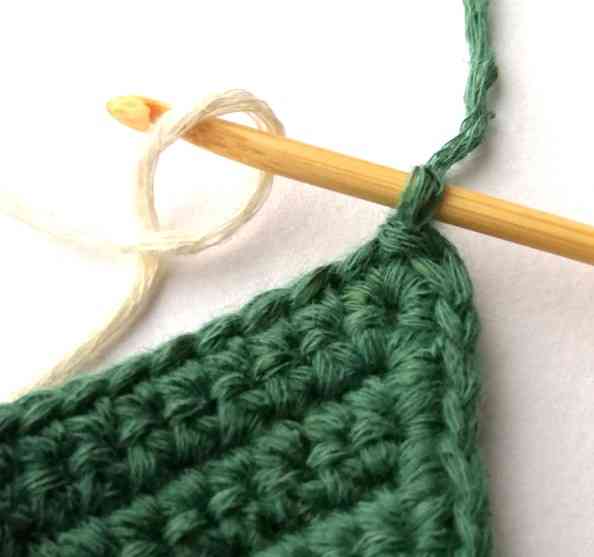
1. For the second round, you should change the color to white. Make a slip stitch to end the first round. Then yarn over your white yarn.
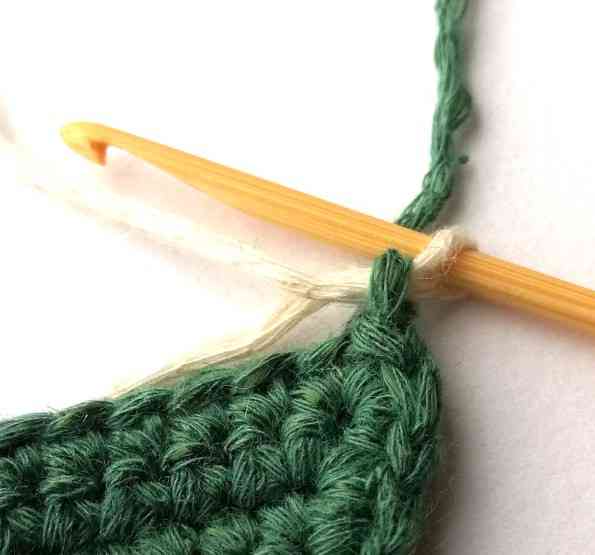
2. Pull the yarn through the loop.
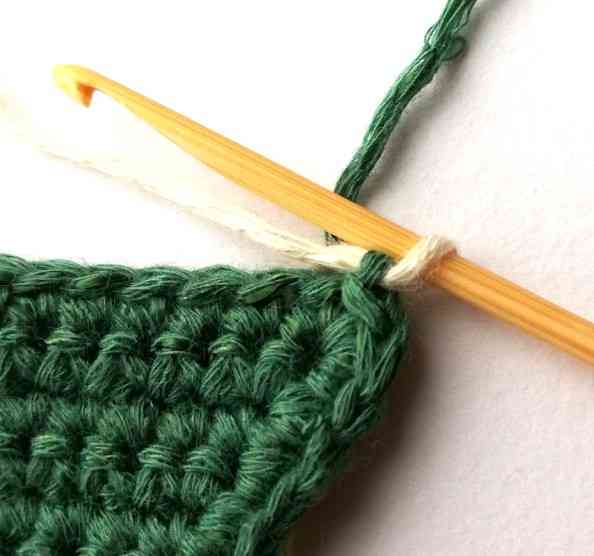
3. Pull the green yarn to tighten. Now you are ready to use white yarn. You can make a single crochet in the next stitch.
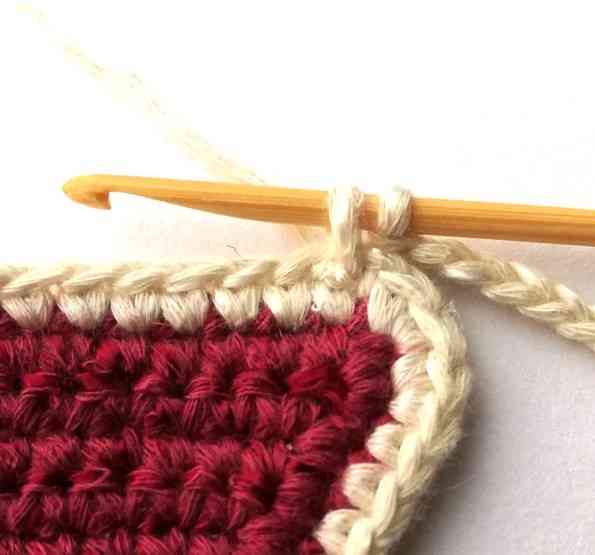
Connecting triangles to the string
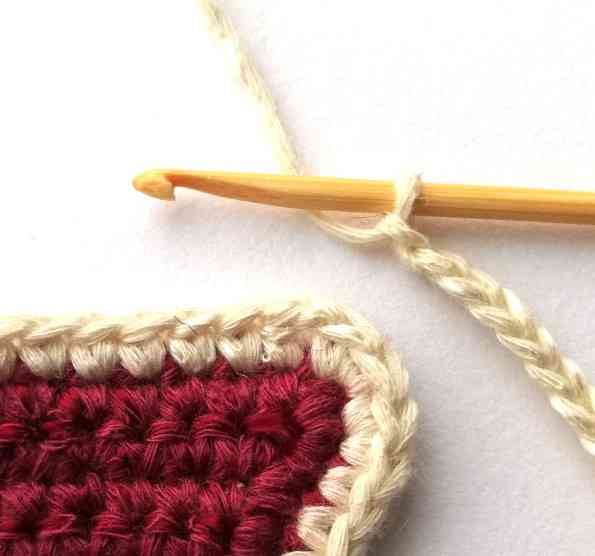
1. Chain 50 and take your first triangle.
2. Insert your hook in the first stitch of the triangle’s top row, yarn over and pull the yarn through. Now you have two loops on your hook.
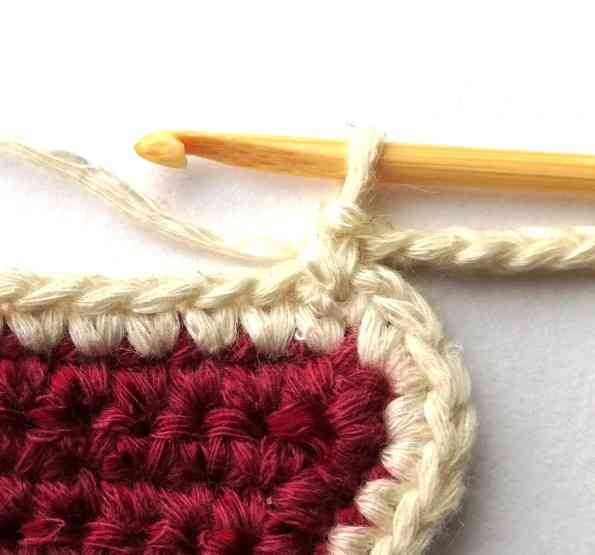
3. Yarn over and pull the yarn through both loops. Continue making single crochets until the end of the row. Chain 12 and repeat step 1-3 for the rest of your triangles.
Enjoy your Christmas garland!
You might also like
There is much more to explore:
You can save this pattern to Pinterest here.