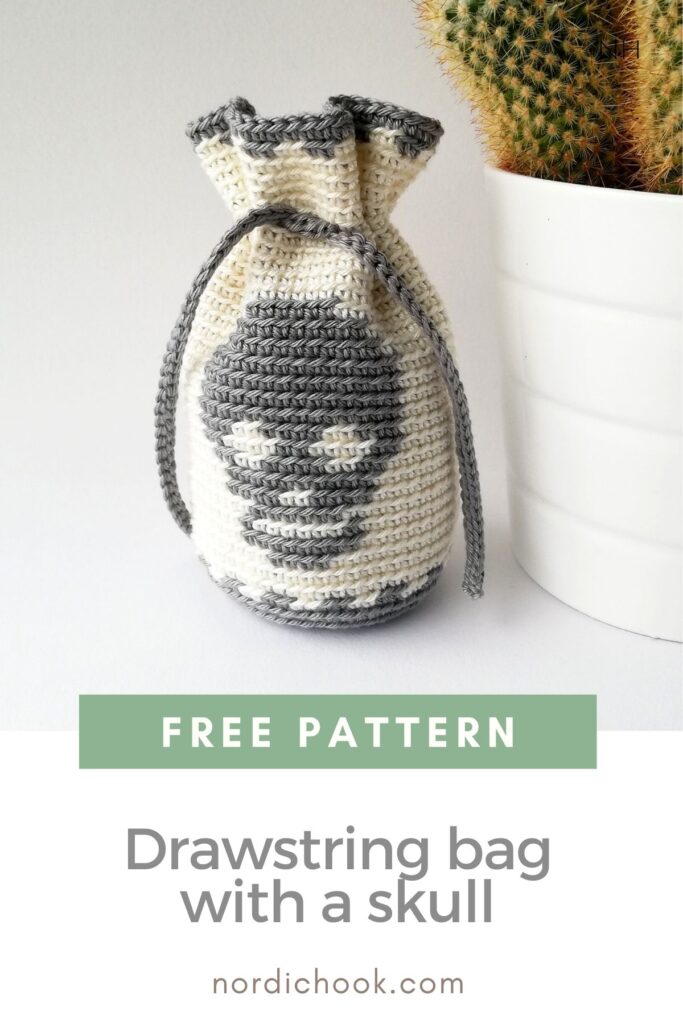
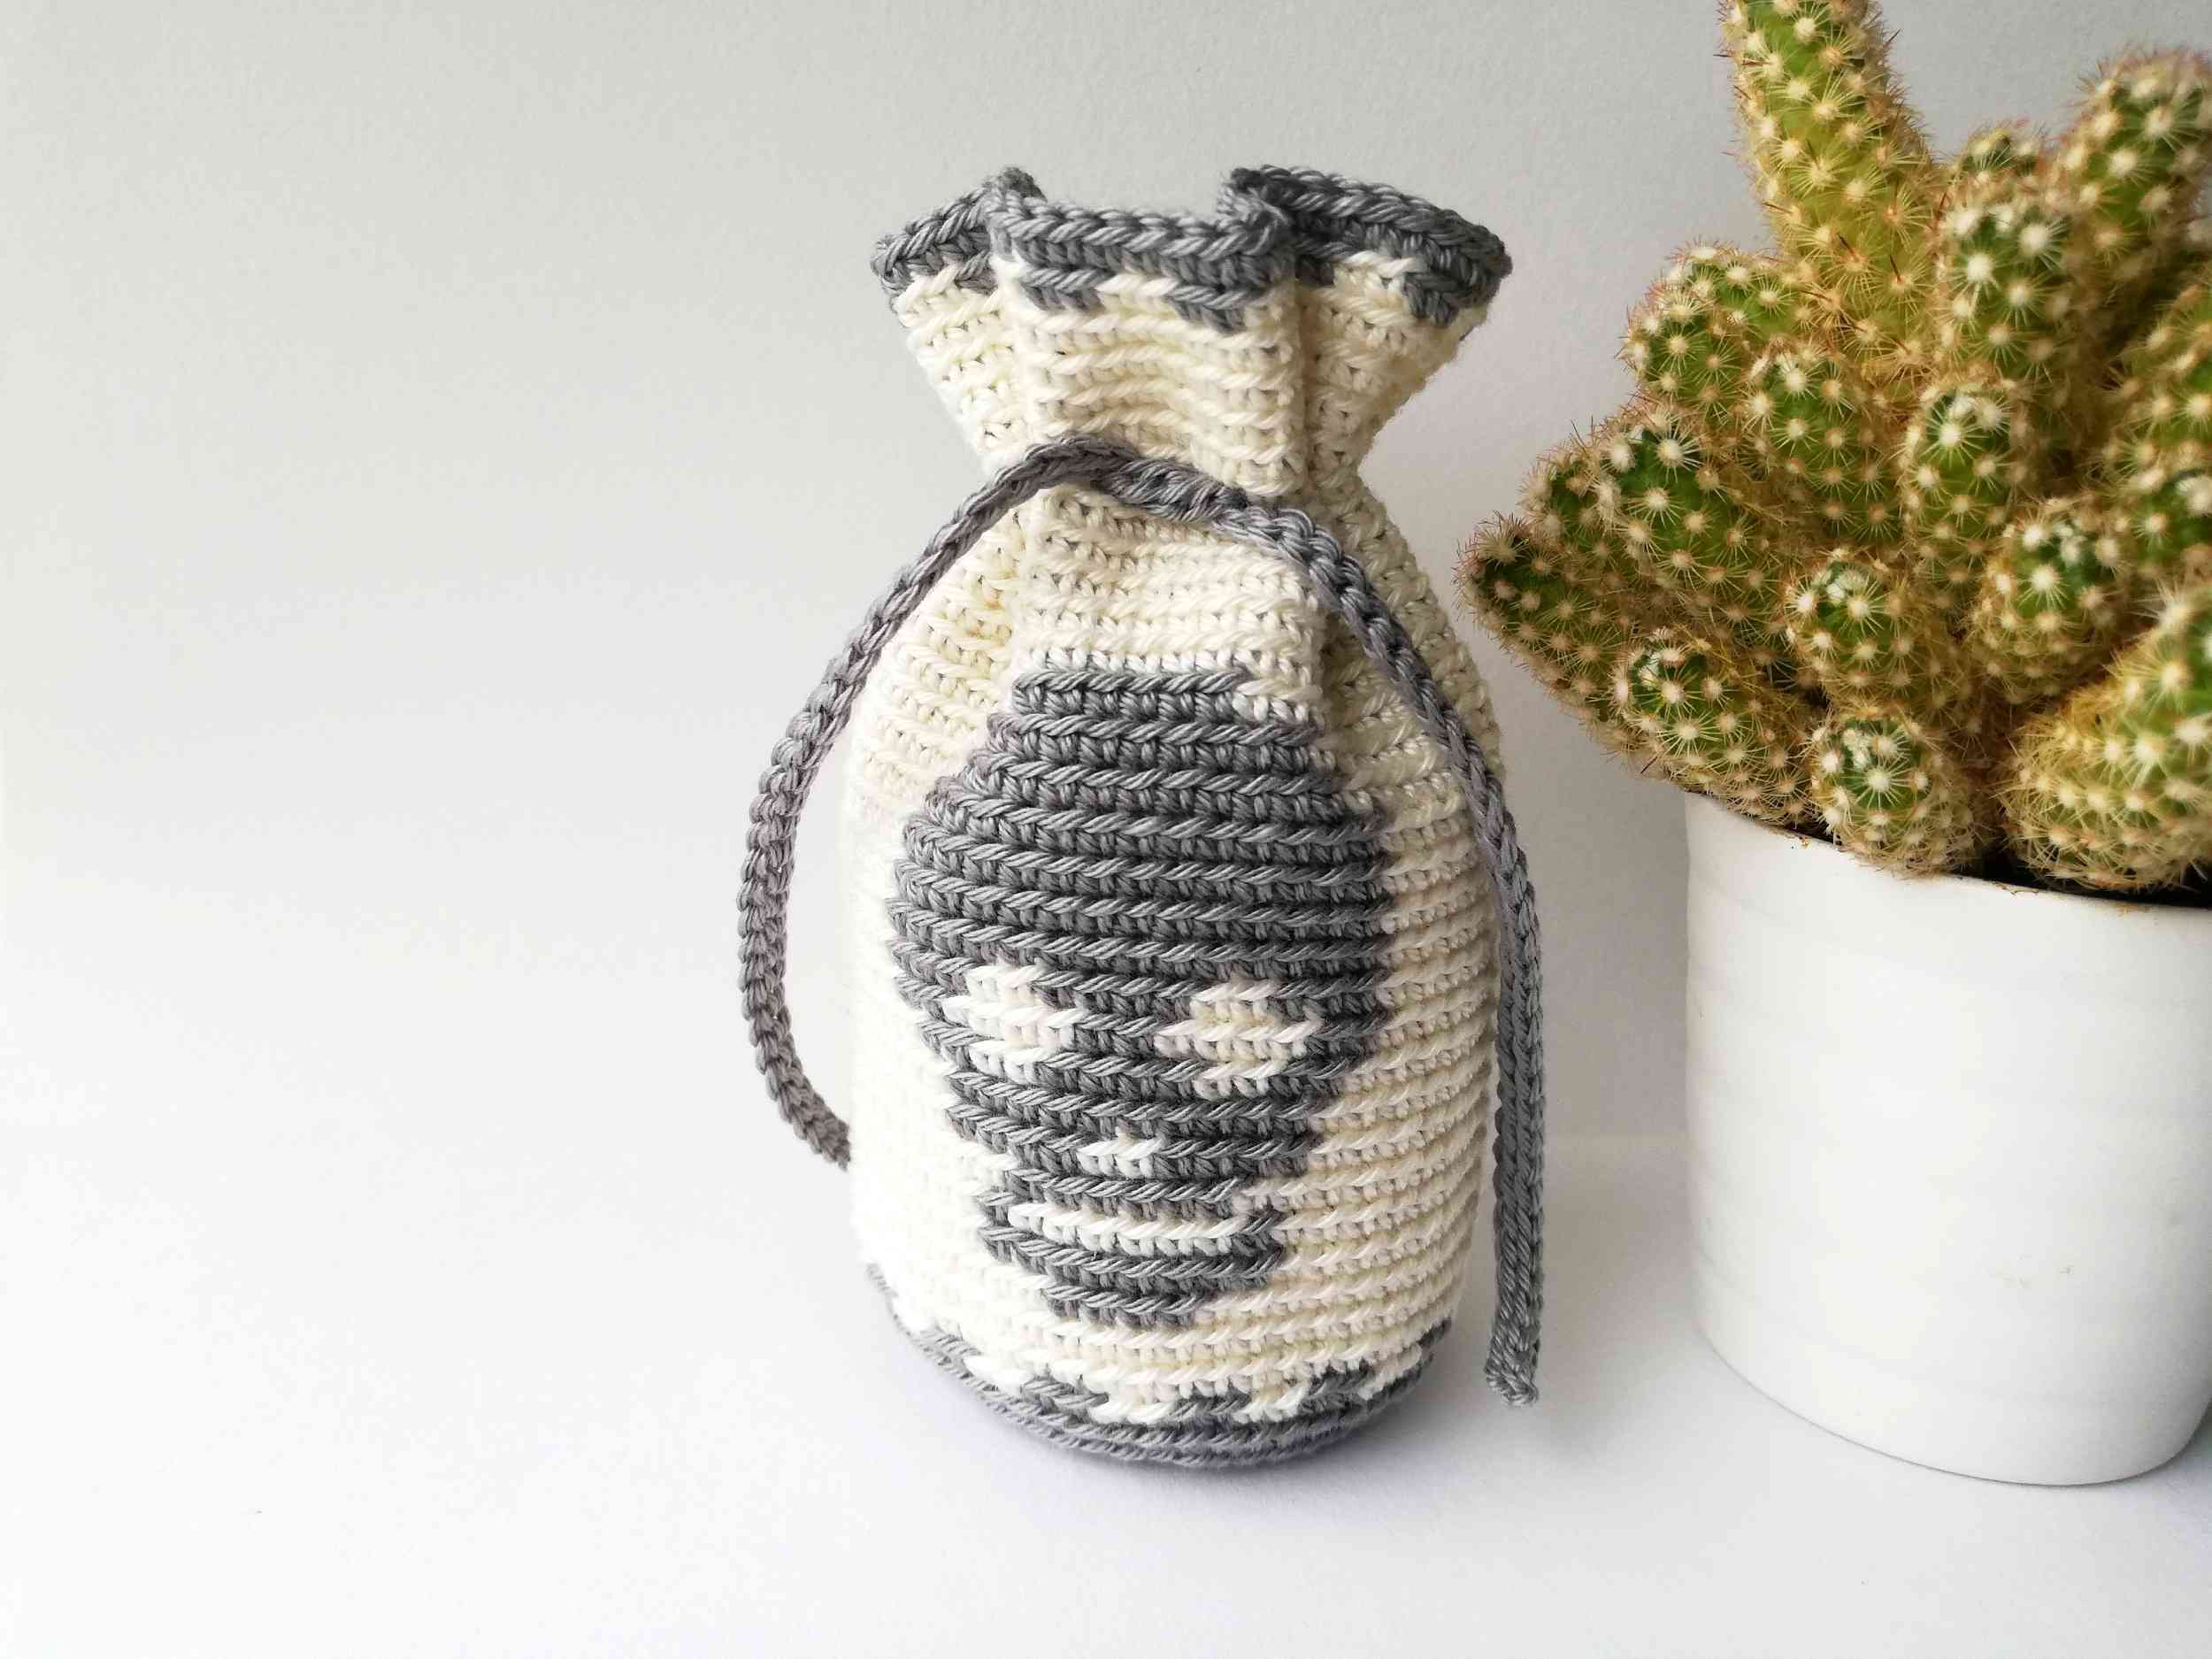
Here is a free pattern for a tapestry crochet drawstring bag with a skull. It is a great quick Halloween project! I think that this bag turned out a bit spooky but also quite cute 🙂 I hope that you will give it a try.
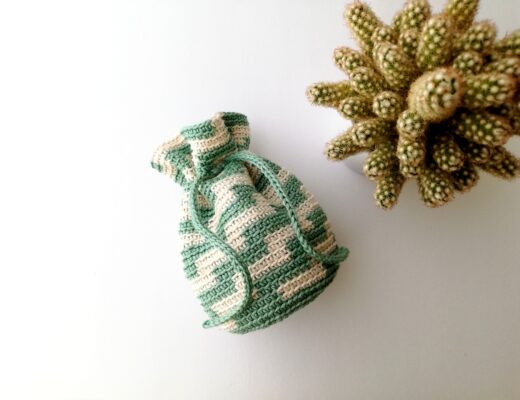
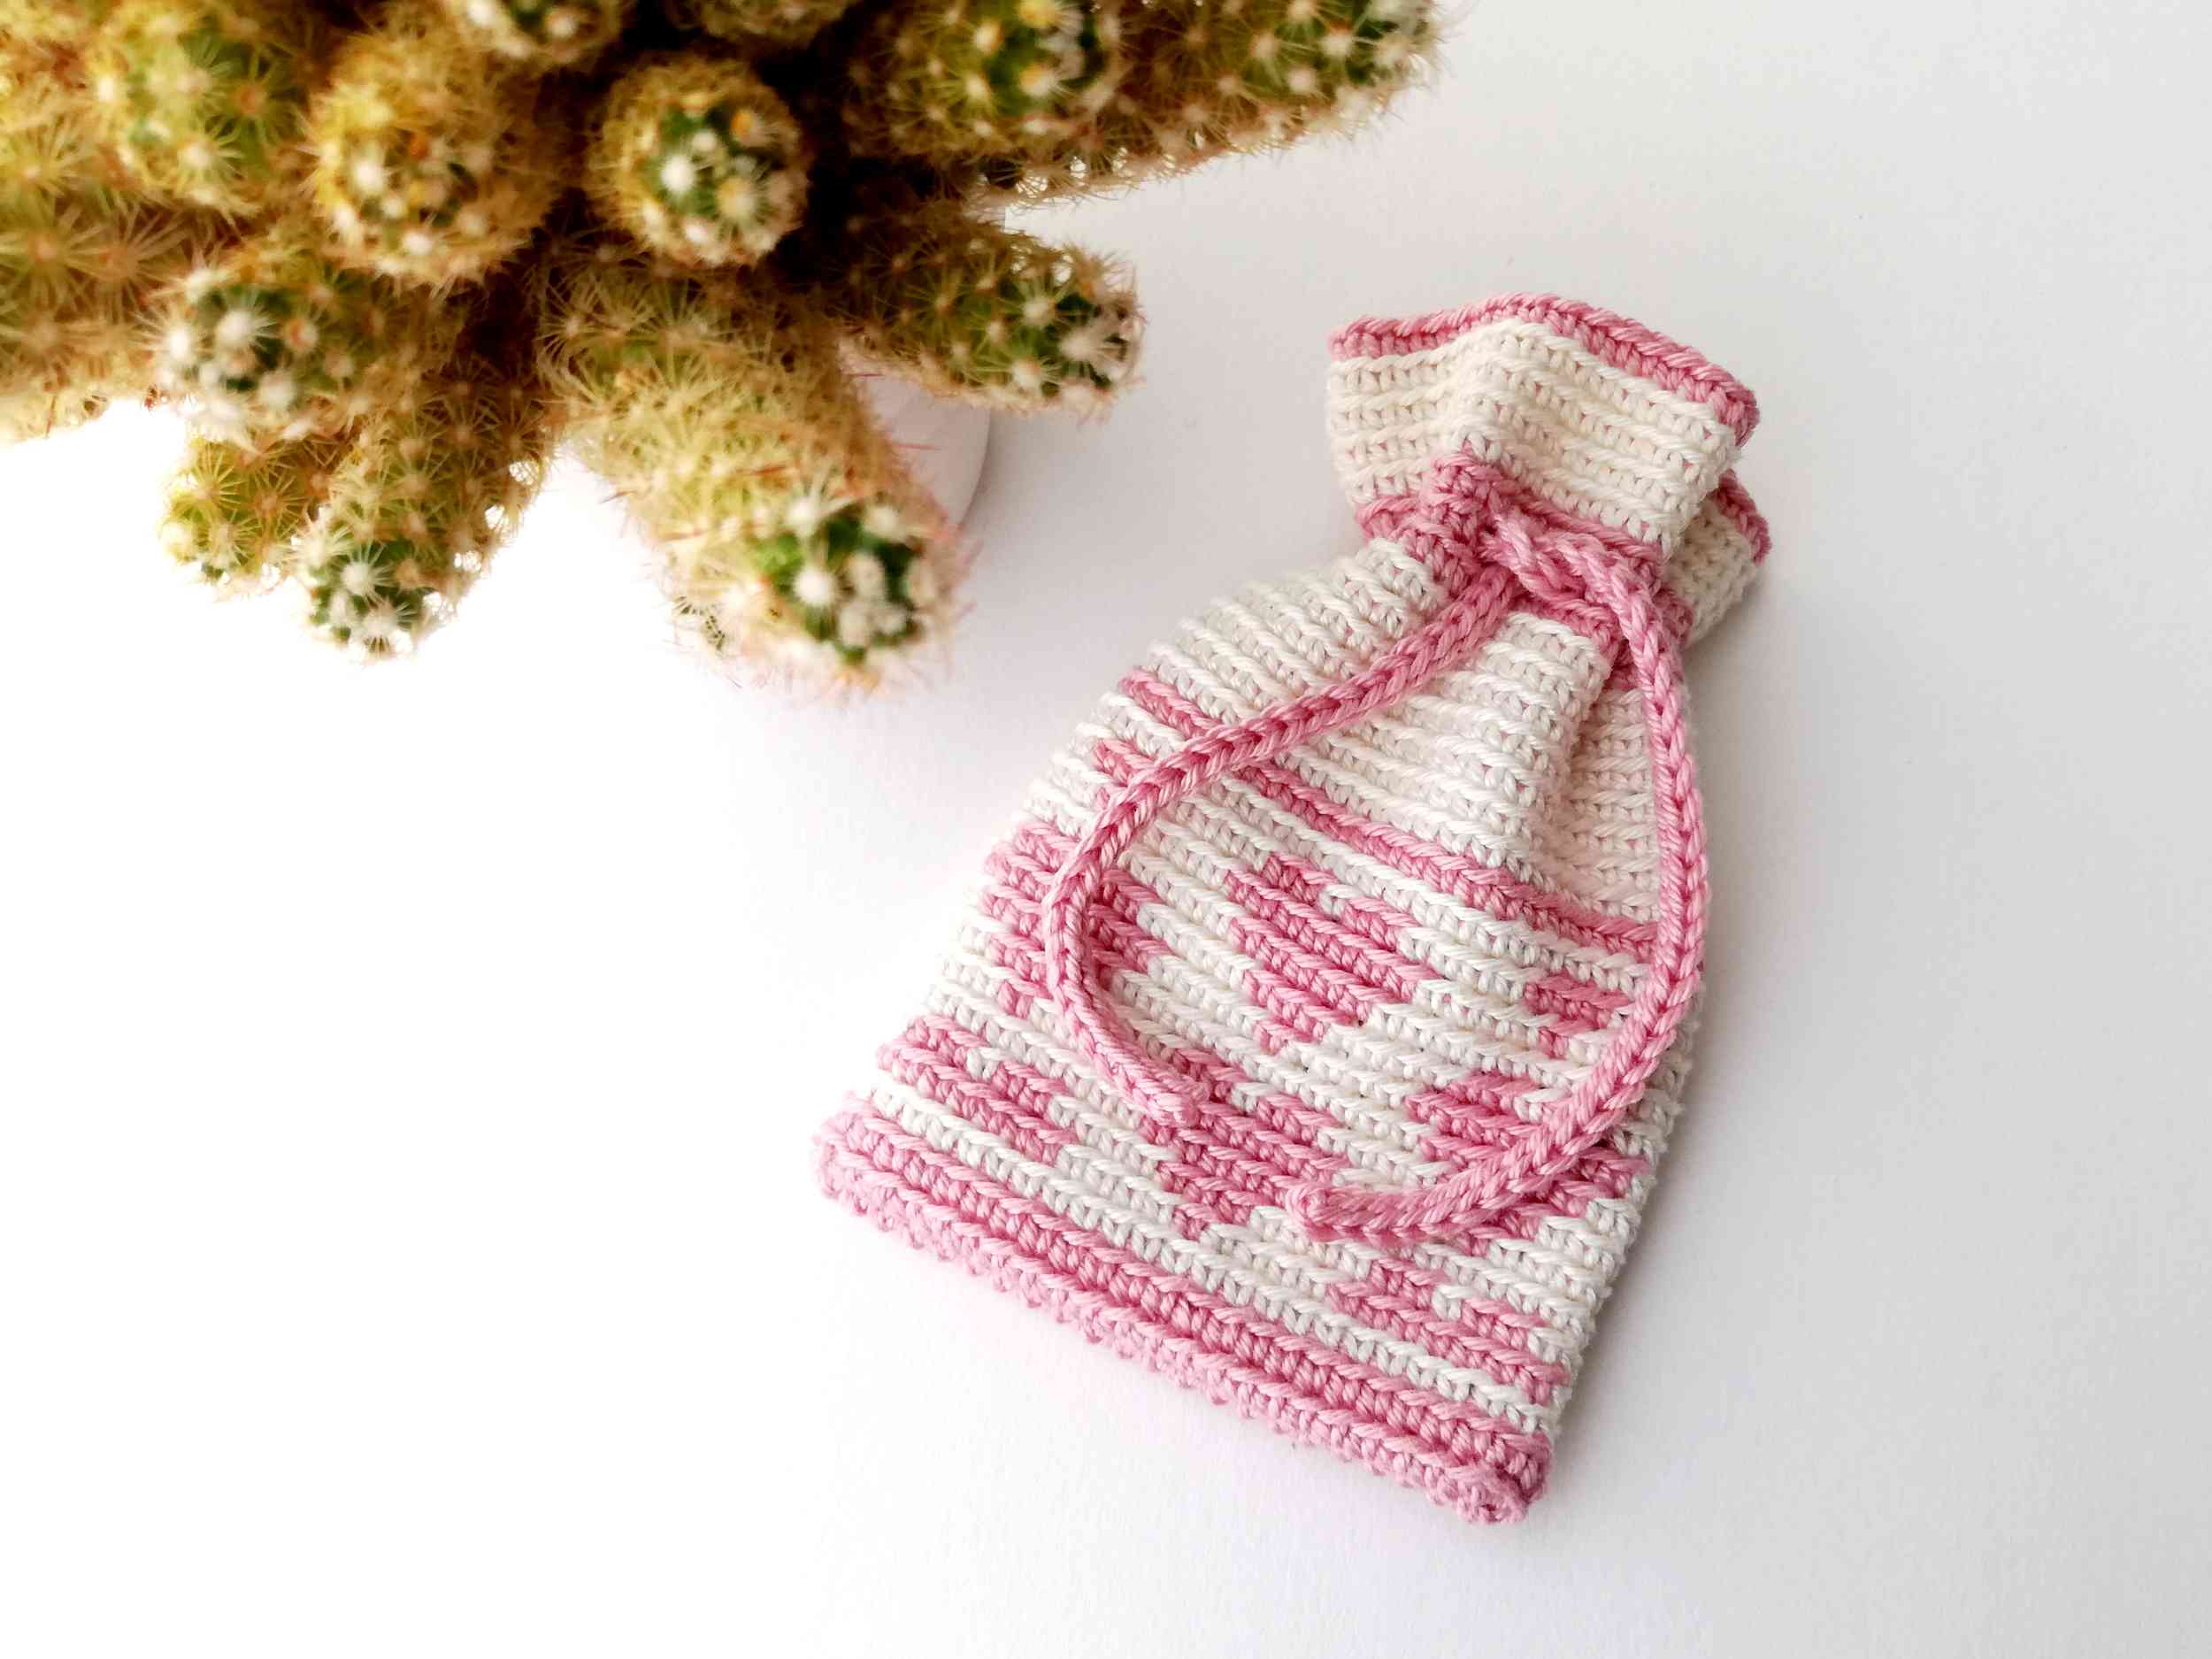
You can find my other tapestry crochet drawstring bag patterns here. Also you can take a look at my spider coasters that also fit Halloween theme here.
Good luck!
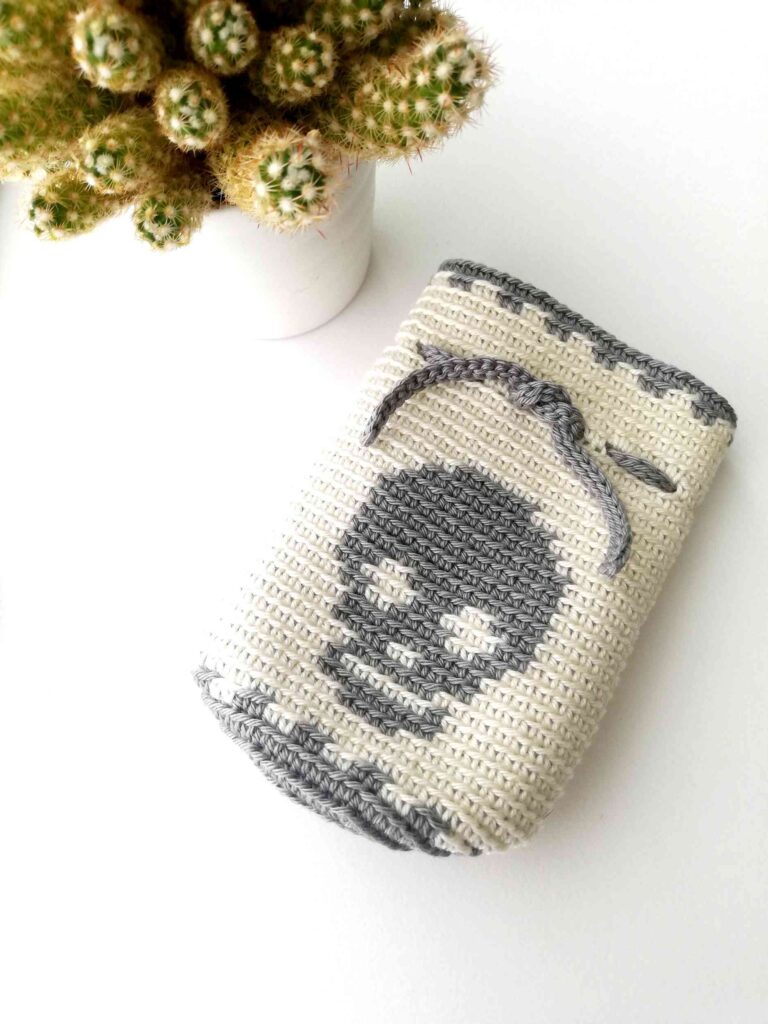

Drawstring bag with a skull
PDF: If you prefer a printable PDF pattern without ads, you can buy it here.
Pinterest: Also, you can save it to Pinterest for later here.
Materials
- Yarn: any thin yarn will work. I used DIAMOND 8/4 mercerized cotton 100% 50g (165 m). Colors: 201 (offwhite), 1361 (gray).
- Hook: as suggested on your yarn label. I used hook size 2.0.
Abbreviations (US terms)
- ch: chain
- sl st: slip stitch
- sc: single crochet
- msc: modified single crochet
- prev: previous
- st: stitch
- rep * *: repeat from * to *
Notes
The diameter of my bag is 5.5 cm and the height is 12.0 cm. You will be working in rounds. For this pattern you should be familiar with the tapestry crochet (you can find the tutorial here). Photo instructions below show the main steps how to make a bag and a string. This pattern uses a modified single crochet: make a single crochet back loop only, just instead of yarning over for the last step, yarn under (see the tutorial here).
To make a modified single crochet increase you need to make two modified single crochets in the same stitch. For this pattern you can work in continuous rounds, which means that in the end of a round you don’t join with a sl st, but instead continue making msc in the top of the first st of the round. Remember to use a marker showing the beginning of each round. Follow the color chart showing how you should change colors.


Pattern
The bag
Start by making a magic (adjustable) ring with your gray yarn. You will not need your white yarn until round 8.
Round 1: 8 sc in the magic ring. (8 st in total)
Round 2: msc inc in every st. (16 st)
Round 3: *msc inc, 1 msc in the next st*, rep ** 8 times. (24 st)
Round 4: msc; *msc inc, 2 msc*, rep ** 7 times, msc inc, 1 msc. (32 st)
Round 5: 2 msc; *msc inc, 3 msc*, rep ** 7 times, msc inc, msc. (40 st)
Round 6: msc; *msc inc, 4 msc*, rep ** 7 times, msc inc, 3 msc. (48 st)
Round 7: 4 msc; *msc inc, 5 msc*, rep ** 7 times, msc inc, msc. (56 st)
The bottom of the bag is finished. You will introduce your white yarn in round 8.
Round 8-32: msc in every st of the prev round. (56 st)
Making the holes for the string:
Round 33: 1 msc, *ch 2, skip 2 st of the prev round, 2 msc*, rep ** 13 times, ch 2, skip 2 st of the prev round, 1 msc. (56 st)
Round 34: 1 msc, *2 msc in the ch2 space of the prev round (make sure to grab the loose yarn hanging in the ch2 space in the prev round too), 2 msc*, rep ** 13 times, 2 msc in the ch2 space of the prev round, 1 msc. (56 st)
Round 35-39: msc in every st of the prev round. (56 st)
In the end make 4 sl st in the next 4 st “to even out” the connection of rounds. Fasten off.
Making the string
Start by chaining. The length of the chain should be around 28-30 cm long. Make a row of slip stitches in the third loop of the chain as it is shown in photo instructions below. When you reach the end of the row, fasten off. You are ready to weave in the string into your bag. Done!
Color chart
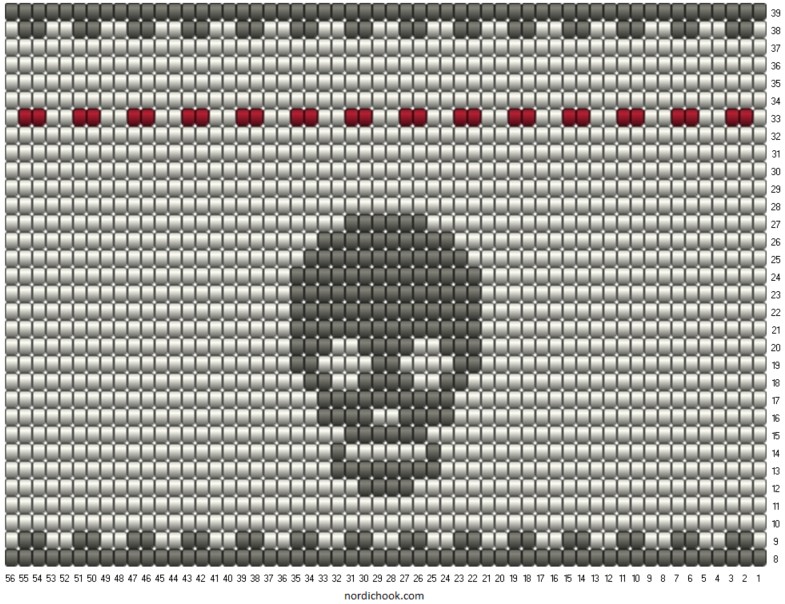

How to read the chart
Each square represents a stitch and its color. In each round you have 56 stitches (56 columns in the chart). Rows represent rounds. First 7 rounds are the bottom of the bag and the color chart starts from round 8. For each round you have to read the row in the chart from right to left.
In the chart, red squares indicate where you should make holes for the string. When you chain 2 for a hole, you cannot hide the yarn you are not working with: it will be ‘hanging’ in the hole. Don’t worry, when you will make round 34, you will grab both yarns you need to hide: the one in round 34 and the one in round 33. See photo instructions.
Photo instructions for the drawstring bag with a skull
Making the bag
Round 1
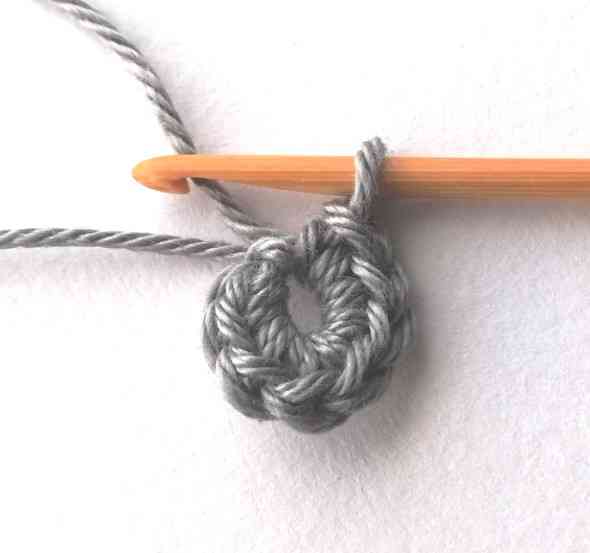

1. Start by making a magic ring. Then make 8 single crochets in the magic ring. Tighten the ring by pulling the end of the yarn.
Round 2
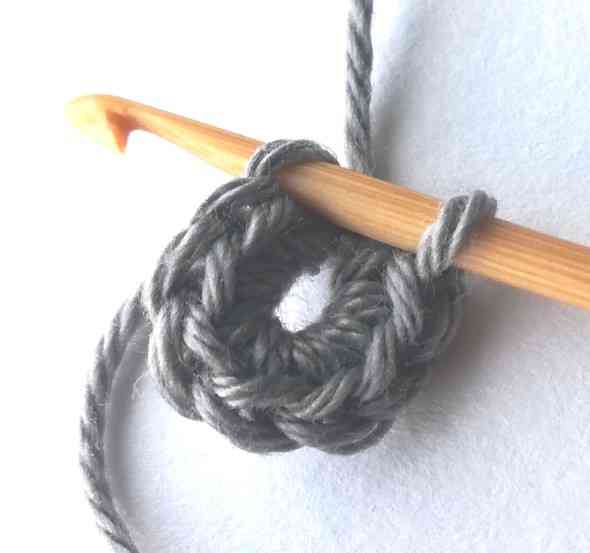

2. Don’t make a slip stitch. Make a modified single crochet in the top of your first stitch of round 1: insert your hook in the top of the first stitch of round 1 grabbing just the back loop.
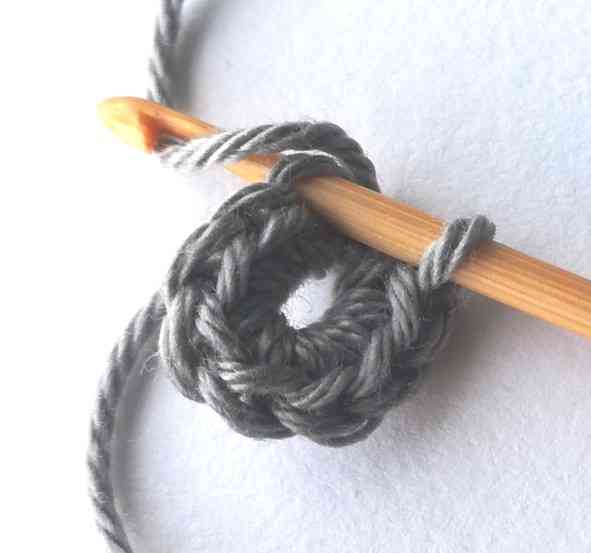

3. Yarn over.
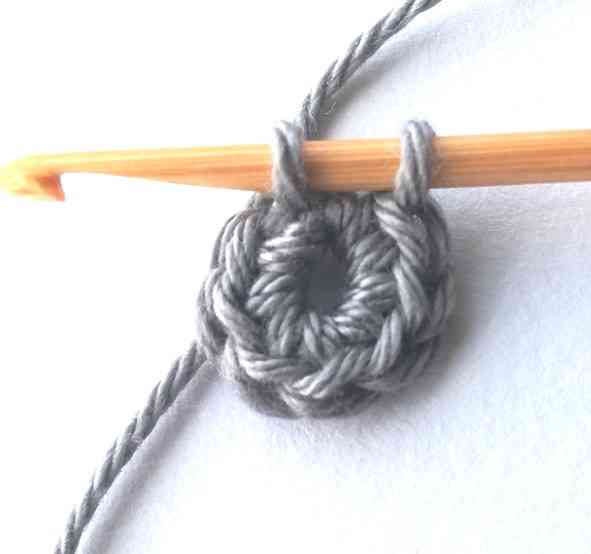

4. Pull the yarn through. Now you have two loops on your hook.
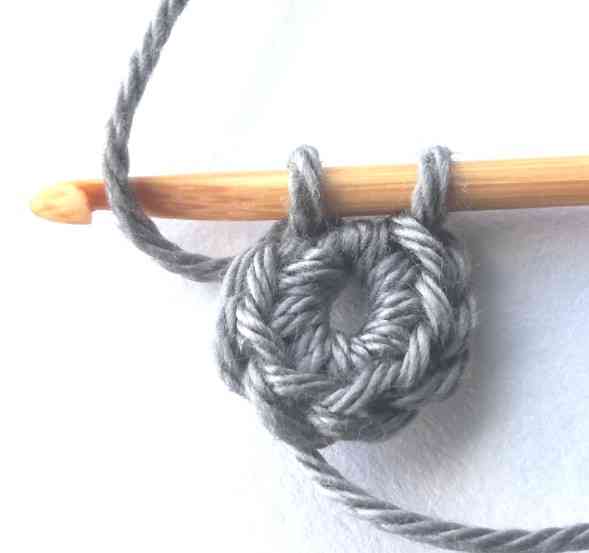

5. Yarn under.
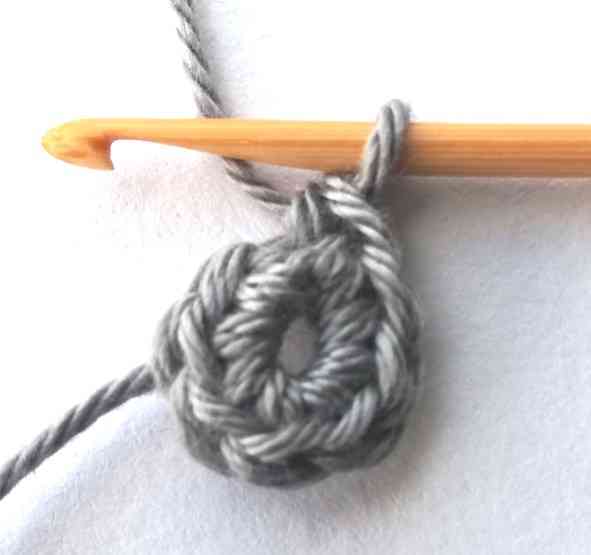

6. Pull the yarn through both loops. You have just made a modified single crochet.
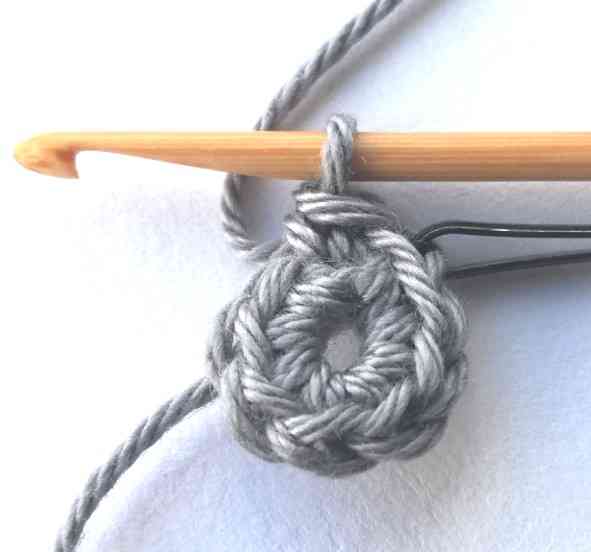

7. To make a modified single crochet increase you just need to make one more modified single crochet in the same stitch. Don’t forget to put your marker in the first stitch of the round.
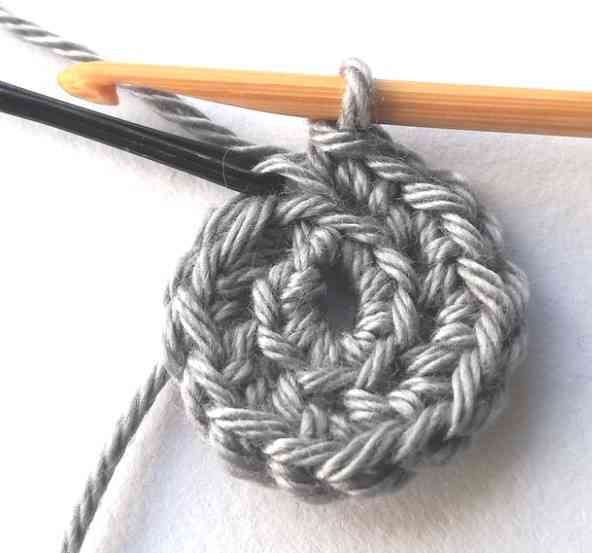

8. Keep making modified single crochet increase until the end of the round.
Round 7
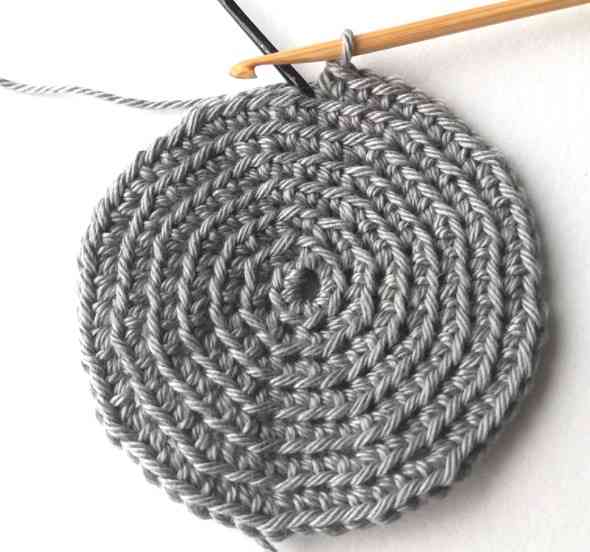

9. Continue following the pattern until the end of round 7.
Round 8
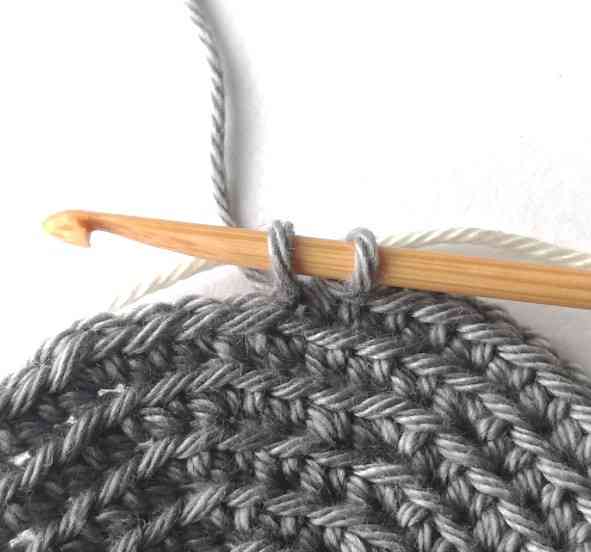

10. In round 8 you have to introduce the white yarn. So, start making the first modified single crochet in round 8 but don’t finish it, stop when you have two loops on your hook. Then put the white yarn behind your hook and in front of the gray yarn like it shown in the picture.
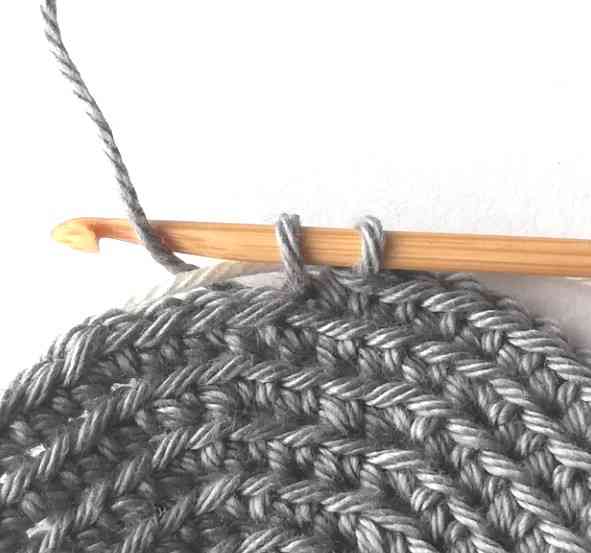

11. Yarn under the gray yarn.
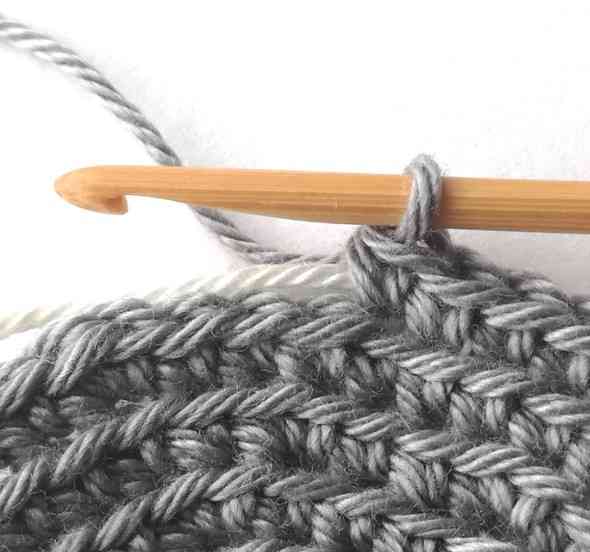

12. Pull the yarn through both loops on your hook. Now the white yarn is secured. Notice that it is wrapped with the gray yarn.
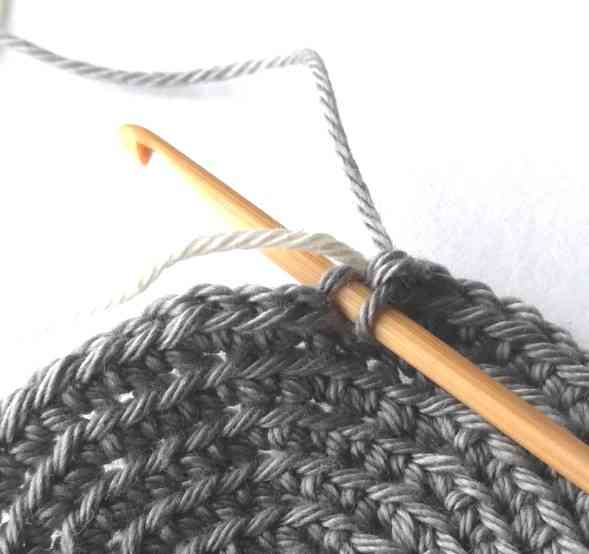

13. To make the next modified single crochet, insert your hook in the next stitch like it is shown in the picture.
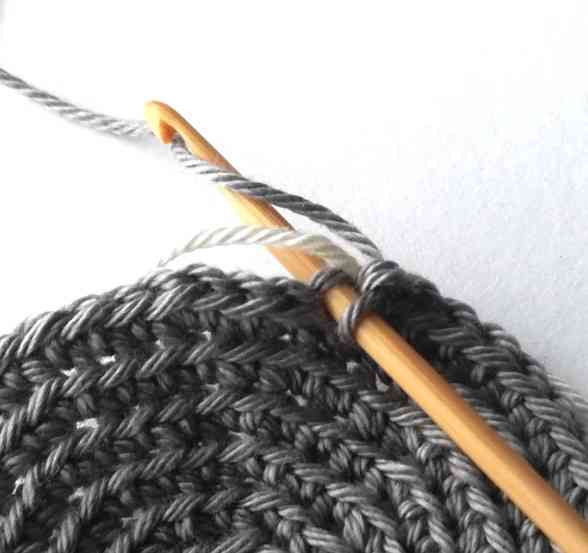

14. Yarn over the gray yarn.
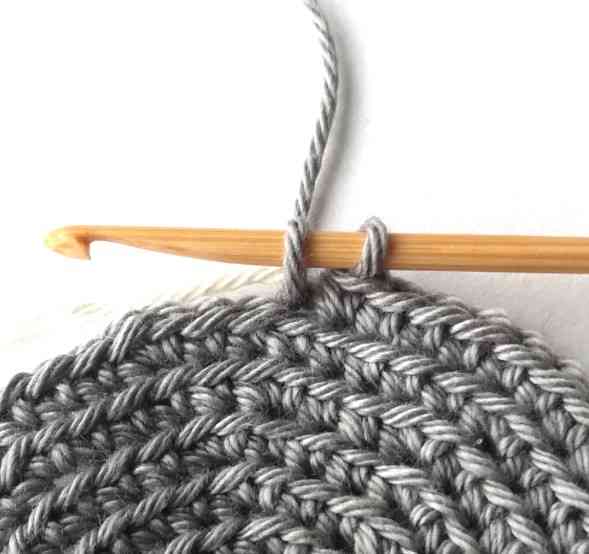

15. Pull the yarn through. Now you have two loops on your hook.
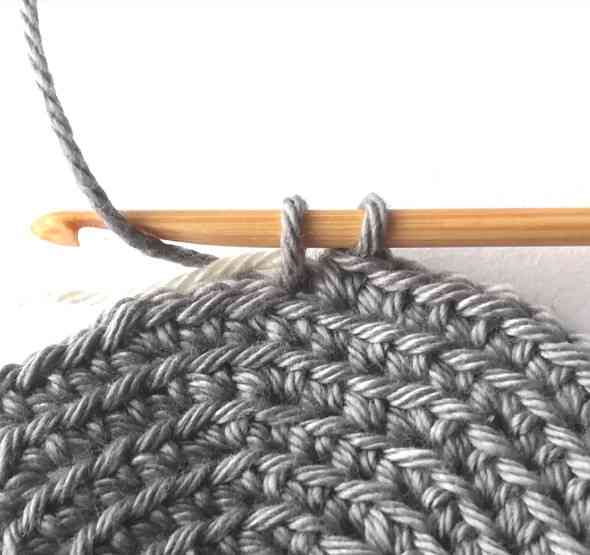

16. Yarn under.
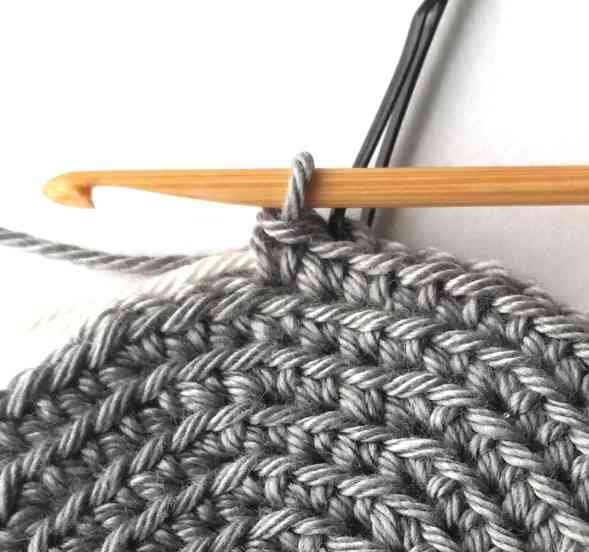

17. Pull the yarn through both loops on your hook. Remember to put the marker in the first stitch of the round.
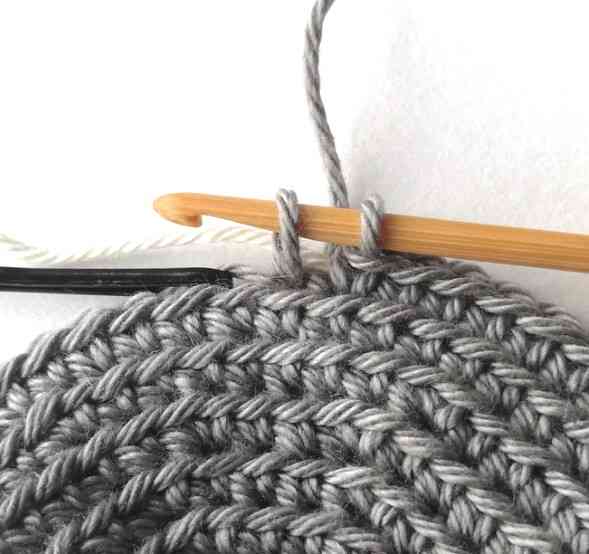

18. The first stitch in round 9 is white, therefore, you need to change yarn color. Start making the last modified single crochet in round 8, but don’t finish it, stop when you have two loops on your hook.
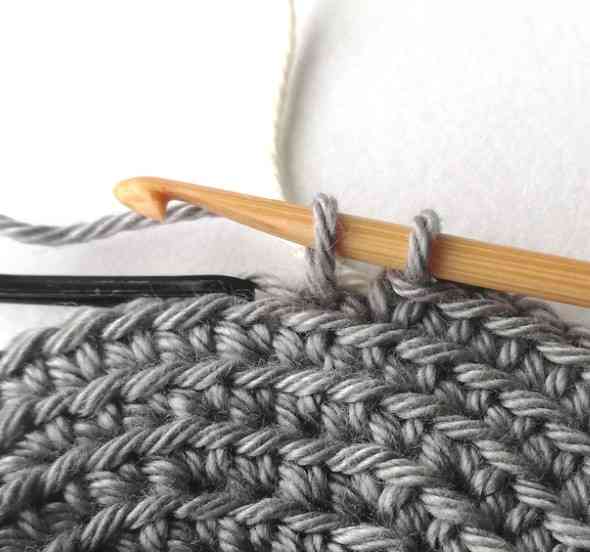

19. Put the white yarn up.
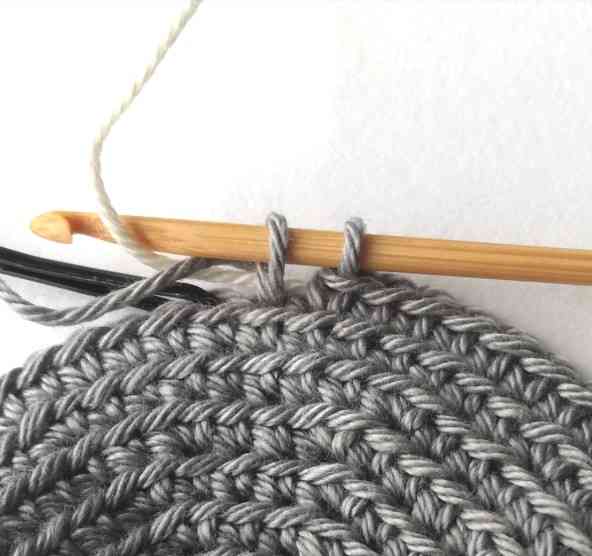

20. Yarn under the white yarn.
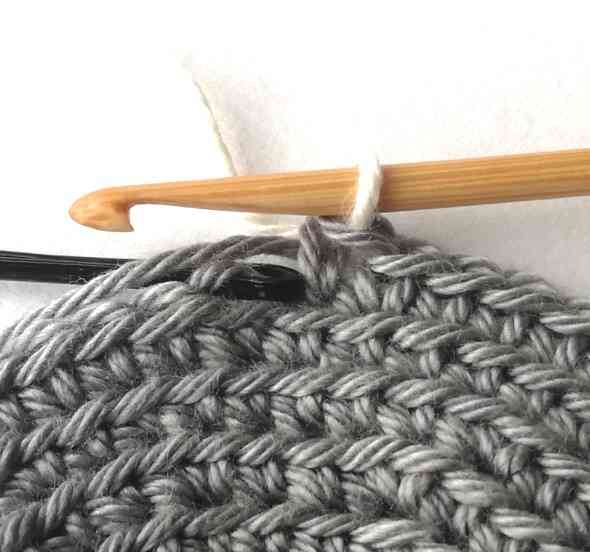

21. Pull the white yarn through both loops on your hook. Now you can work with the white yarn.
Round 9
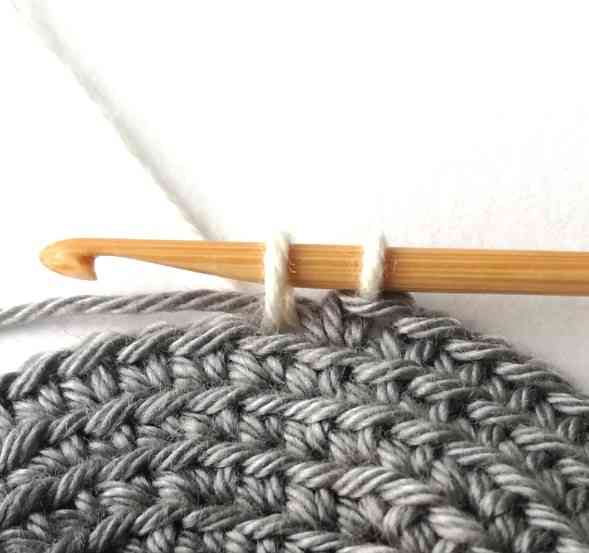

22. Start making the first stitch in round 9 with the white yarn, but don’t finish it, stop when you have two loops on your hook. The next stitch should be gray, therefore you have to change yarn color again.
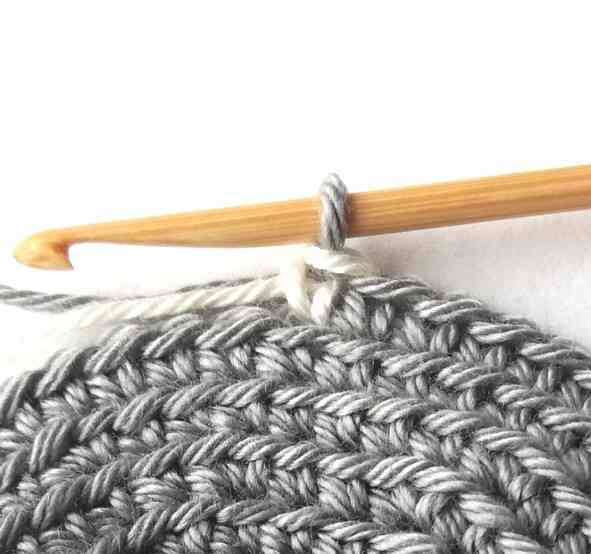

23. So, put the gray yarn up, yarn under and pull it through both loops on your hook. Now you can use the gray yarn again.
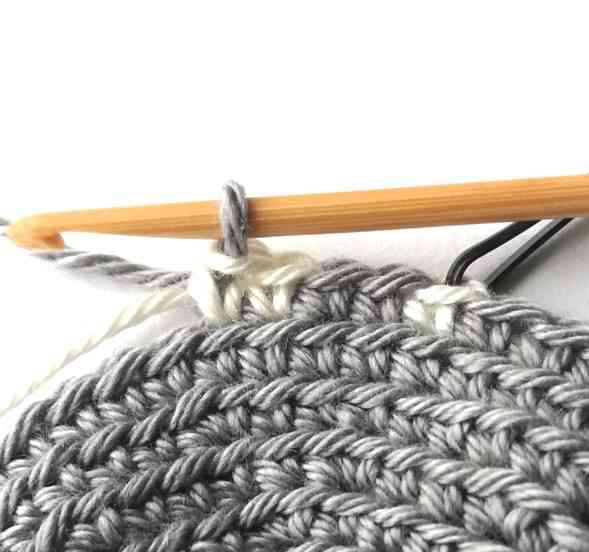

24. Keep changing yarn color according to the color chart.
Round 23
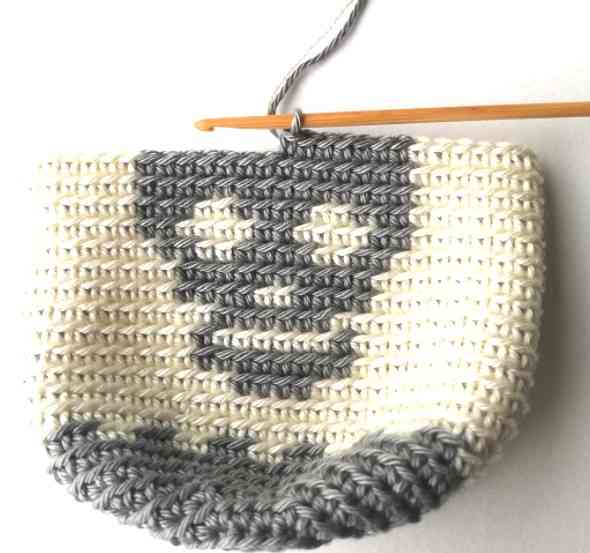

25. After some rounds your bag will look like this.
Round 33
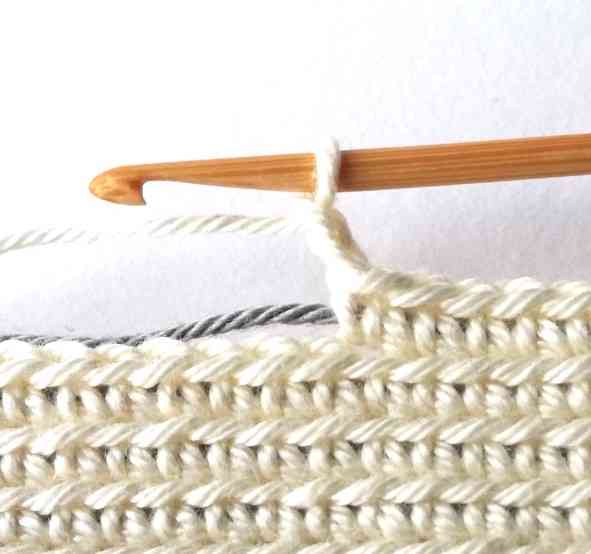

26. In round 33 you have to make holes for a string. So, make one modified single crochet and then chain two.
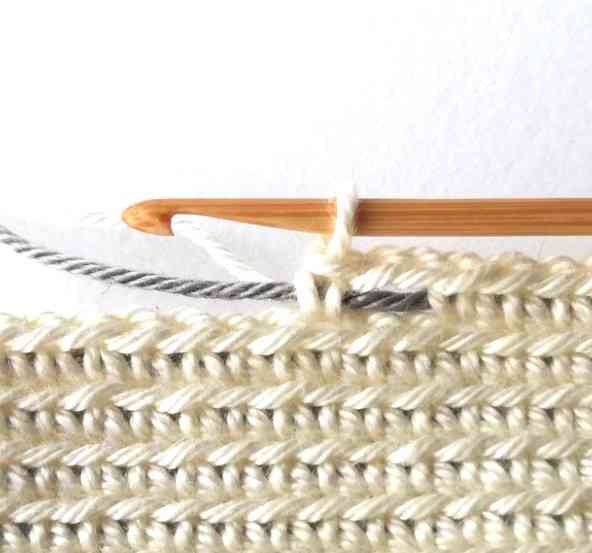

27. Skip two stitches and make a modified single crochet. Don’t worry that the gray yarn is ‘hanging’ in the hole, you will hide it when you will make the next round.
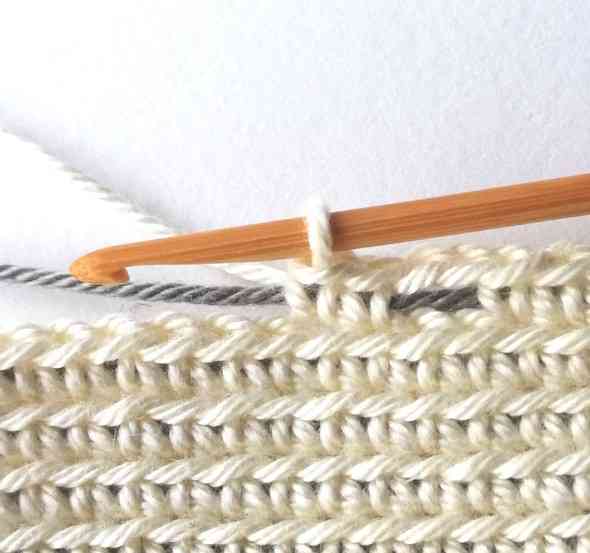

28. Make a modified single crochet in the next stitch.
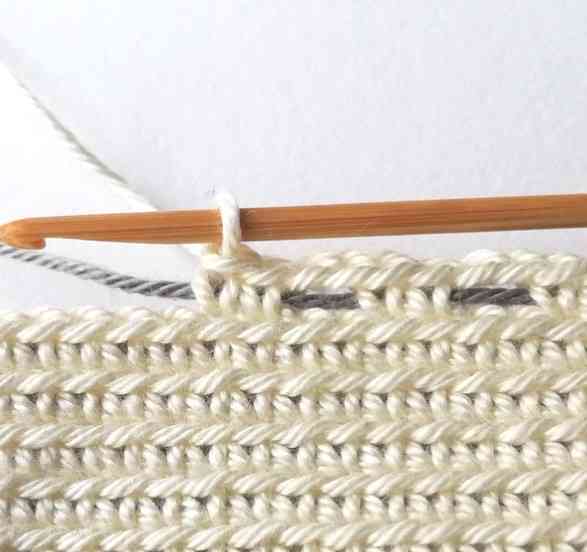

29. Then chain two, skip two stitches and make two modified single crochets in the next two stitches.
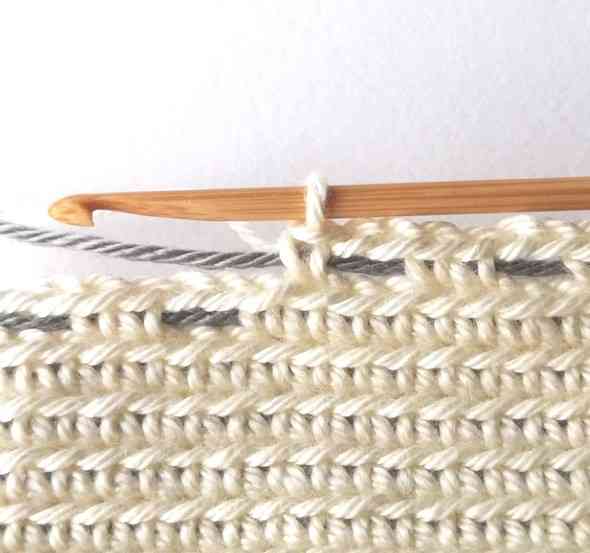

30. Keep working in the same way until the end of the round.
Round 34
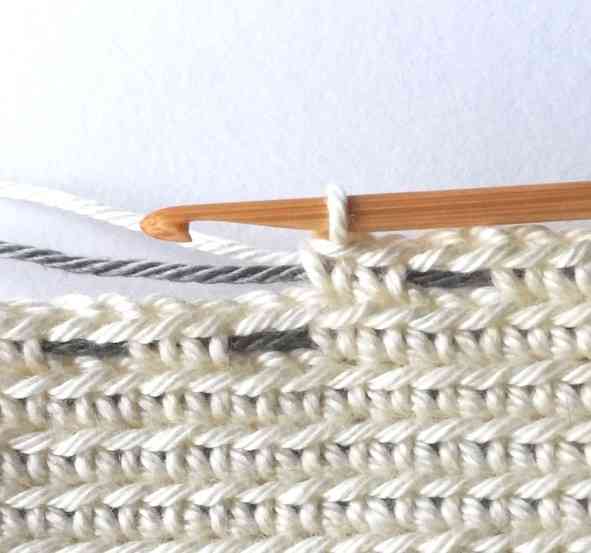

31. Make one modified single crochet in the next stitch.
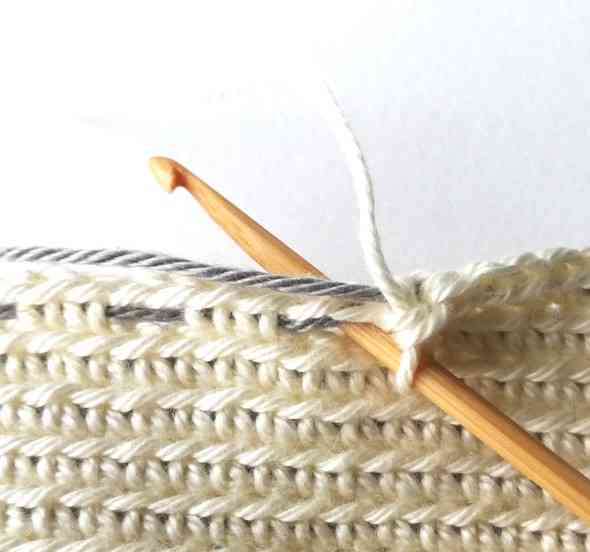

32. Then insert your hook in the chain two space of the previous round grabbing both gray yarns like it is shown in the picture.
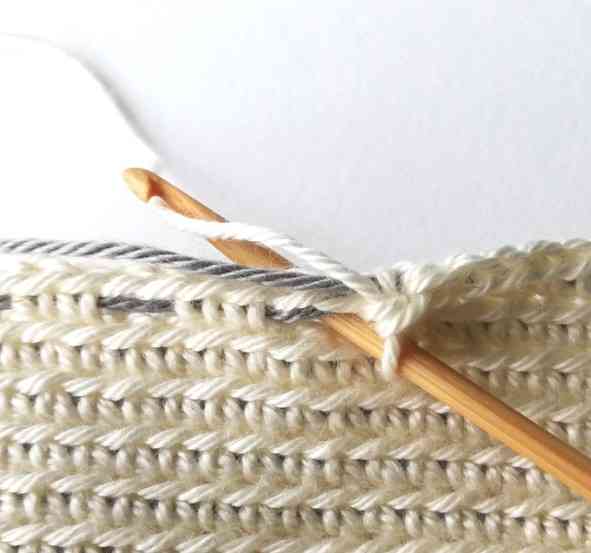

33. Yarn over the white yarn.
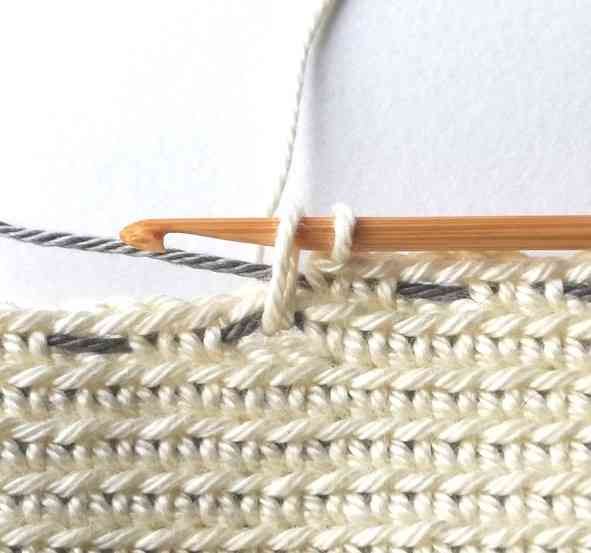

34. Pull the yarn through. Now you have two loops on your hook.
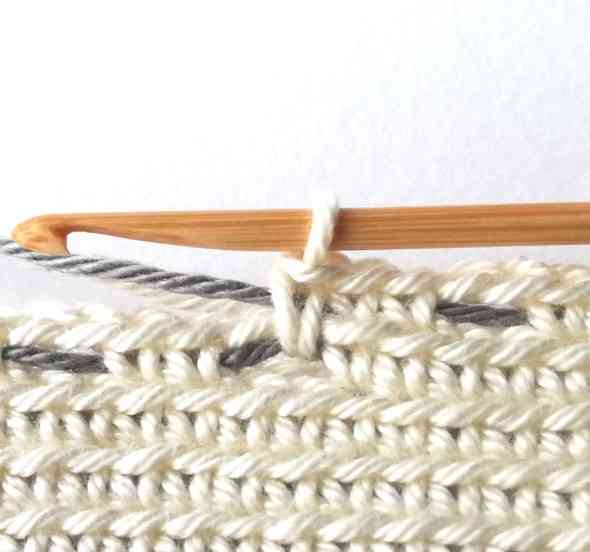

35. Yarn under and pull the yarn through both loops. Notice that both gray yarns are wrapped with the white yarn.
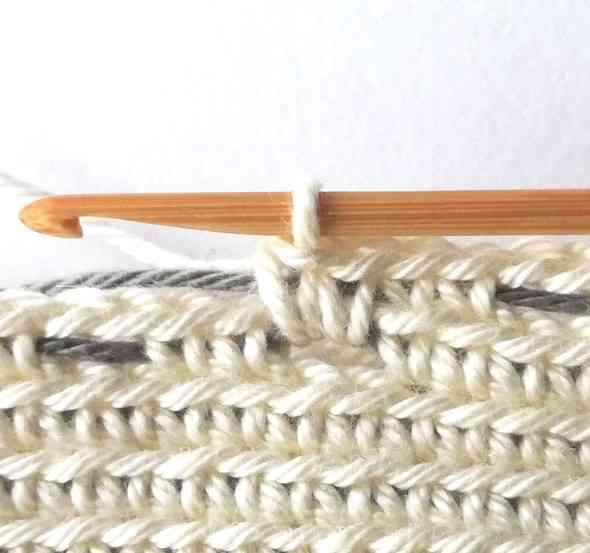

36. Make another modified single crochet in the same chain two space.
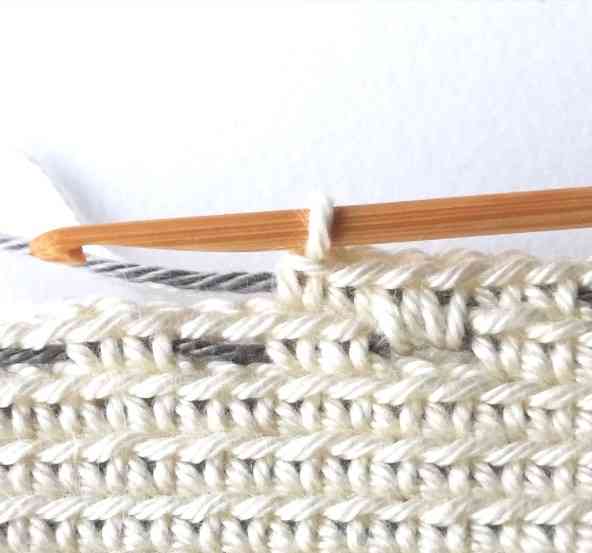

37. Then make two modified single crochets in the next two stitches.
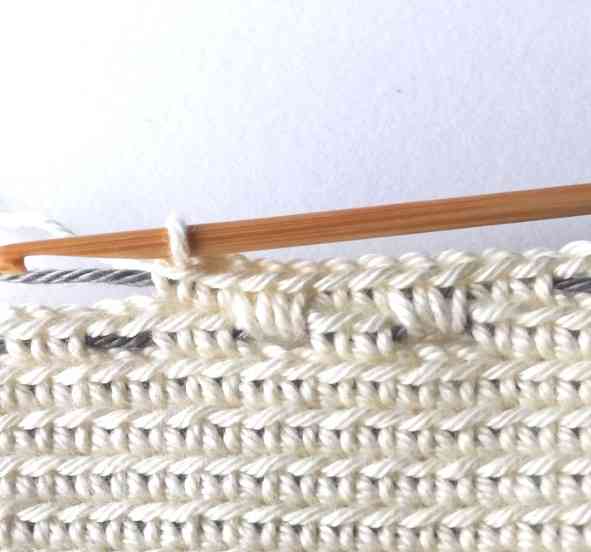

38. Keep working in the same way until the end of the round.
Round 39
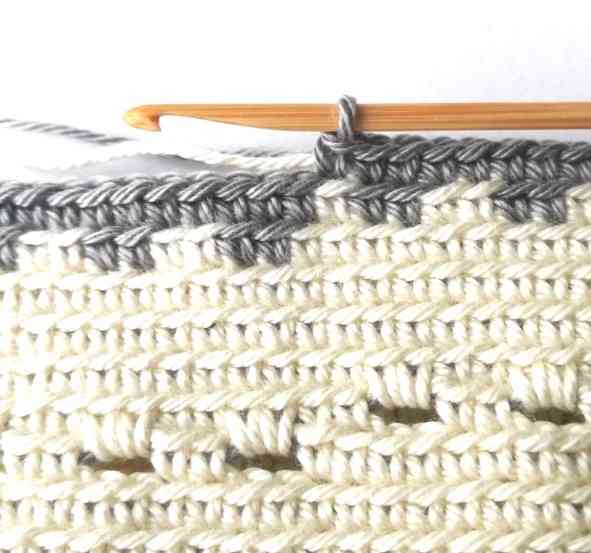

39. This is how the bag looks at the end of round 39. Notice that colors do not match exactly where a new round start, but that is normal because you are working in continuous rounds.
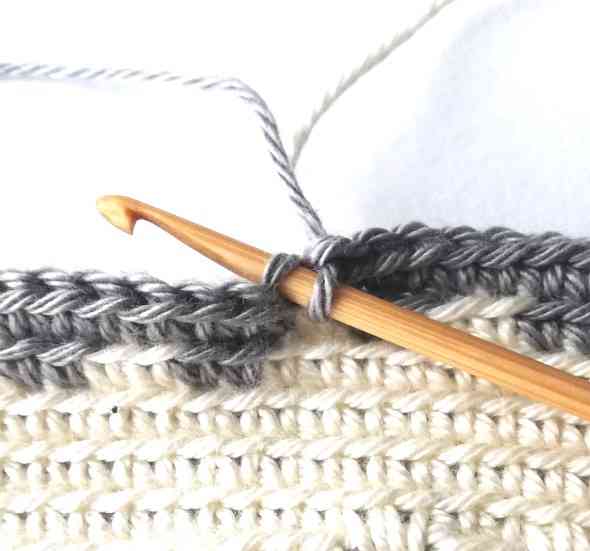

40. To “even out” the edge you will have to make a few slip stitches. Now you can leave the white yarn aside. Insert your hook in the next stitch grabbing just the back loop.
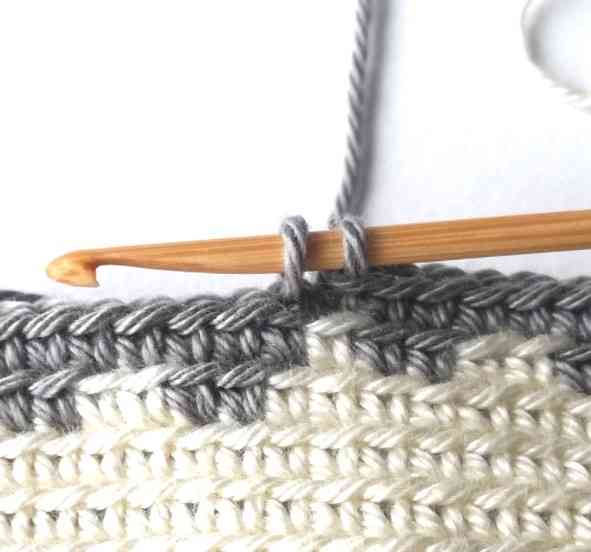

41. Yarn over and pull the yarn through. Now you have two loops on your hook.
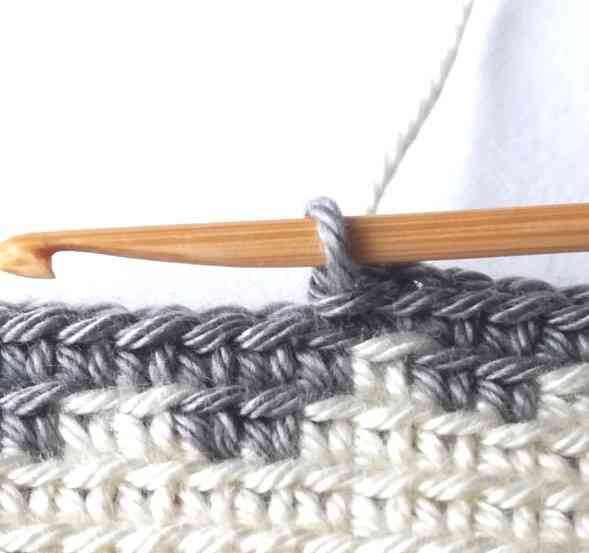

42. Then pull the first loop on your hook through the second one.
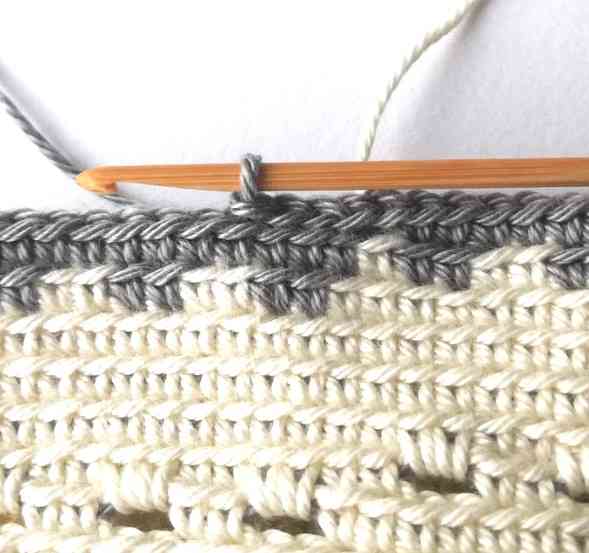

43. Make three more slip stitches. Fasten off.
Finished drawstring bag with a skull


44. Done!
Making the string
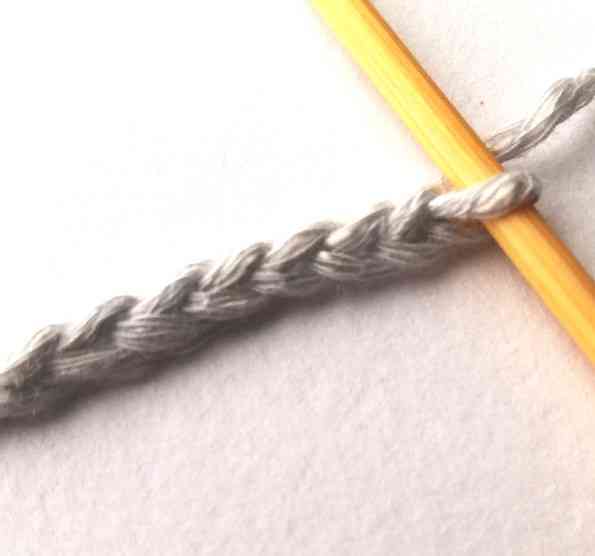

1. Start with a chain.
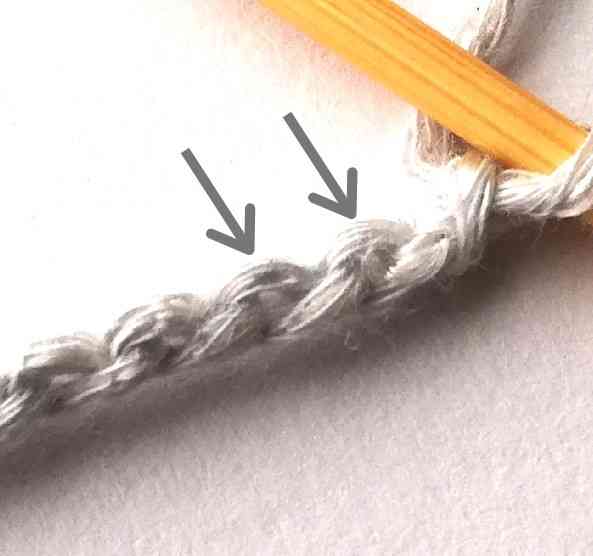

2. Now you will be working in the third loop of your chain which is behind ‘v’.
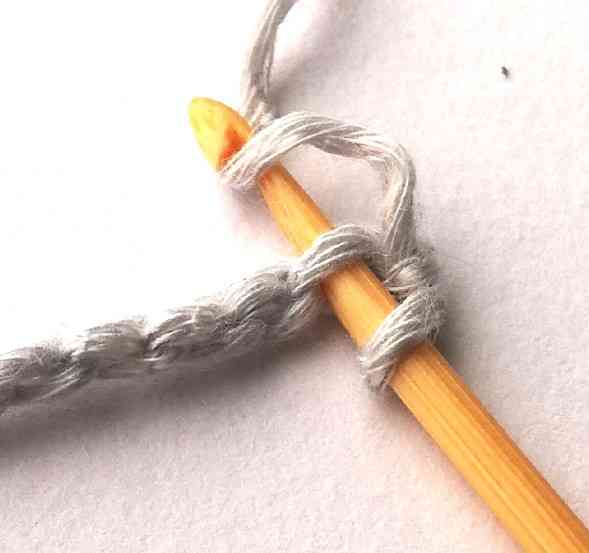

3. Insert your hook in the third loop of the chain and yarn over.
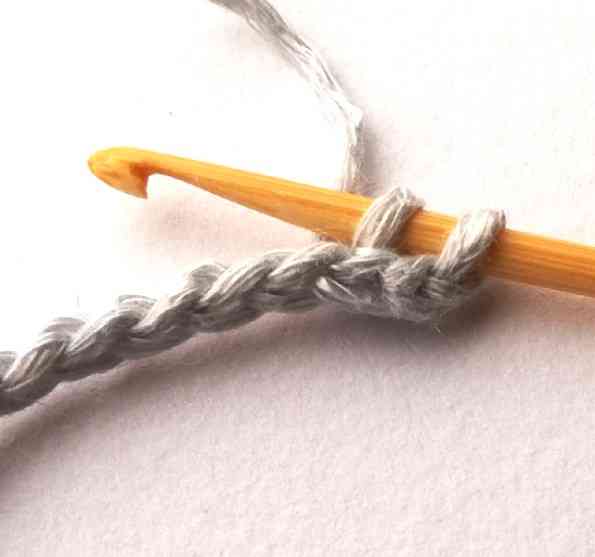

4. Pull the yarn through. Now you have two loops on your hook.
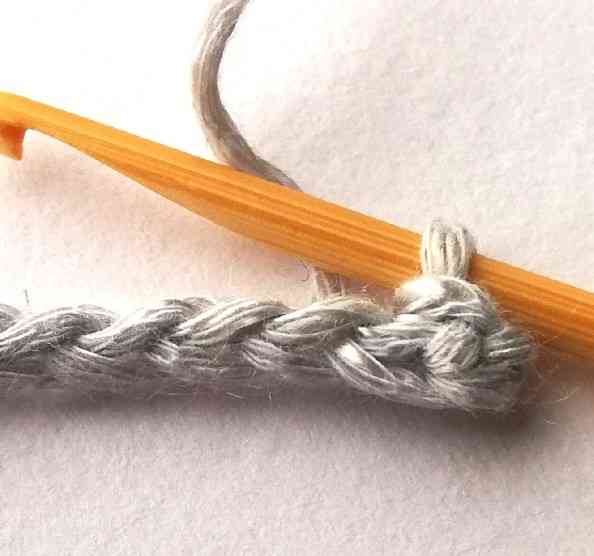

5. Pull the first loop through the other one. Now you have one loop on hour hook. You have just made your first slip stitch.
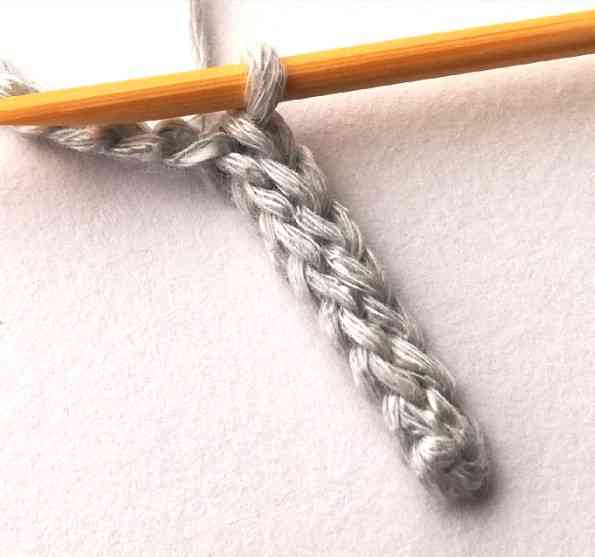

6. In the photo you can see that after several stitches it starts looking like two chains stuck together. Continue making slip stitches in the third loop of the chain until the end of the row. Fasten off. Done!
Enjoy your drawstring bag with a skull!
PDF: If you prefer a printable PDF pattern without ads, you can buy it here.
You can save this pattern to your Pinterest crochet board here.


Pauline
October 10, 2021 at 5:12 pmThank you for a great pattern – it’s cute and spooky 🙂