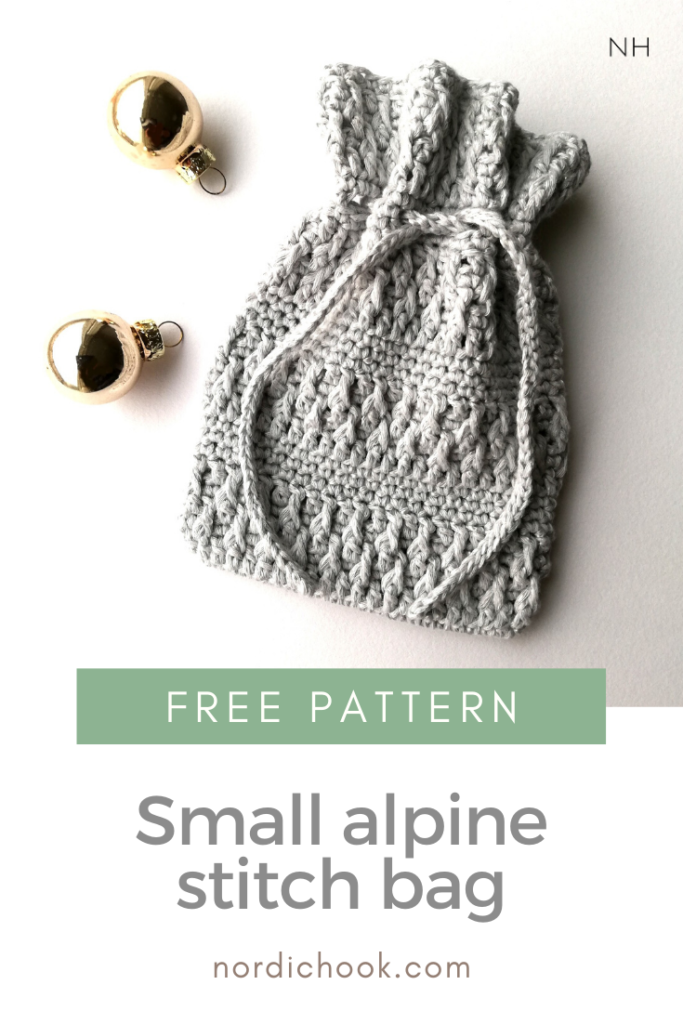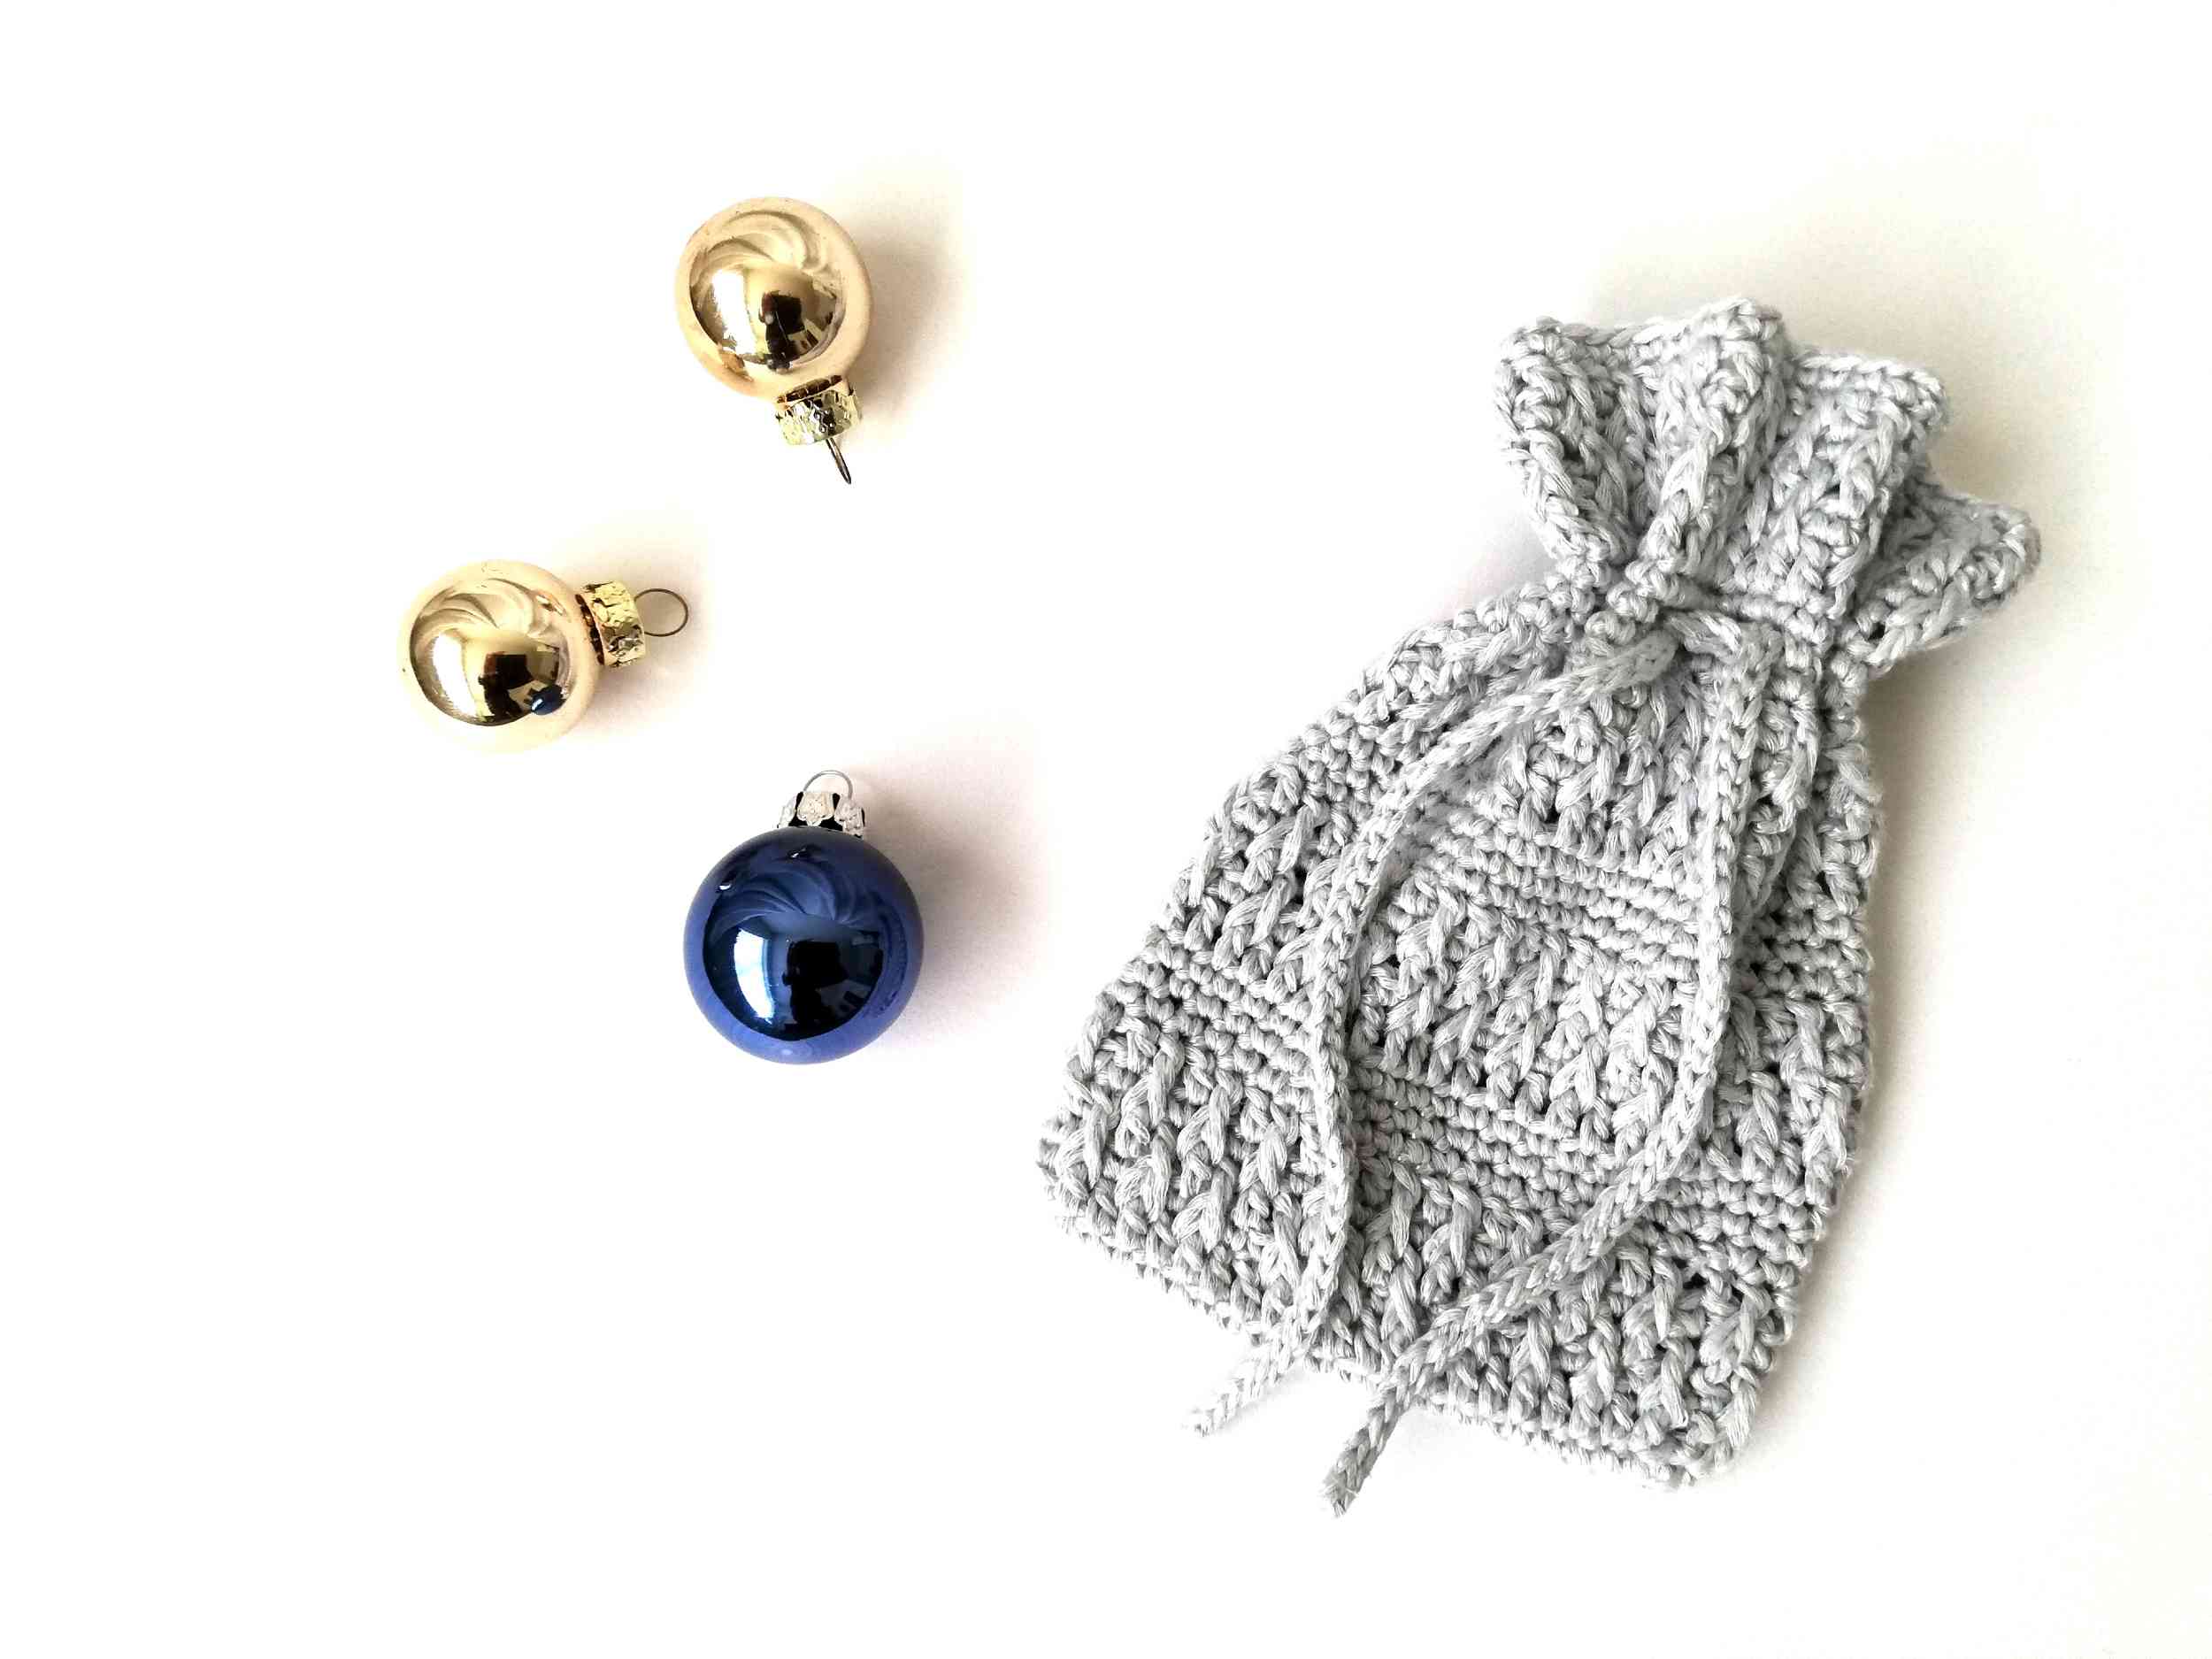
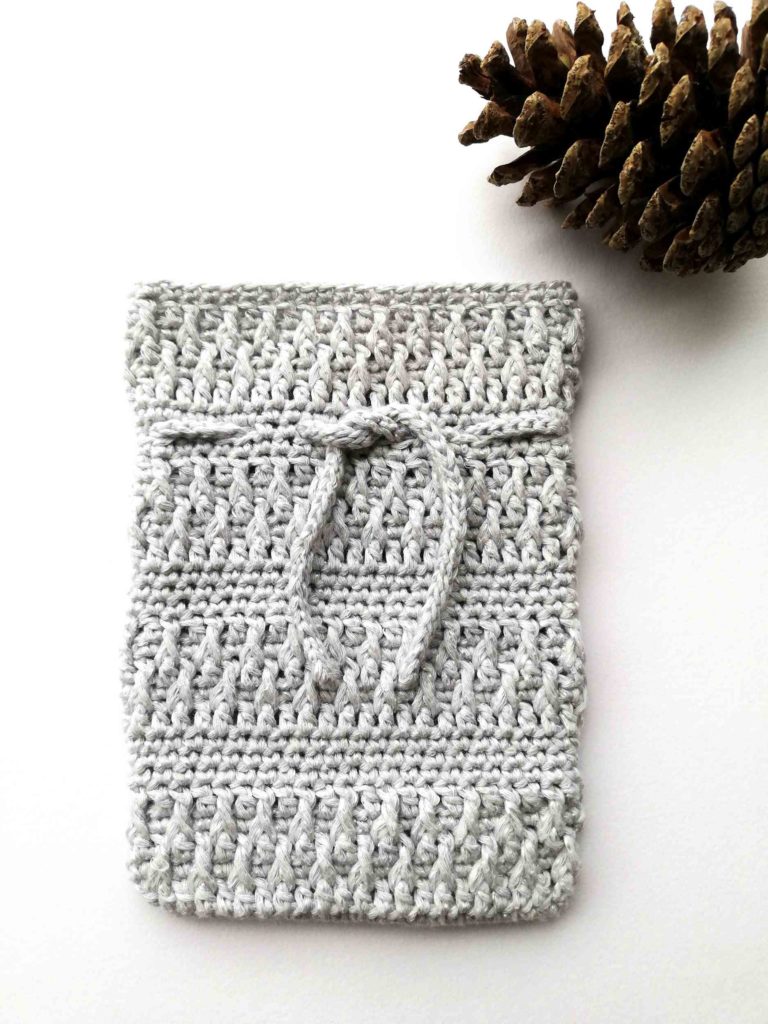
Here is a free crochet pattern for a cute drawstring bag. This small alpine stitch bag is not only a nice way to pack your present, but also a gift in itself: I am sure that everyone can find a use for a cute handmade bag. 🙂
It is also a good project to try if you want to practice (or learn!) the alpine stitch. I made a photo tutorial (see here) for those who are not familiar with this beautiful stitch. The size of the bag can be adjusted, and I explain how to do that in the pattern below. The bag is made in one piece, working in rounds. It starts in a similar way to my easy mini pillow, so if you are not sure how to start, you can check the photo instructions for the beginning here (just instead of double crochets, make single crochets). You can also experiment with colors: for example, use different color yarn for the three groups of single crochet rows, or just make a string in a different color.
The pattern includes a list of materials, abbreviations, notes, and a written pattern. You can find my other free crochet patterns for bags and pouches here and more free crochet projects here.
Printable PDF
Join Nordic Hook Club and download the PDF pattern without ads for free! By joining the Club, you also get access to one of the largest crochet stitch libraries. There you will find hundreds of ad-free downloadable crochet stitch tutorials that include detailed step-by-step photo instructions, concise written patterns and member-exclusive charts. Plus, you can download all Nordic Hook patterns, stitches and e-books for free! Read more about all the membership benefits here and sign up today.
Read more and sign up!
Small alpine stitch bag
Materials
- Yarn: I use white Somerset linen silk yarn 50 g. However, any thin cotton yarn will work.
- Hook: I use a 2.0 mm hook. If you are using a different yarn, choose the hook size that is recommended on your yarn label.
Abbreviations (US terms)
- ch: chain
- sc: single crochet
- dc: double crochet
- fpdc: front post double crochet
- sl st: slip stitch
- prev: previous
- st: stitch
- rep * *: repeat from * to *
Notes
You will be working in rounds. This pattern uses the alpine stitch, which consists of double crochets, front post double crochets, and single crochets. Photo instructions below show how to make a string. You can adjust the width of the bag by choosing the length of your chain: make (multiples of 4) + 1 + (1 for a turning chain). The size of my bag is 10 x 14.5 cm.
Pattern
The bag
Start by chaining multiples of 4 + 1 until you reach the desired length (the width of the bag) + 1. For my bag I chained 20 + 1 + 1.
Round 1: You will be working down the chain, then turn and work in the other side of the chain. Make sc in every st of the chain starting from the second chain from your hook (turning chain for single crochets does NOT count as a stitch). Turn. 1 sc in the end of the chain, make sc in every st until you come back to the beginning of the chain. 1 sc in the end of the chain. Join with a sl st to close the round.
The start of the alpine stitch:
Round 2: ch 2 (it counts as a st), dc in every sc of the prev round starting from the second sc of the prev row. Join with a sl st.
Round 3: ch 1 (it does NOT count as a st), sc in every st of the prev round starting with the ch2 of the prev round. Join with a sl st.
Round 4: ch 2 (it counts as a st), make a fpdc in the second dc of round 2 (skip the ch2 of round 2 which counts as the first dc), dc in the third sc of the prev round. Make fpdc in the fourth dc of round 2, dc in the fifth sc of the prev round. Keep alternating fpdc and dc until the end of the round. Join with a sl st.
Round 5: ch 1 (it does NOT count as a st), sc in every st of the prev round starting with the ch2 of the prev round. Join with a sl st.
Round 6: ch 2 (it does NOT count as a st), fpdc in the ch2 of round 4, dc in the second sc of the prev round, skip the fpdc of round 4 and make fpdc in the following dc of round 4. Dc in the fourth sc of the prev round. Keep alternating fpdc and dc until the end of the round. Join with a sl st.
Here ends the first alpine stitch part.
Round 7: ch 1 (it does not count as a st), sc in every st of the prev round. Join with a sl st.
Round 8-9: repeat round 7 two times.
Round 10-14: repeat round 2-6.
Round 15-17: repeat round 7 three times.
Round 18-22: repeat round 2-6.
Round 23: repeat round 7.
Making the holes for the string :
Round 24: ch 1 (it does not count as a st), *2 sc in the next two st, ch 2, skip 2 following sc*, rep * * until the end of the round. Join with a sl st.
Round 25: repeat round 7.
Round 26-31: repeat round 2-7.
Fasten off.
Making the string
Start by chaining 50 (or any length that fits best for your bag, my string is 34 cm long). Make a row of slip stitches in the third loop of the chain as it is shown in photo instructions below. When you reach the end of the row, fasten off. You are ready to weave in the string into your bag. Done!
Photo instructions
Making the string
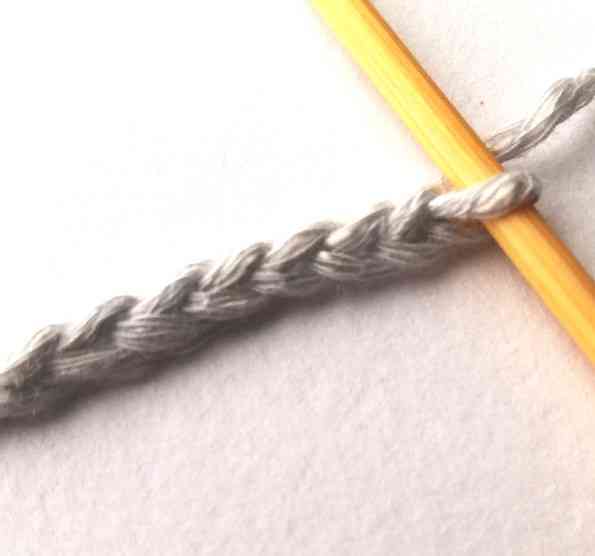
1. Start with a chain.

2. Now you will be working in the third loop of your chain which is behind ‘v’.
3. Insert your hook in the third loop of the chain and yarn over.
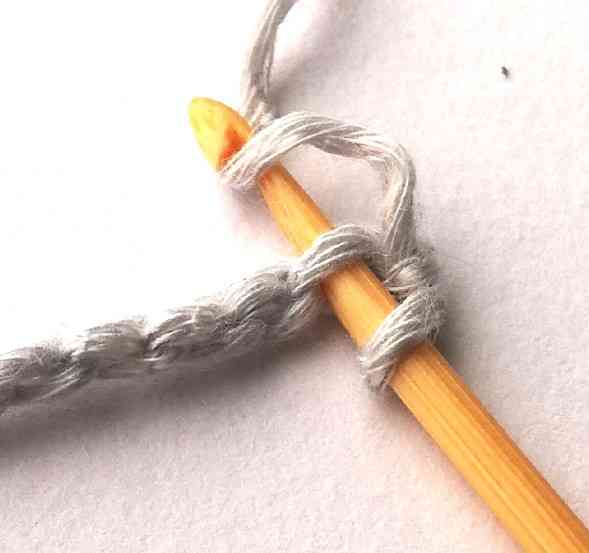
4. Pull the yarn through. Now you have two loops on your hook.
5. Pull the first loop through the other one. Now you have one loop on your hook. You have just made your first slip stitch.

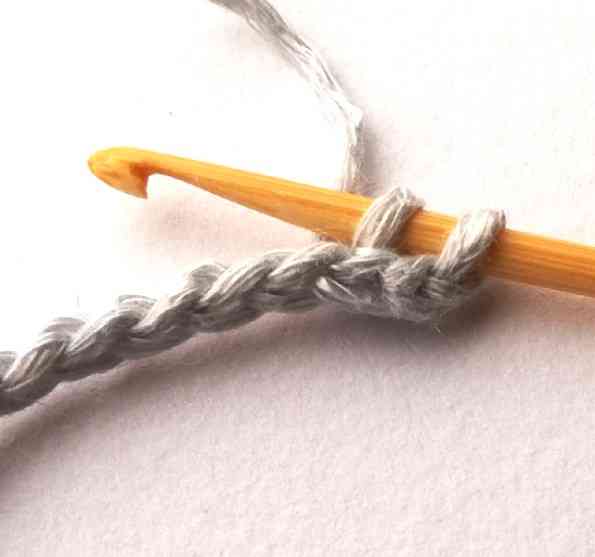
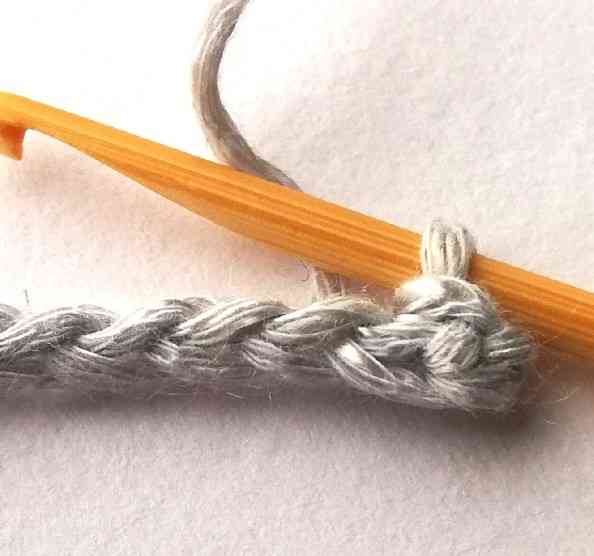
6. In the photo you can see that after several stitches it starts looking like two chains stuck together. Continue making slip stitches in the third loop of the chain until the end of the row. Fasten off. Done!
Enjoy your bag!
You might also like
There is much more to explore:
You can save this pattern to Pinterest here.