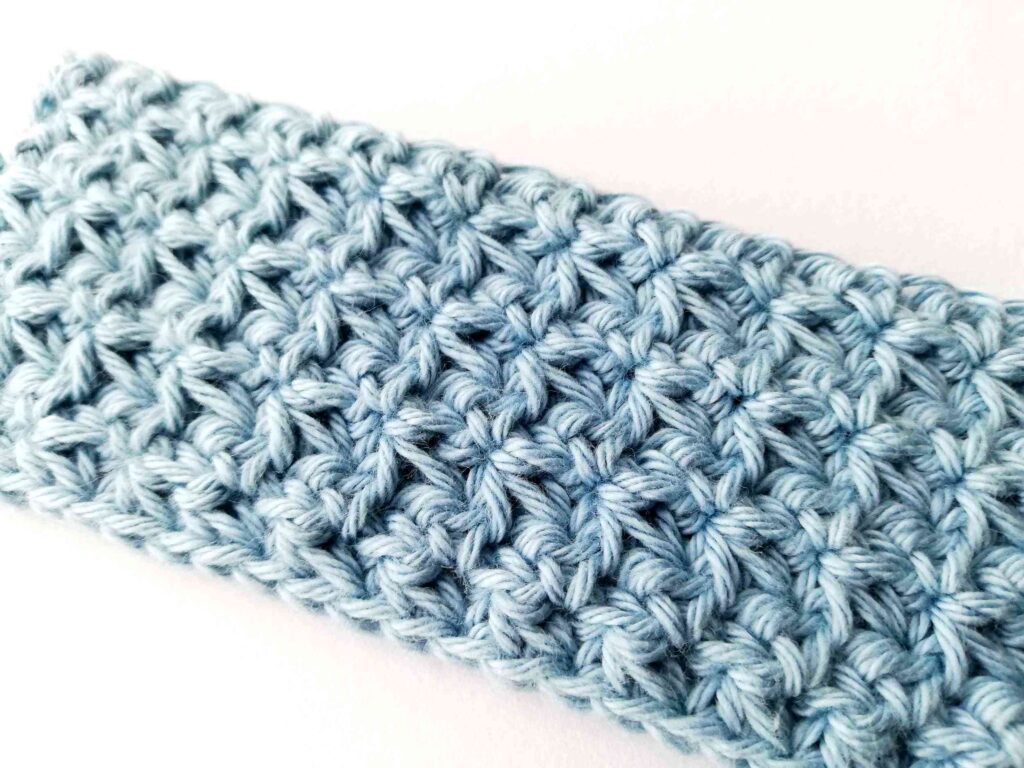
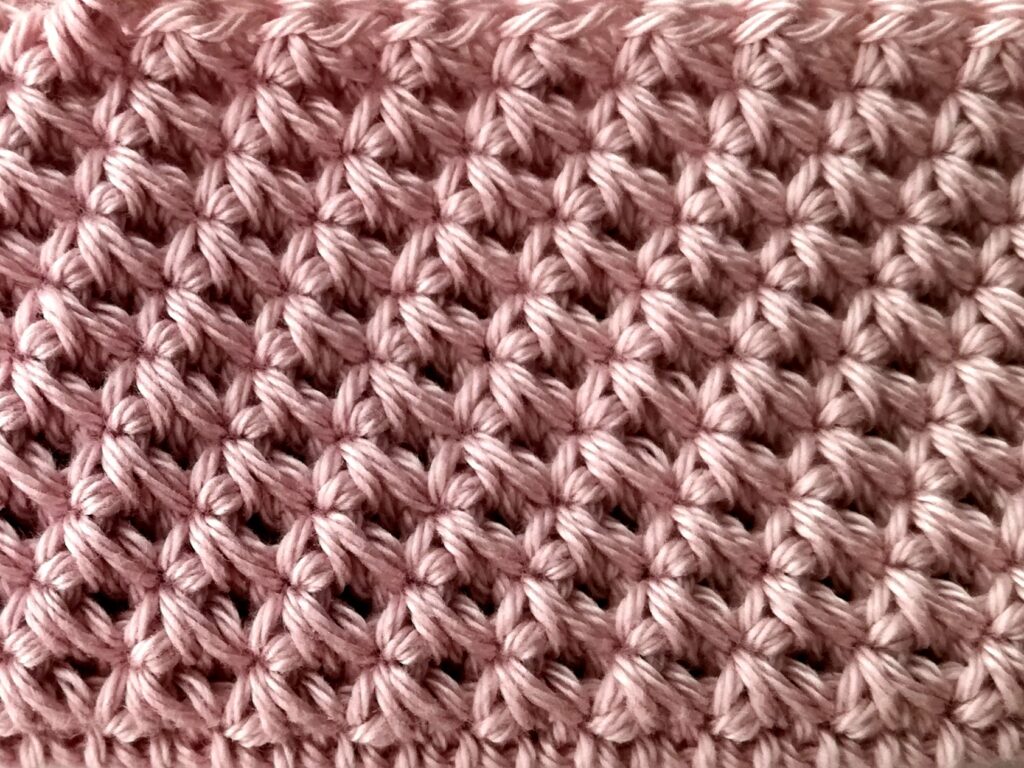
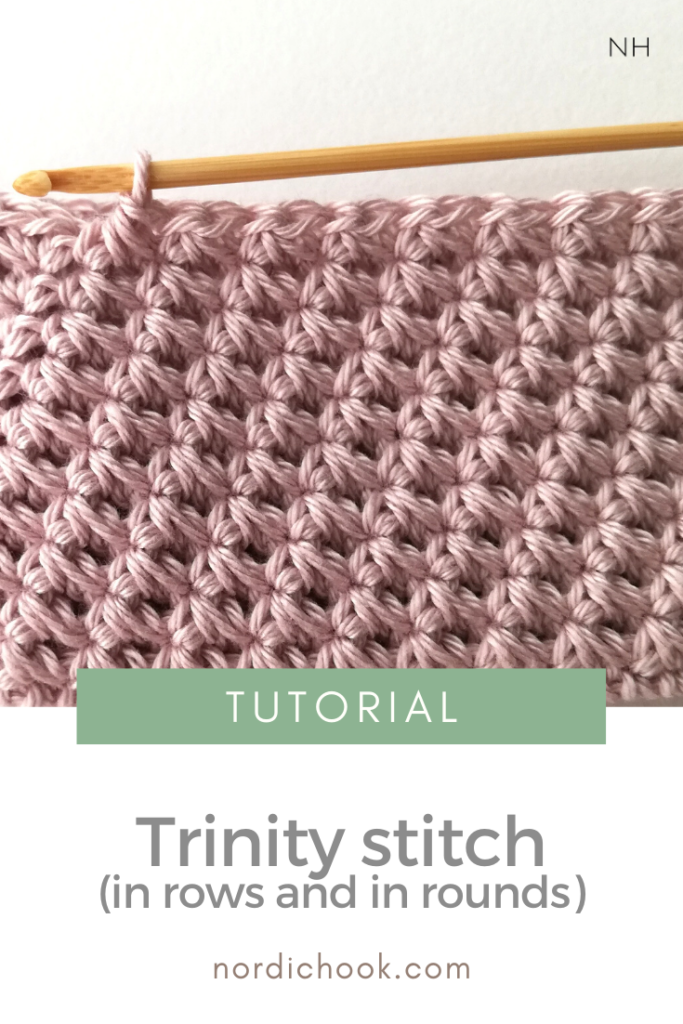
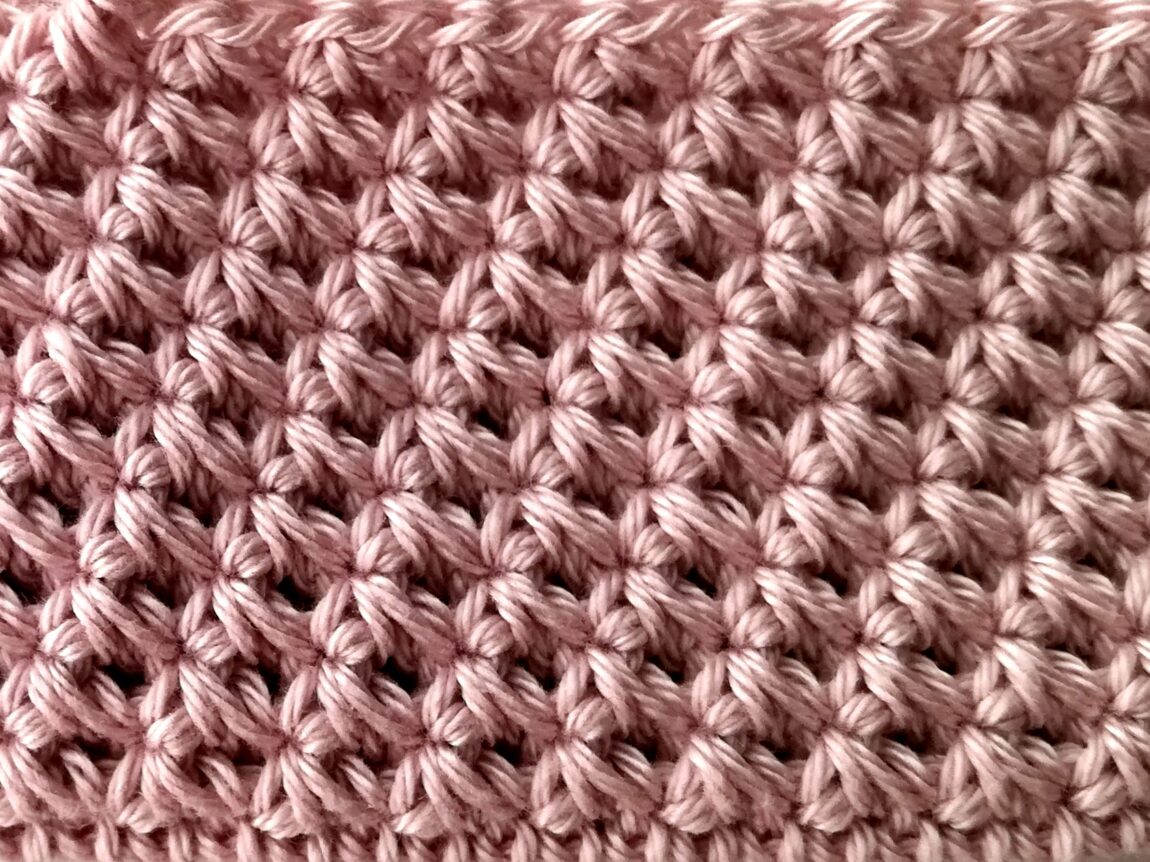
In this tutorial I show how to make this beautiful trinity stitch in rows and in rounds. For me it looks completely different when you work in rows and in rounds. Personally, I prefer the latter.
This stitch is easy to make and it is suitable for beginners: you just need to repeat the same row or round. For this tutorial you should know how to make a single crochet (sc). The instructions below have two parts: the first part shows how to work in rows, and the second parts shows how to work in rounds.
Save this tutorial to Pinterest here.
Good luck!
Photo instructions
Trinity stitch in rows step-by-step

Row 1
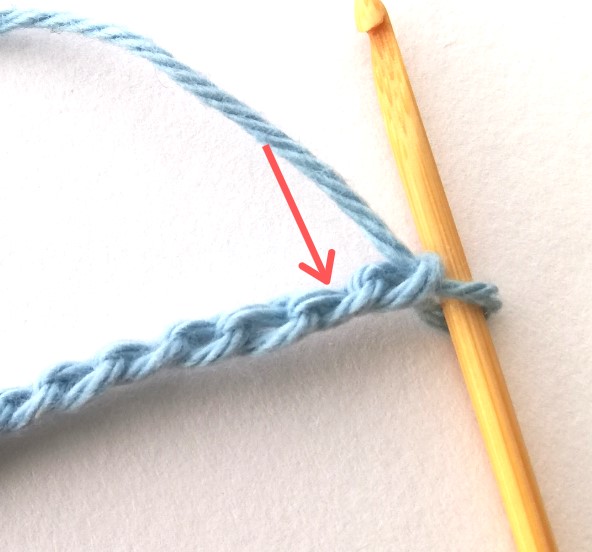

1. Start with an even number of chains. You will start working in the second chain from your hook like it is shown in the picture.
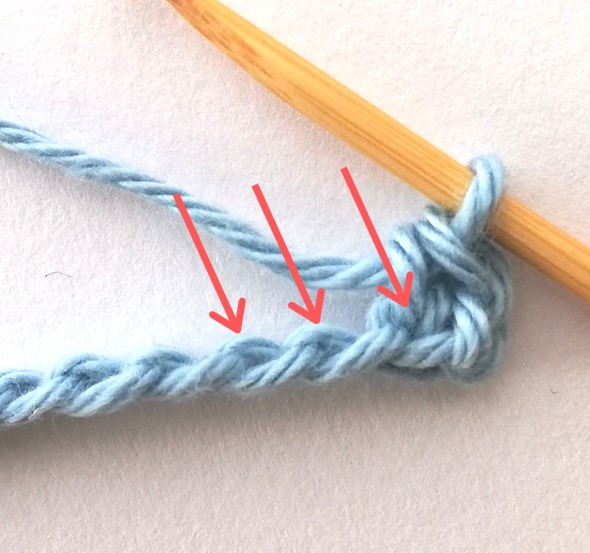

2. So, make a single crochet in the second chain from your hook. Next you will be working in the the same st you have just made a single crochet and the next two stitches.
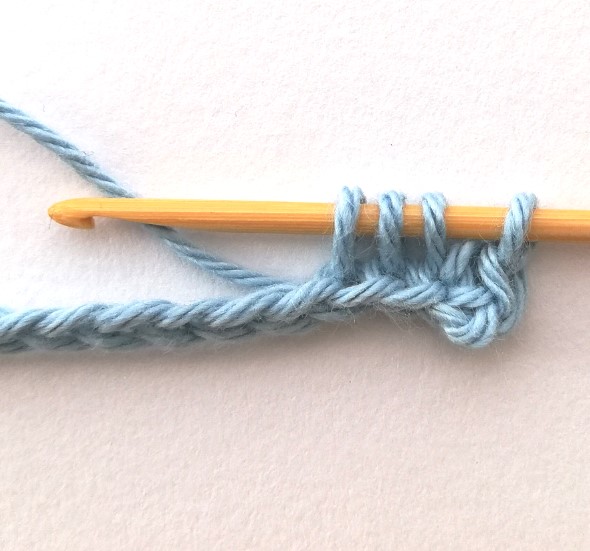

3. So, insert your hook in the stitch were you have just made a single crochet, yarn over and pull the yarn through. You have two loops on your hook. Then insert your hook in the next st, yarn over and pull the yarn through. Now you have three loops on your hook. Insert your hook the next st, yarn over and pull the yarn through. Now you have four loops on your hook.
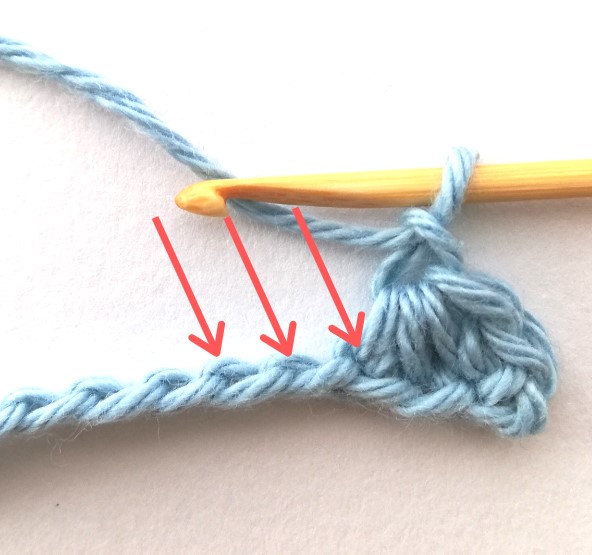

4. Yarn over and pull the yarn through all four loops. Chain one. Now you will be working in the last stitch you have just worked in and the next two stitches like it is shown in the picture.
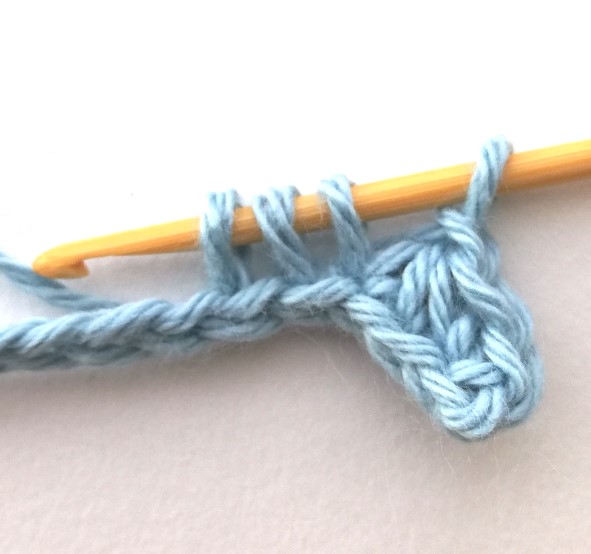

5. Insert your hook in the last st you have just worked in, yarn over and pull the yarn through. Now you have two loops on your hook. Then insert your hook in the next st, yarn over and pull the yarn through. Now you have three loops on your hook. Finally insert your hook in the next st, yarn over and pull the yarn through. Now you have four loops on your hook.
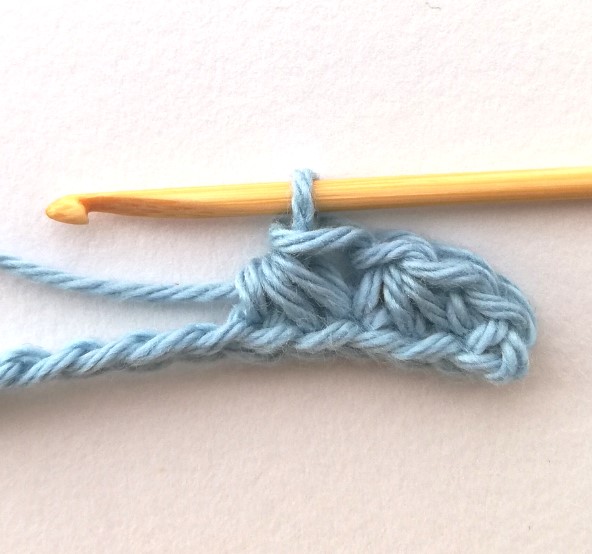

6. Yarn over and pull the yarn through all four loops.
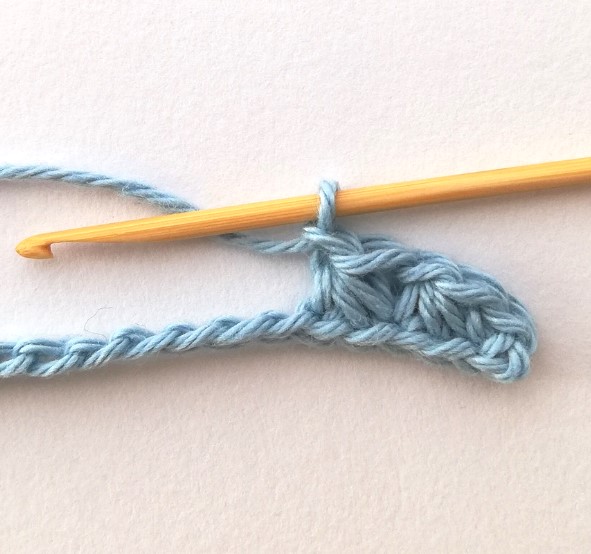

7. Chain one and continue working in the same way until the end of the row.
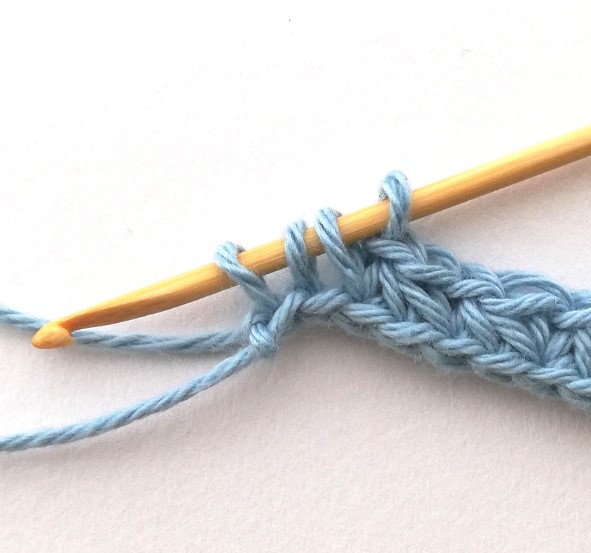

8. Here you reach the end of the first row.
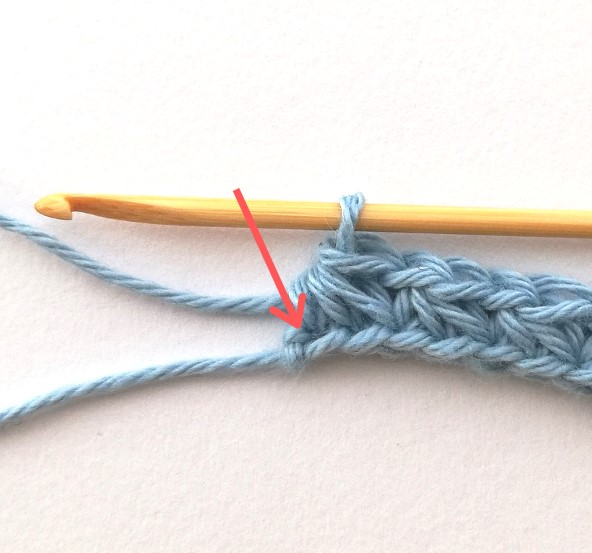

9. Yarn over and pull the yarn through all four loops on your hook. Don’t chain one. Now you will be working in the last st of this row as it is shown in the picture.
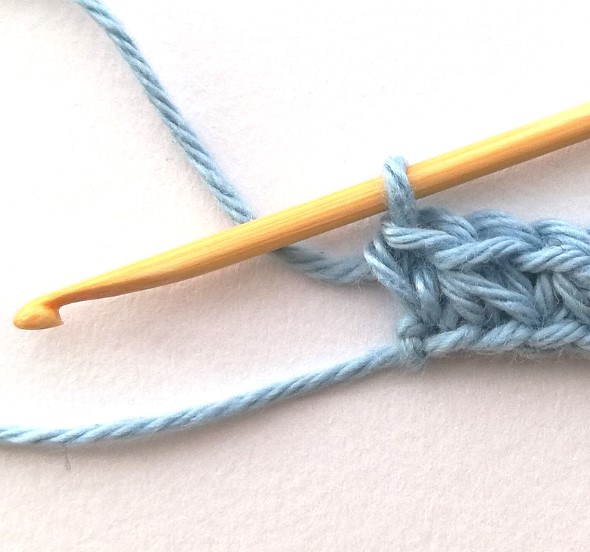

10. So, make a single crochet in the last st of the row (it is the last stitch where you have already worked in).
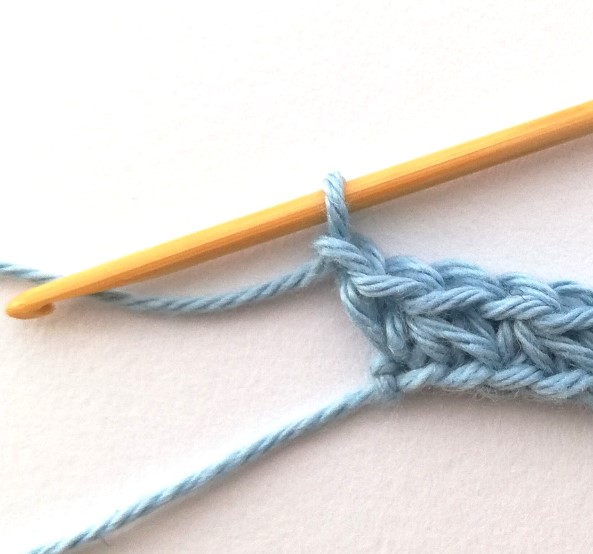

11. Chain one and turn your work around.
Row 2
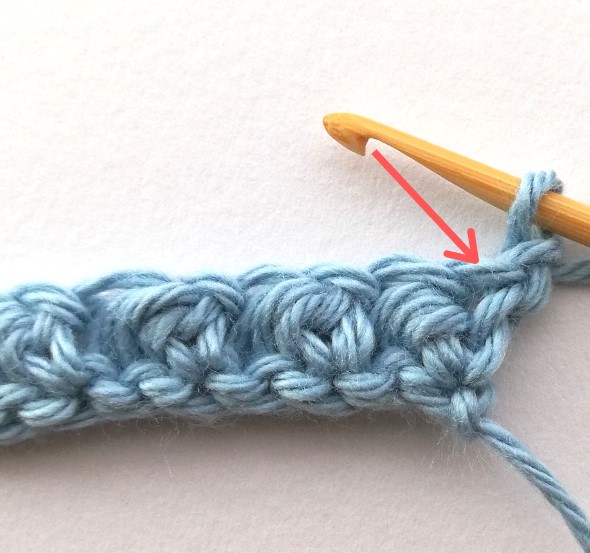

12. Now you will be working in the very first st of the row like it is shown in the picture.
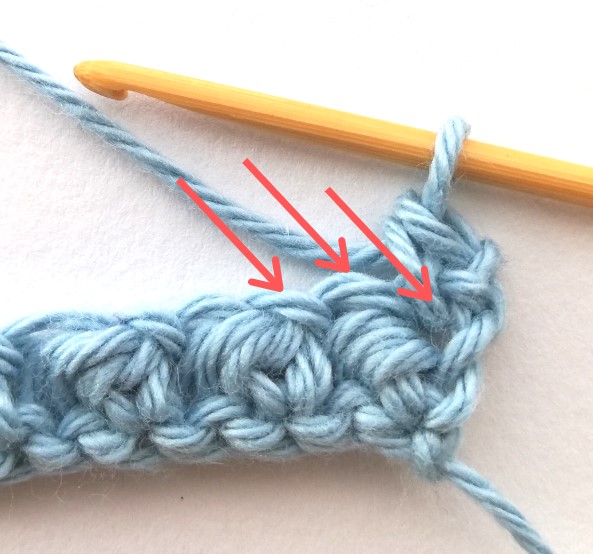

13. So, make a single crochet in that very first st. Now you will be working in the same way as in the first row: in the st where you have just made a single crochet and the next two stitches.
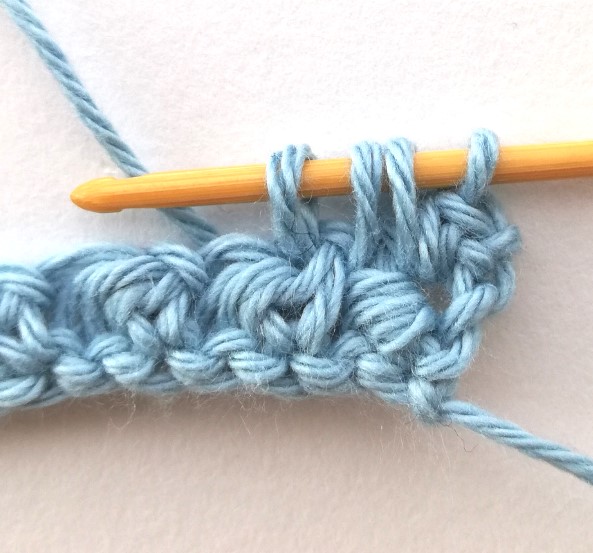

14. Insert your hook in the last st you have just worked in, yarn over and pull the yarn through. Now you have two loops on your hook. Then insert your hook in the next st, yarn over and pull the yarn through. Now you have three loops on your hook. Finally insert your hook in the next st, yarn over and pull the yarn through. Now you have four loops on your hook.
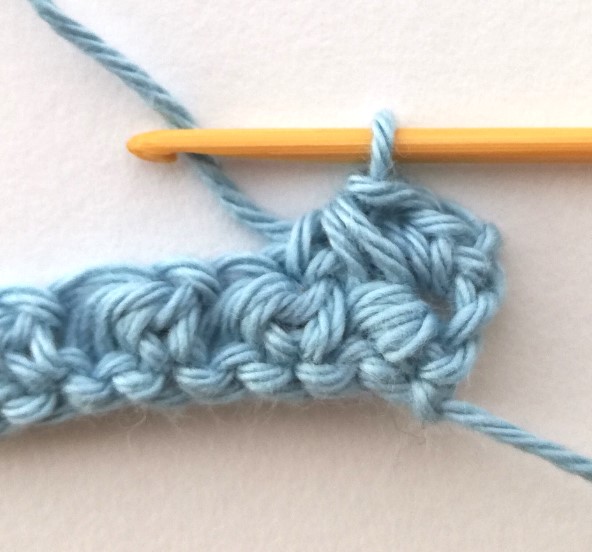

15. Next yarn over and pull the yarn through all four loops.
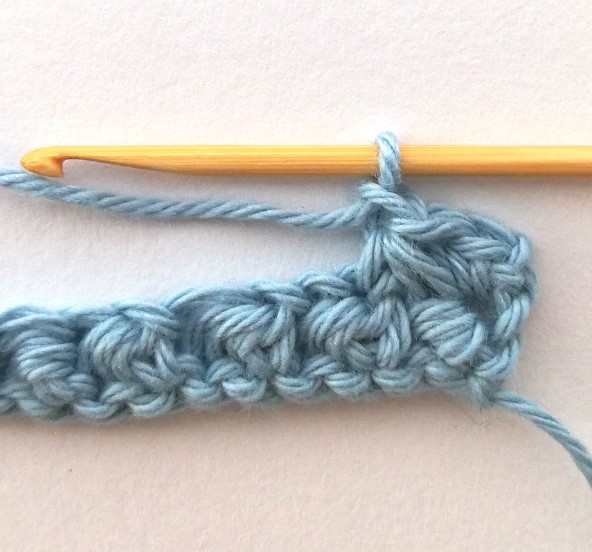

16. Then chain one.
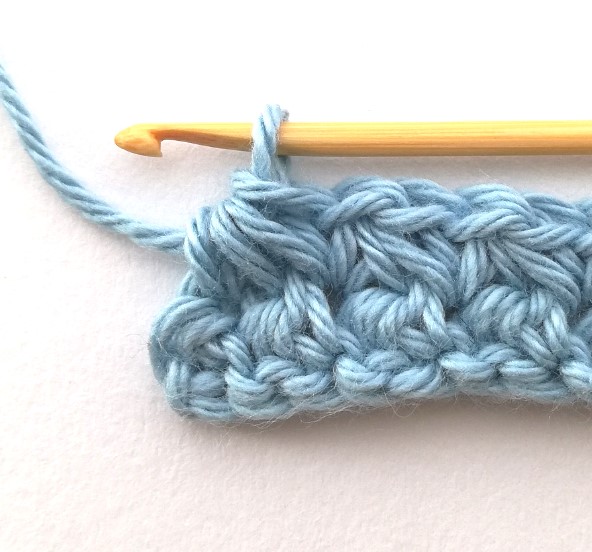

17. Continue working in the same way until the end of the row. When you reach the end, don’t chain one as usually.
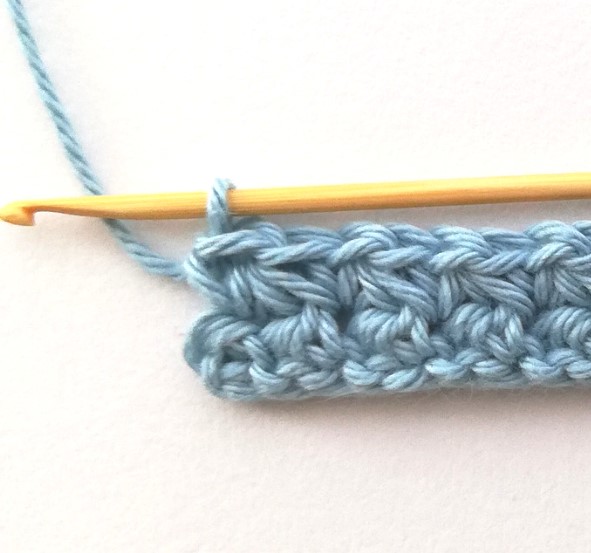

18. Instead make a single crochet in the last st where you have just worked in. Then chain one, turn your work around and work on your third row.
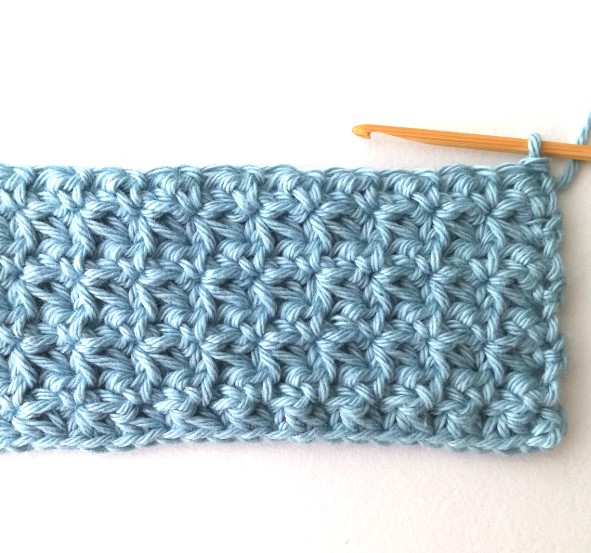

19. This is how the trinity stitch looks after a few rows.
Trinity stitch in rounds step-by-step

Round 1
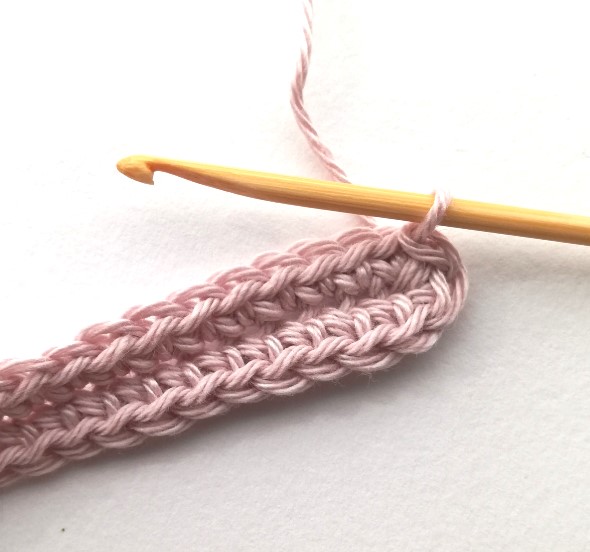

1. When working in rounds, you should also have an even number of stitches. In this example, I made chain and then single crochets around it. Then I connected with a slip stitch. This will be the base for the trinity stitch that will start in the second round.
Round 2
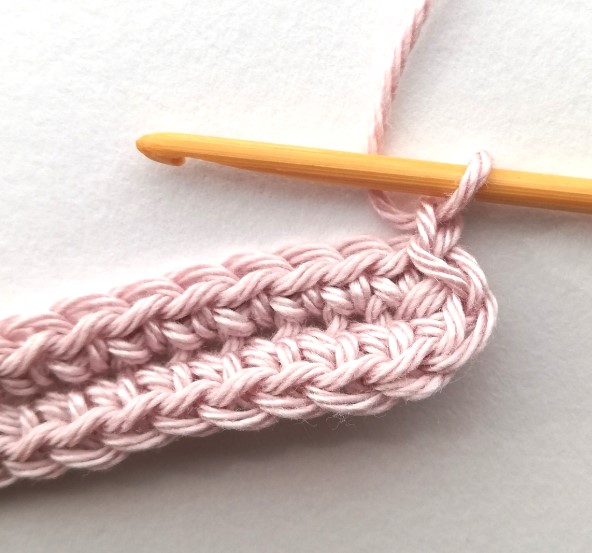

2. Chain one.
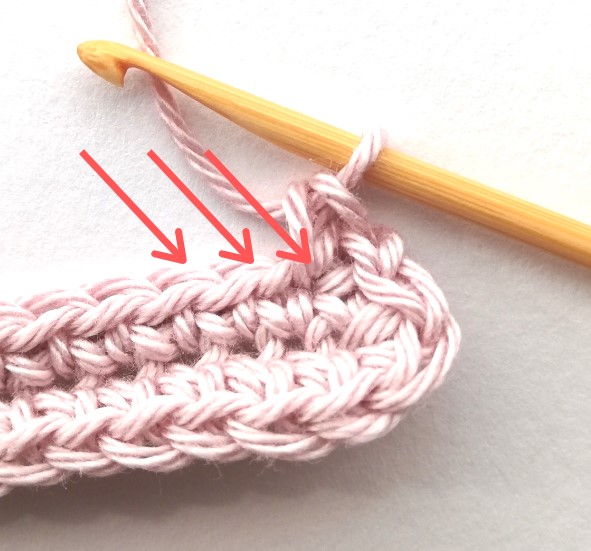

3. Next make a single crochet in the first stitch. You will be working in the same way as would be working in rows until the end of this round. The picture shows in which stitches you will be working next.
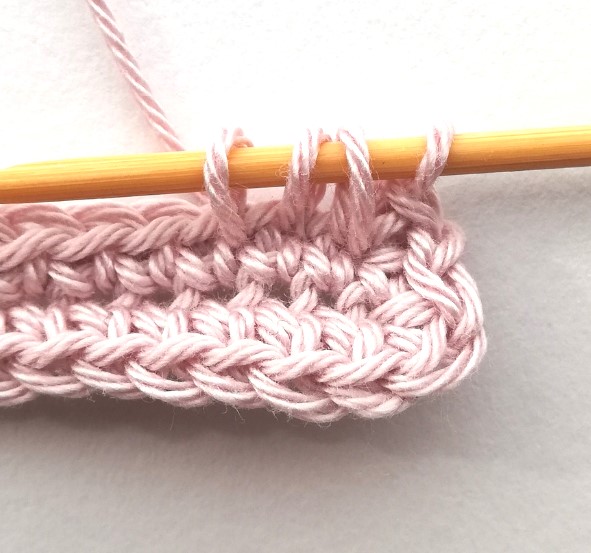

4. So, insert your hook in the st where you have just made a single crochet. Yarn over and pull the yarn through. Now you have two loops on your hook. Then insert your hook in the next st, yarn over and pull the yarn through. Now you have three loops on your hook. Finally insert your hook in the next st, yarn over and pull the yarn through. Now you have four loops on your hook.
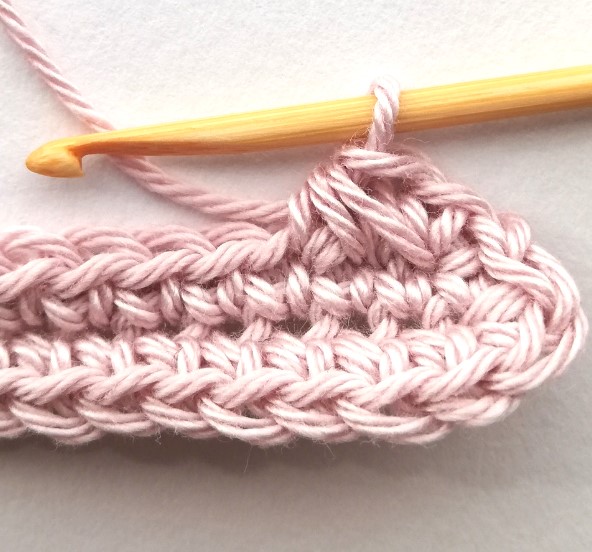

5. Next yarn over and pull the yarn through all four loops.
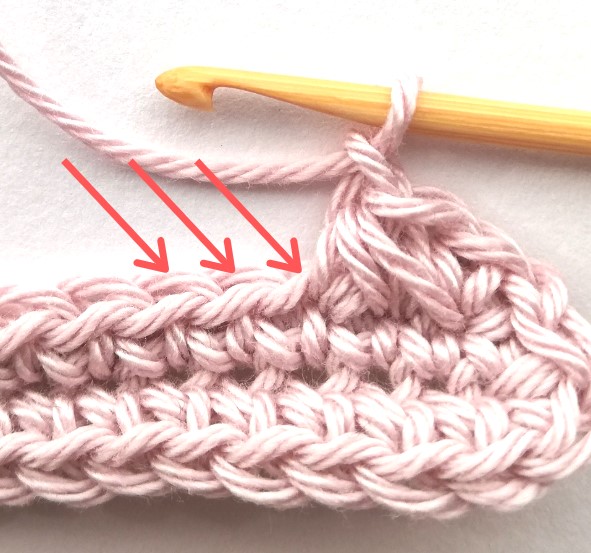

6. Then chain one and work in the stitches that are indicated in the picture.
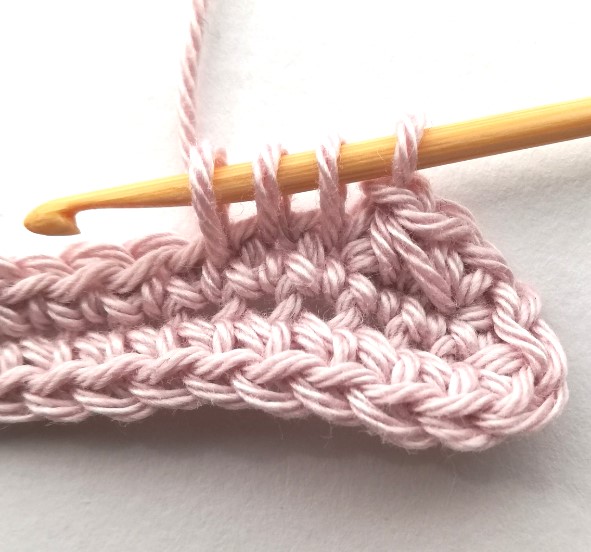

7. Insert your hook in the last st you have just worked in, yarn over and pull the yarn through. Now you have two loops on your hook. Then insert your hook in the next st and pull the yarn through. Now you have three loops on your hook. Finally insert your hook in the next st and pull the yarn through. Now you have four loops on your hook.
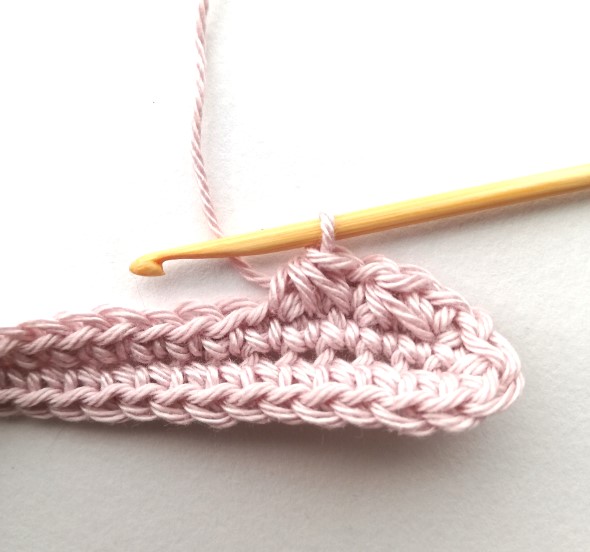

8. Yarn over and pull the yarn through all four loops. Chain one.
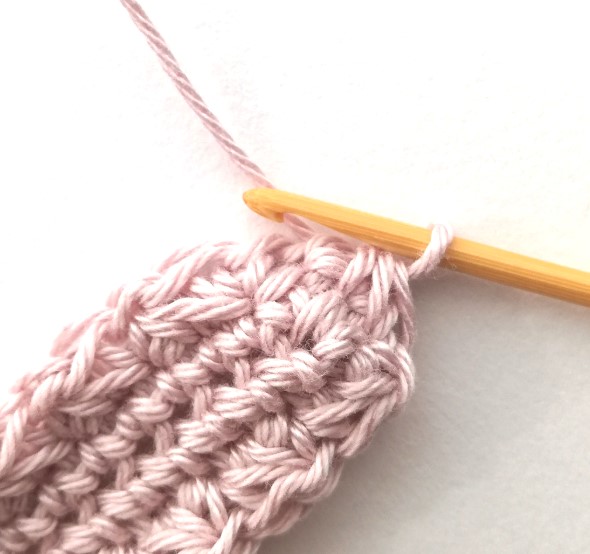

9. Continue until the end of the round. When you reach the end, don’t chain one as usually.
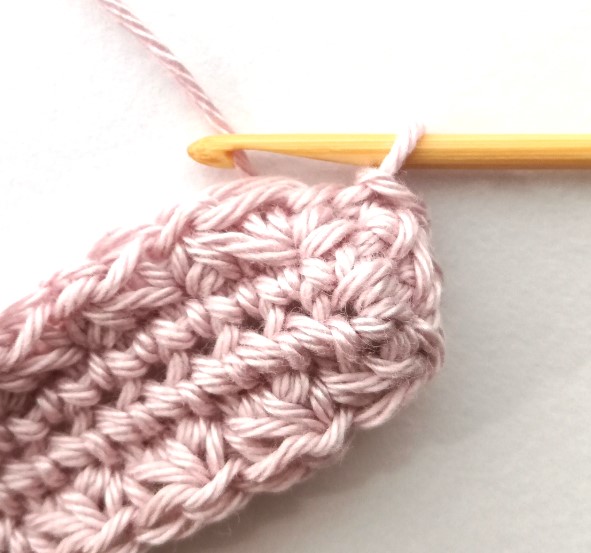

10. Instead connect with a sl st to the first single crochet of this round.
Round 3
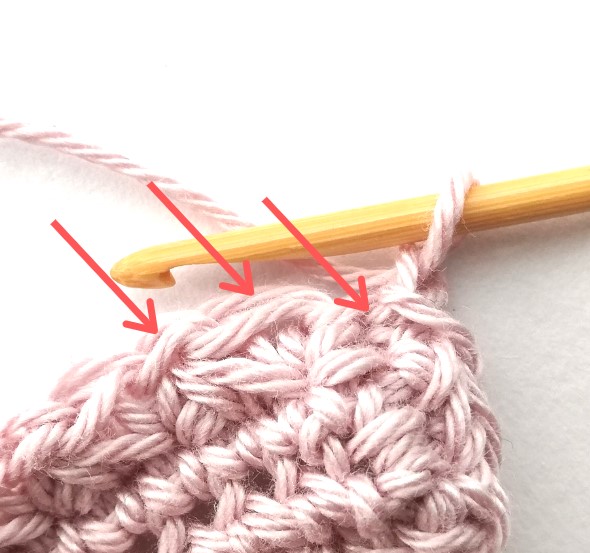

11. Then chain one and make a single crochet in the very first st. Next work in the stitches as indicated in the picture.
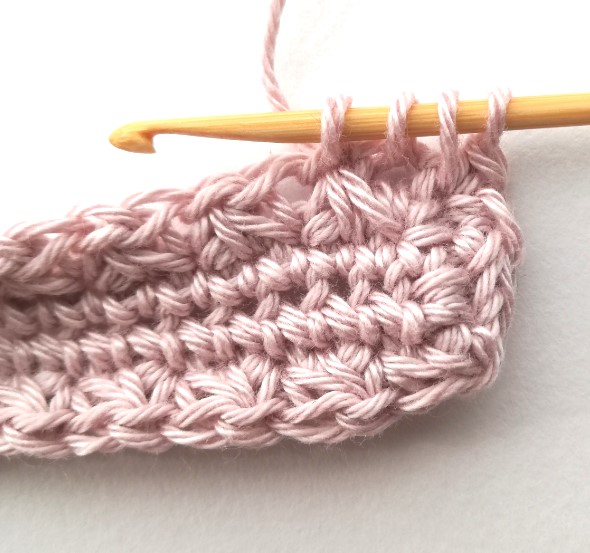

12. So, work in the st where you have just made a single crochet, then in the next two stitches. You have four loops on your hook again.
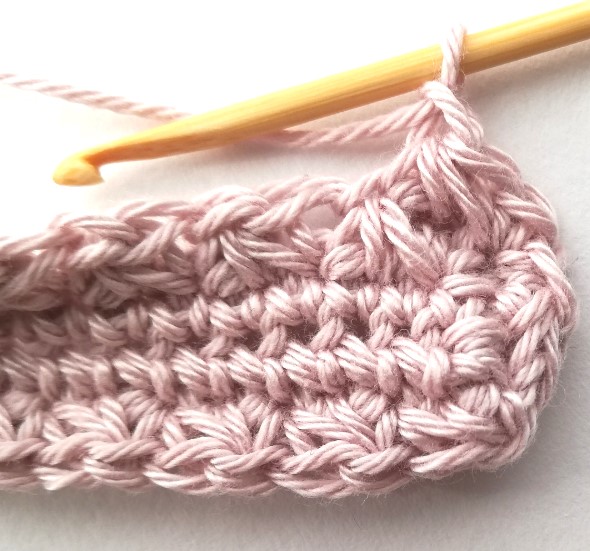

13. Yarn over, pull the yarn through all four loops and chain one. Keep working in the same way.
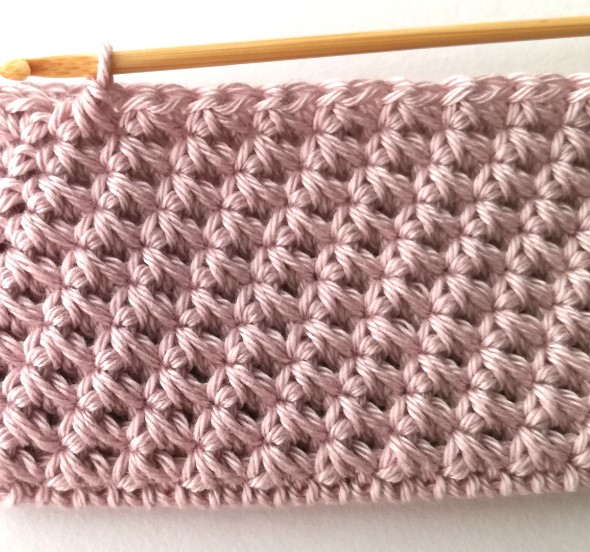

14. This is how the trinity stitch looks after a few rounds. Done!
Save this tutorial to Pinterest here.


Ans Basson
August 16, 2021 at 9:31 amBeautiful and easy.
Ans Basson
August 16, 2021 at 9:34 amIWould love too have more like this please.
Nordic Hook
August 21, 2021 at 1:21 pmI am glad that you like this stitch. I will try to put more similar tutorials!
Diana
December 21, 2021 at 7:50 amThank you. Probably the clearest instructions I have ever read.
Nordic Hook
December 21, 2021 at 11:38 amThank you so much! 🙂
Sheri
October 15, 2022 at 1:15 pmThank you for the great visual description of this stitch… I’m going to try it for a book cover for my daughter..
Nordic Hook
October 16, 2022 at 12:30 pmI am glad that you like my tutorial 🙂 I am sure your book cover will look beautiful!
Hildah
December 13, 2022 at 5:16 pmYou really know how to use your hook. The patterns are so beautiful.
Nordic Hook
January 12, 2023 at 11:01 amThank you very much!