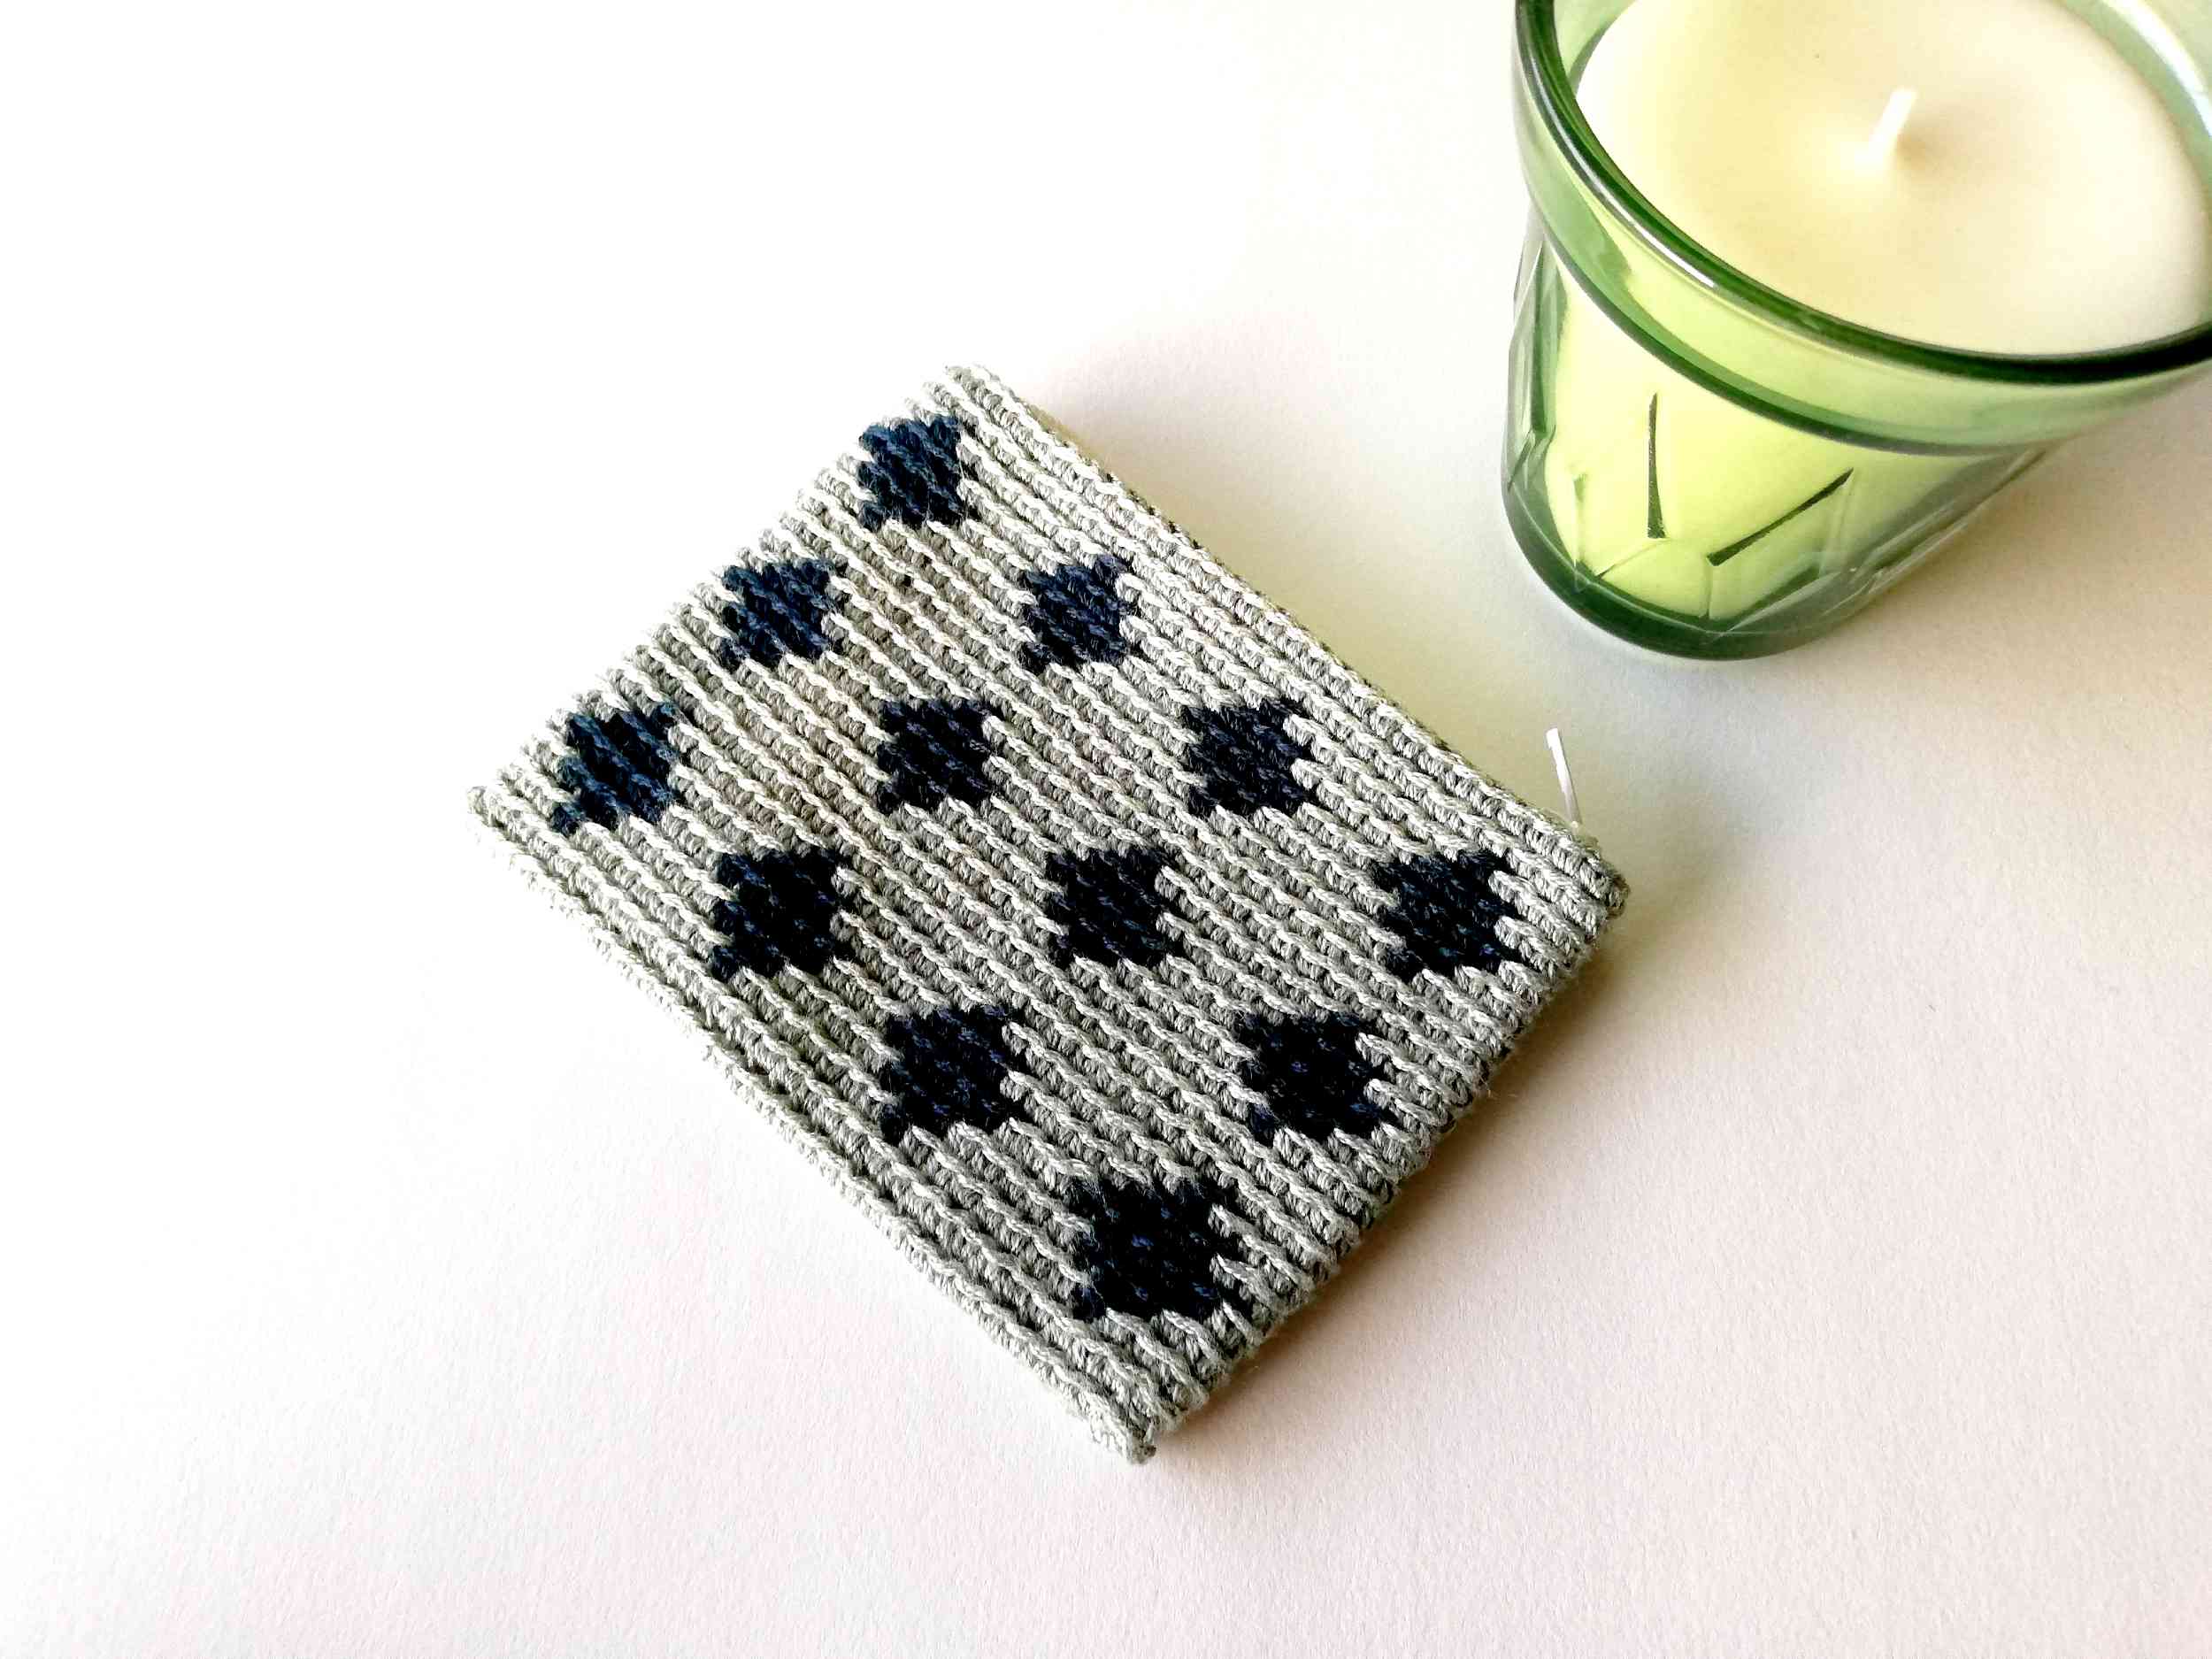
This week I am sharing a free crochet pattern for a tapestry crochet zipper pouch Blue Diamonds. It is a quick project and quite simple of you are familiar with tapestry crochet. If not, this tapestry crochet zipper pouch is a good way to practice this technique. I made a tutorial for tapestry crochet, that you can find here.
For this project I used viscose yarn instead of my usual mercerized cotton. I should say, that mercerized cotton is still my favorite. I feel that is easier to work with and the final result also looks better. However, viscose yarn has a very nice shine (unfortunately, photos do not do justice in this sense).
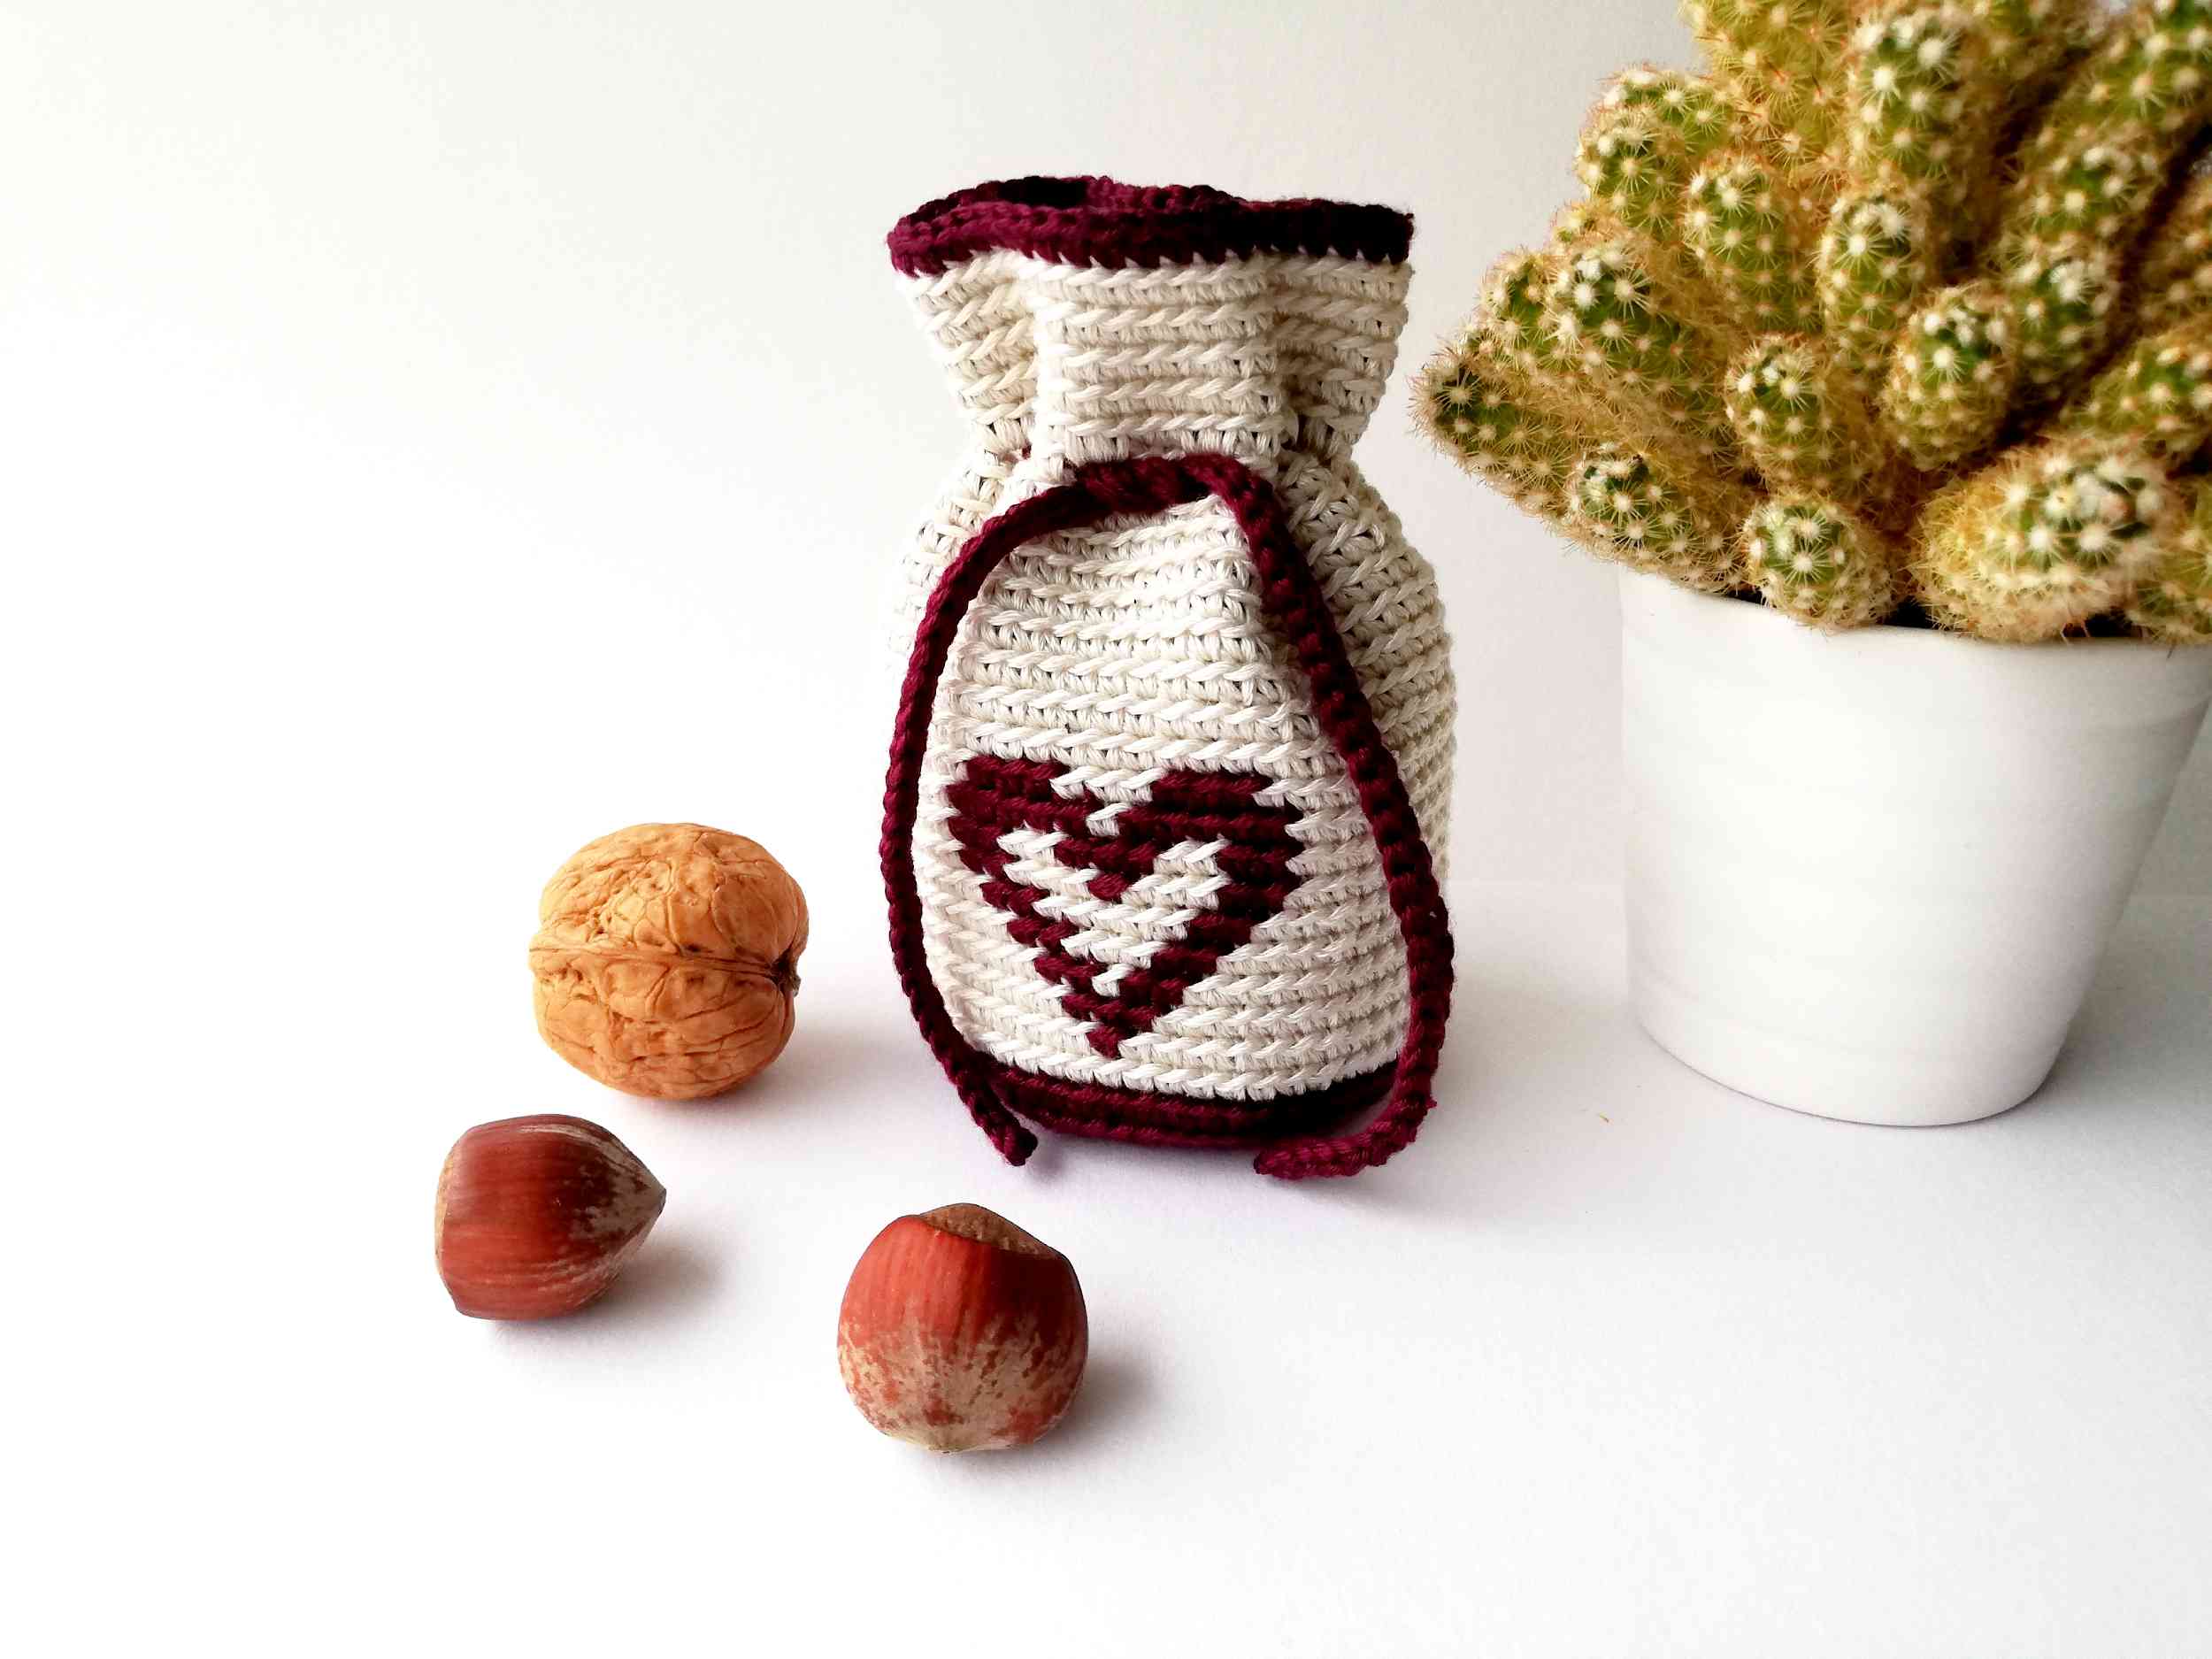
You can also take a look at my other designs for crochet zipper pouches: a circles crochet pouch with a zipper, a zigzag diamond pouch, a honey pouch, an alpine stitch pouch, a cross stitch pouch, a textured striped pouch and a crown pouch.
If you are not sure how to sew in a zipper and attach lining, you can take a look at a tutorial here.
Good luck!
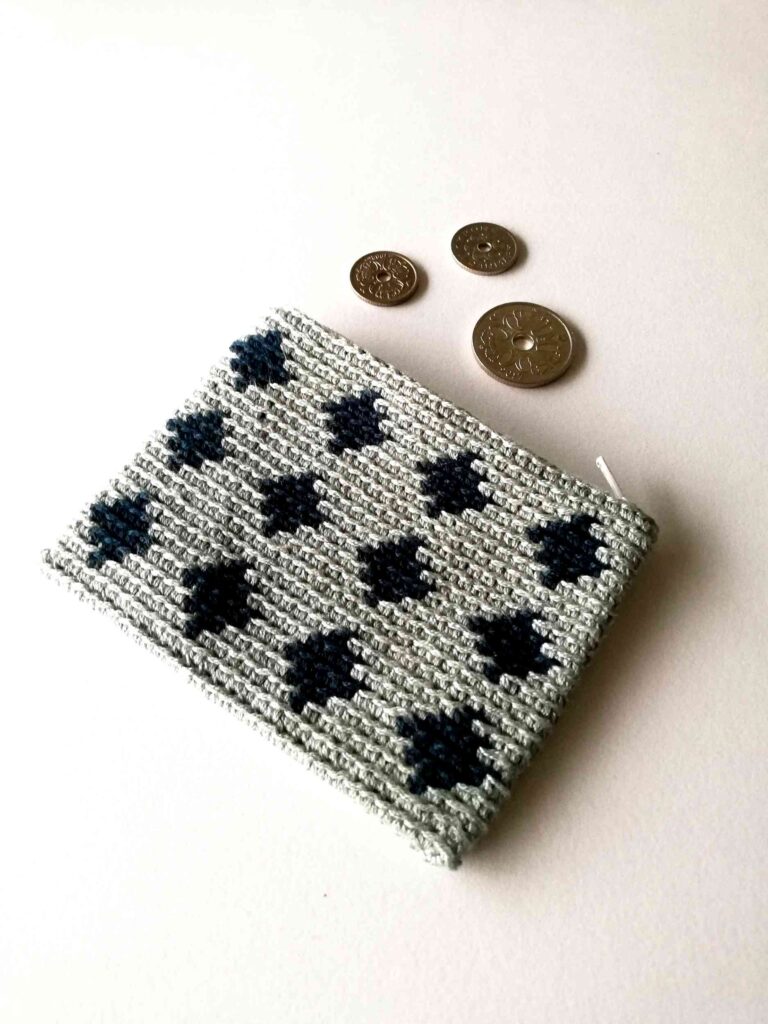

Tapestry crochet zipper pouch Blue Diamonds
PDF: If you prefer a printable PDF pattern without ads, you can buy it here.
Pinterest: Also, you can save it to Pinterest for later here.
Materials
- Yarn: any thin yarn will work. I used Strik & smil “Art silk garn”, 100% viscose, 50 g, colors: gray and dark blue.
- Hook: as suggested on your yarn label. I used hook size 2.0.
Abbreviations (US terms)
- ch: chain
- sl st: slip stitch
- sc: single crochet
- msc: modified single crochet
- st: stitch
Notes
The size of my pouch is 12.0 x 9.0 cm. You will be working in rounds. For this pattern you should be familiar with tapestry crochet (you can find the tutorial here). The photo instructions below show the main steps how to make the pouch. This pattern uses a modified single crochet: make a single crochet back loop only, but instead of yarning over for the last step, yarn under (see the tutorial here). Except for the first round, every round is made in the same way: chain one, make 63 modified single crochets, join with a slip stitch. Follow the color chart showing how you should change colors.


Pattern
Start by chaining 32 with gray yarn.
Round 1: To make the first round, you will be working down the chain, then turn and work on the other side of the chain. Make sc in every st of the chain starting from the second chain from your hook. Turn. 1 sc in the end of the chain, make sc in every st (starting with the one you have just worked into; now that st has 3 sc in total) until you come back to the beginning of the chain. 1 sc in the end of the chain. Join with a sl st to the first sc of this round. In total you should have 64 st.
Add your blue yarn like it is shown in the photo instructions below. Follow the color chart for all the rounds until the end.
Round 2-21: ch 1, msc in every st of the prev round. Join with a sl st.
Fasten off and sew in a zipper.
Color chart for the crochet zipper pouch
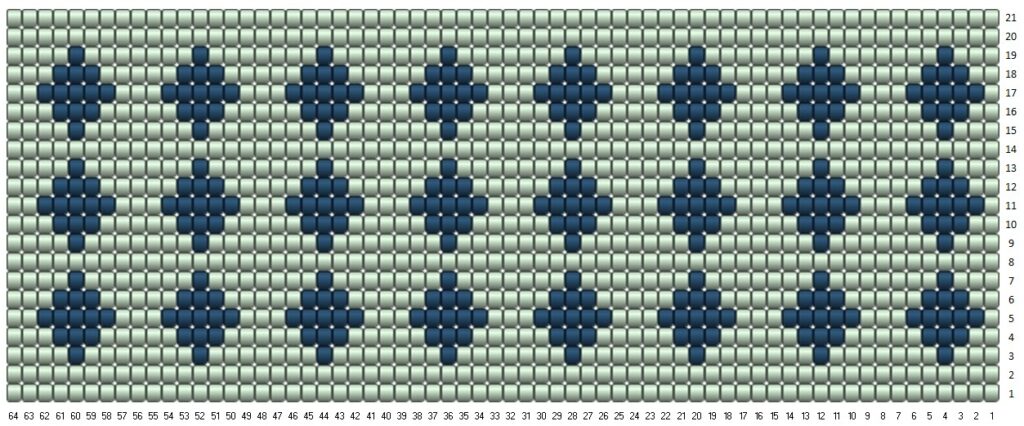

How to read the chart
Each square represents a stitch and its color. In each round you have 64 stitches. Rows represent rounds. For each round you have to read the row in the chart from right to left. The chain that you make in the beginning of each round counts as a stitch.
Photo instructions for the crochet zipper pouch
Round 1
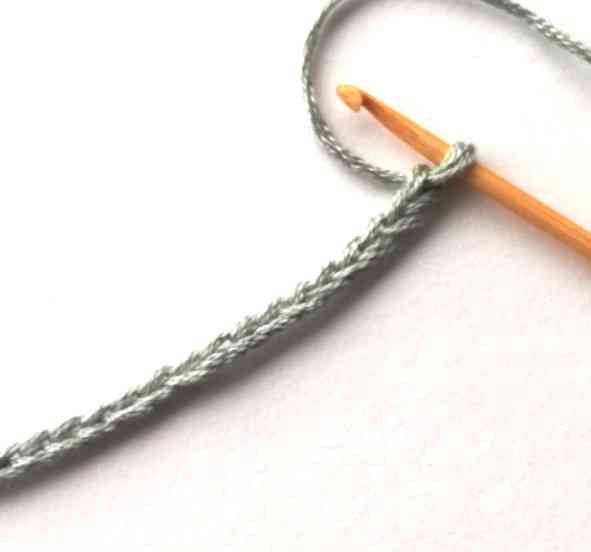

1. Start by chaining 32.
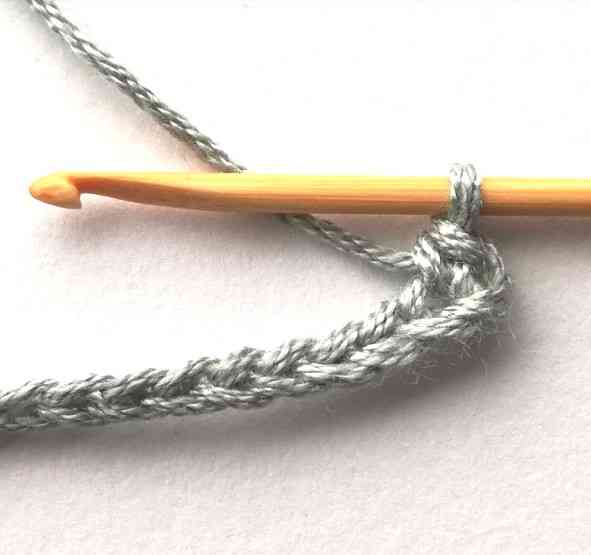

2. Make a single crochet in the second chain from your hook.
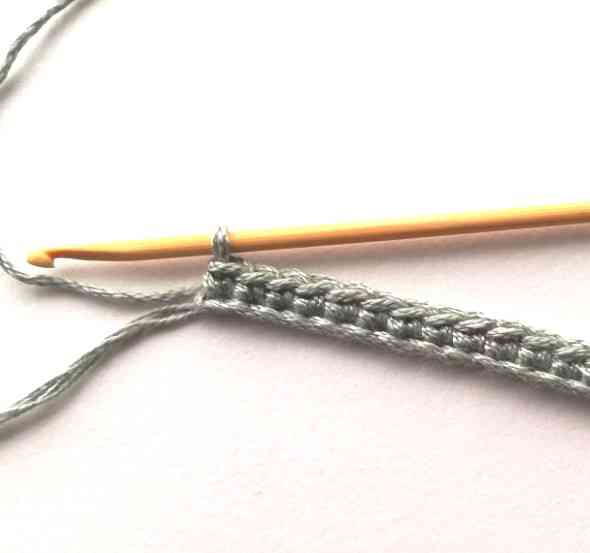

3. Continue making single crochets until the end of the chain.
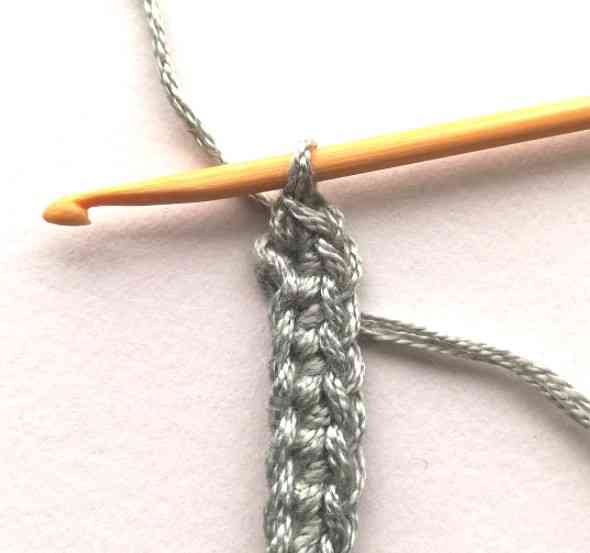

4. Then make one single crochet in the end of the chain.
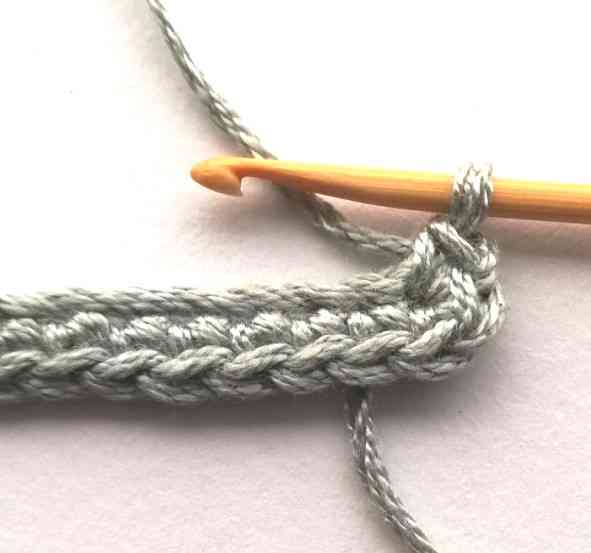

5. Turn your work and make one more single crochet in the same stitch.
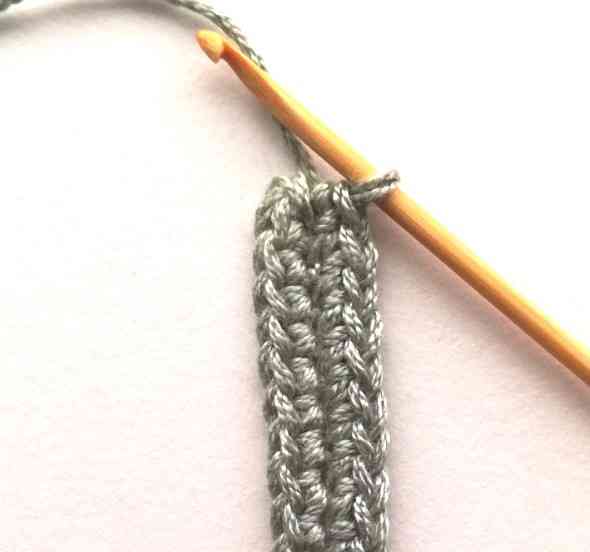

6. Then continue making single crochets in every stitch until you reach the end.
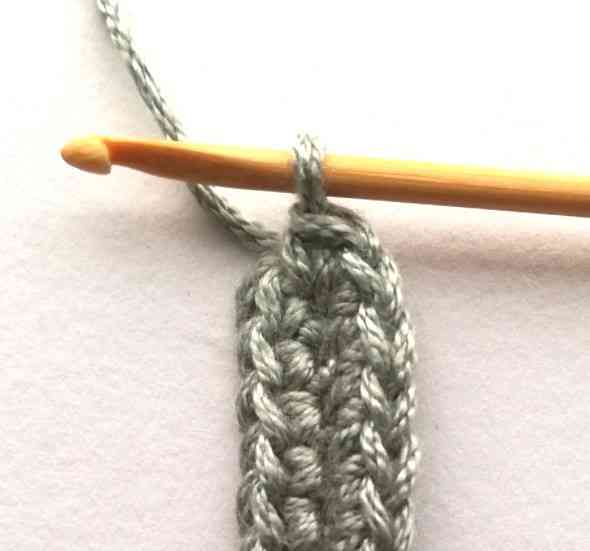

7. Make one single crochet in the end of the chain. In total you should have 64 stitches.


8. Join with a slip stitch to the first single crochet of this round.
Round 2
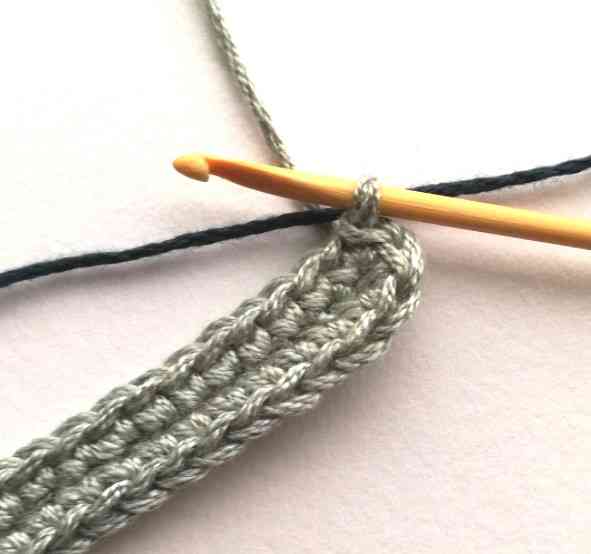

9. Next put the blue yarn behind the hook and in front of the gray yarn like it is shown in the picture.
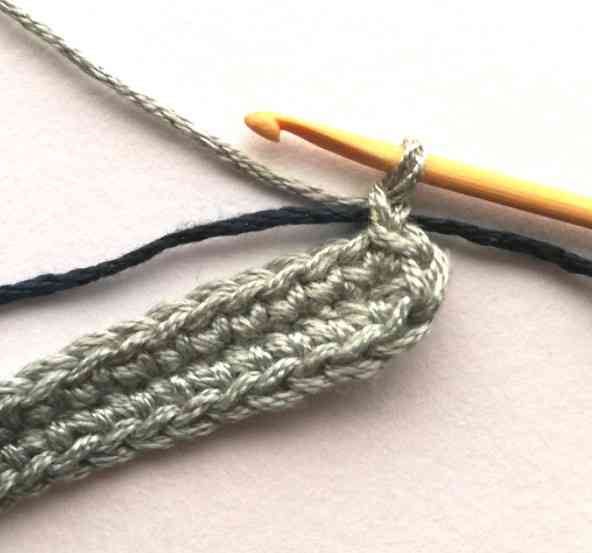

10. Chain one. Now your blue yarn is secured.
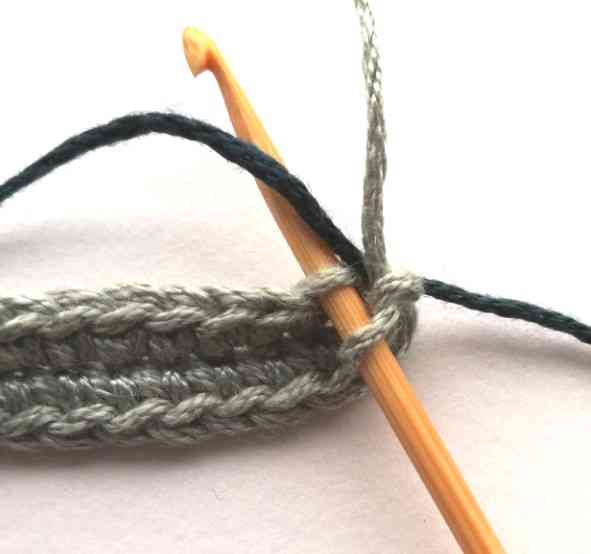

11. Then insert your hook in the next stitch grabbing just the back loop.
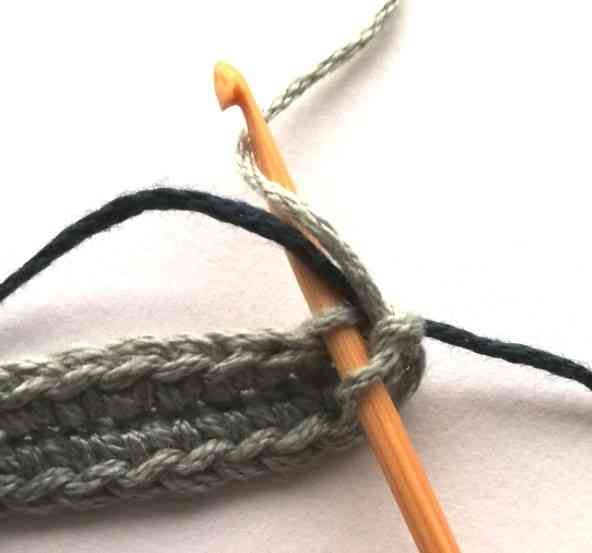

12. Yarn over the gray yarn.
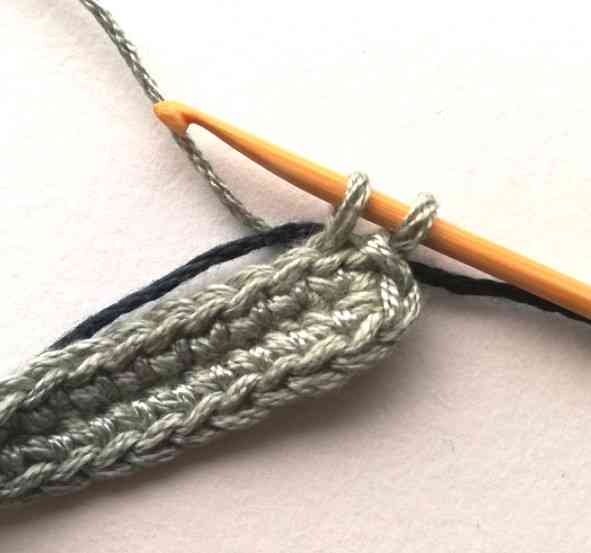

13. Pull the yarn through. Now you have two loops on your hook.
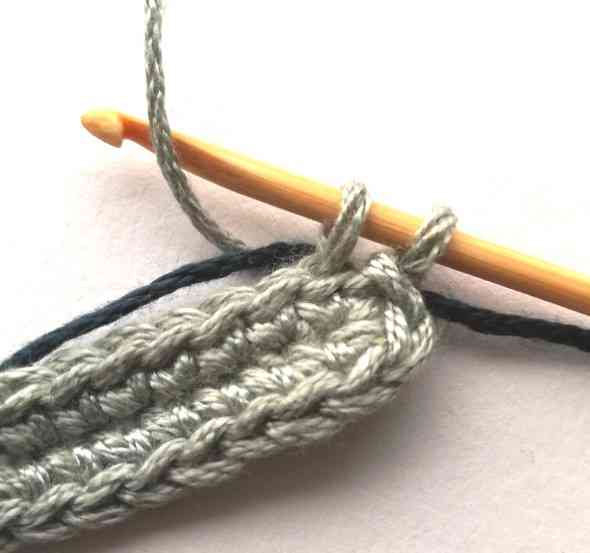

14. Then yarn under the gray yarn like it is shown in the picture.
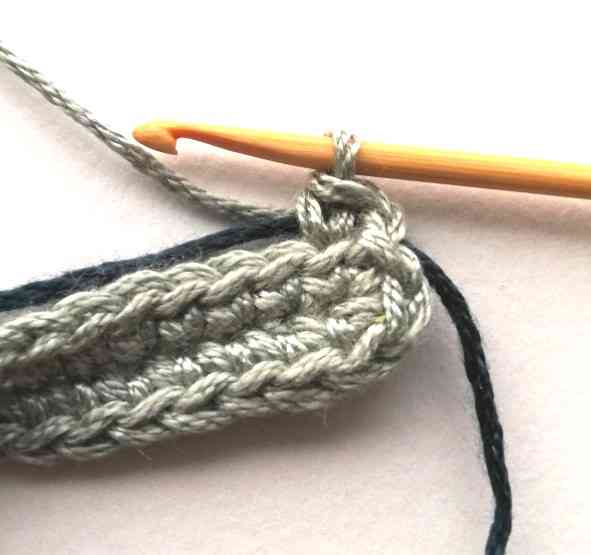

15. Pull the yarn through both loops. You have just made a modified single crochet. Notice that the blue yarn is wrapped around with the gray yarn.
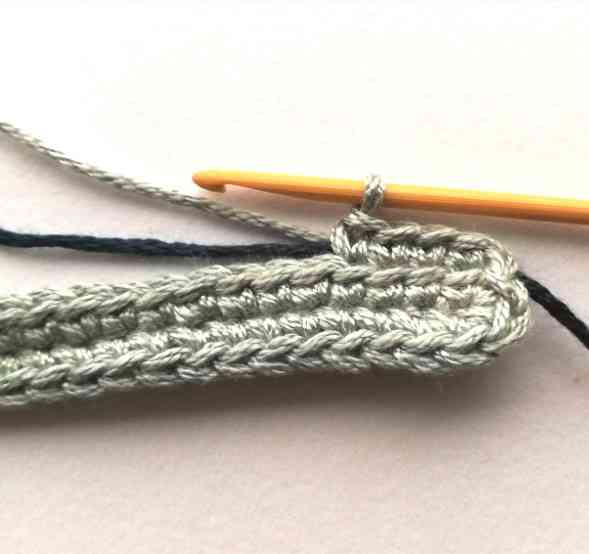

16. Continue making modified single crochets.
Round 3
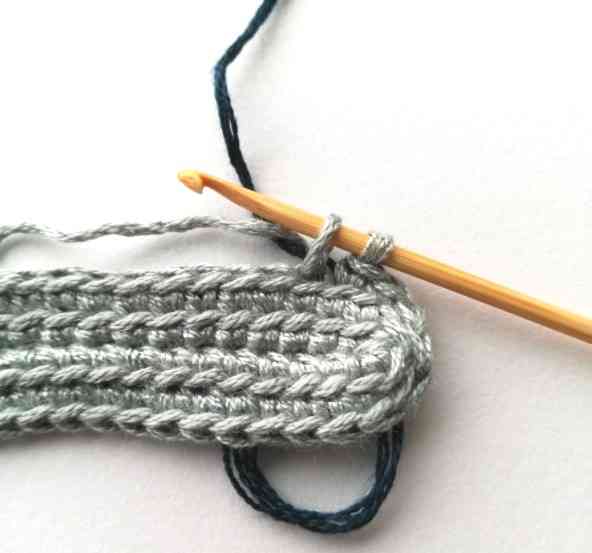

17. In round 3 you have to change yarn color, because the fourth stitch should be blue. So, chain 1 (this is your first stitch), make one full msc, then start making the second msc (which is your third stitch), but don’t finish it, stop when you have two loops on your hook. Then put the blue yarn up like it is shown in the picture.
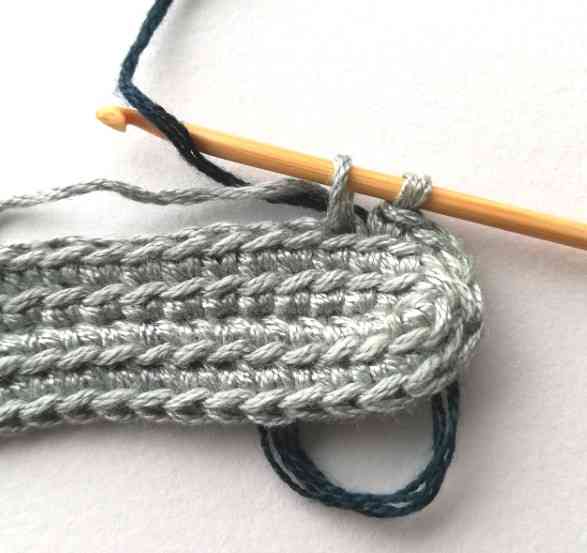

18. Yarn under the blue yarn.
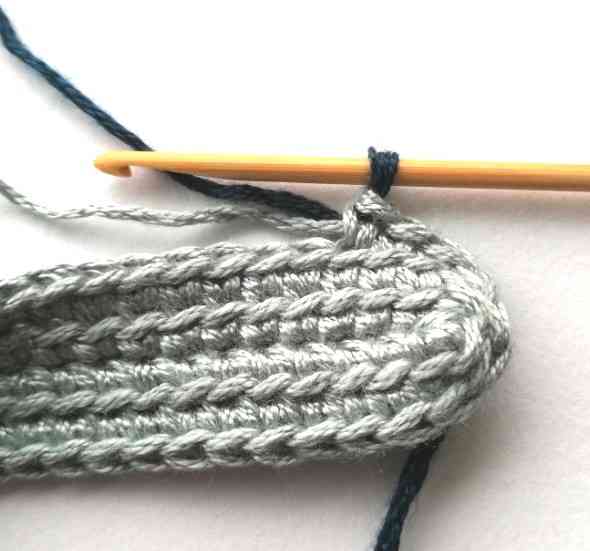

19. Pull the yarn through both loops. The blue yarn is ready to use.
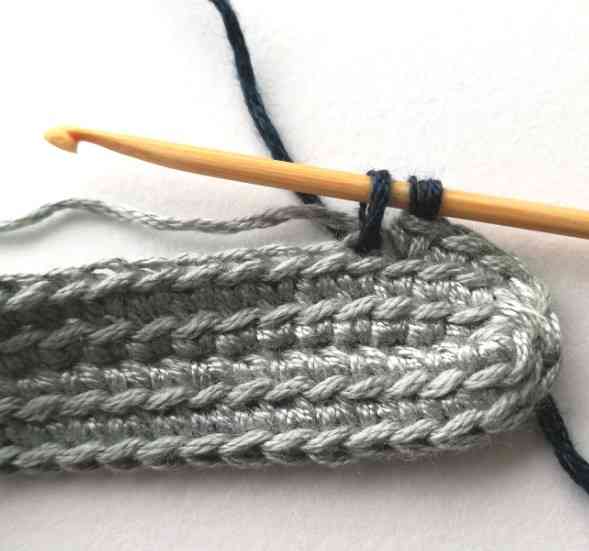

20. Start making the fourth stitch in blue, but don’t finish it, because you have to change color again (the fifth stitch should be gray).
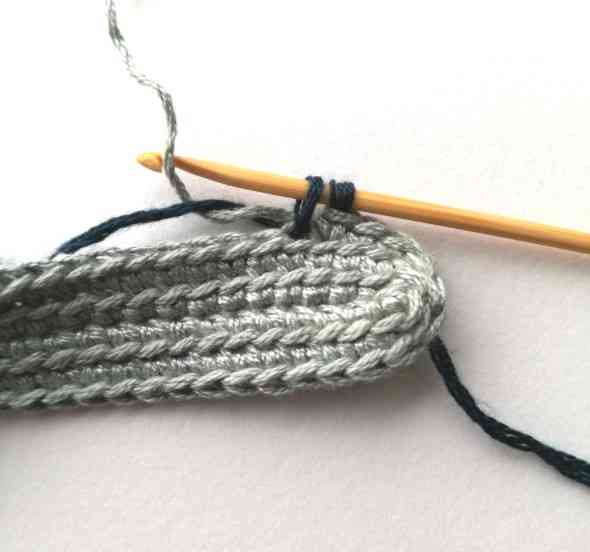

21. So, put the gray yarn up and yarn under.
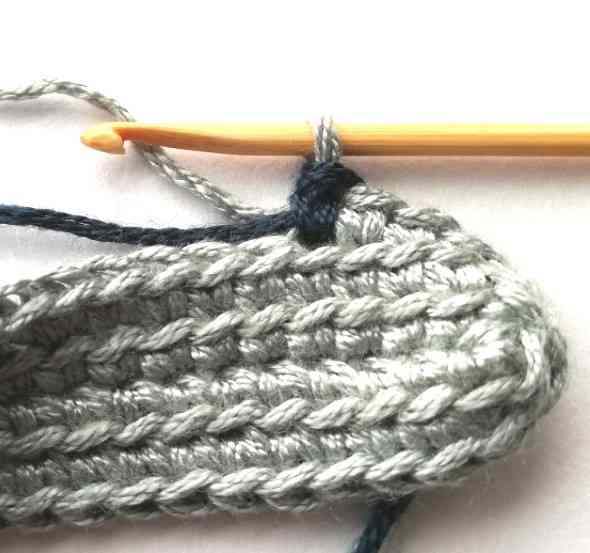

22. Pull the yarn through both loops. The gray yarn is ready to use.
How to join with a slip stitch
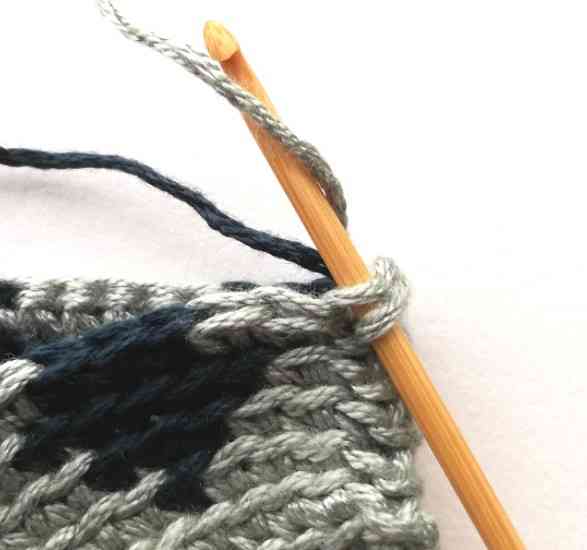

23. Next pictures show how to make a slip stitch in the end of each round. Insert your hook in the chain that you made in the beginning of the round. Yarn over the gray yarn. Notice that the blue yarn is behind now.
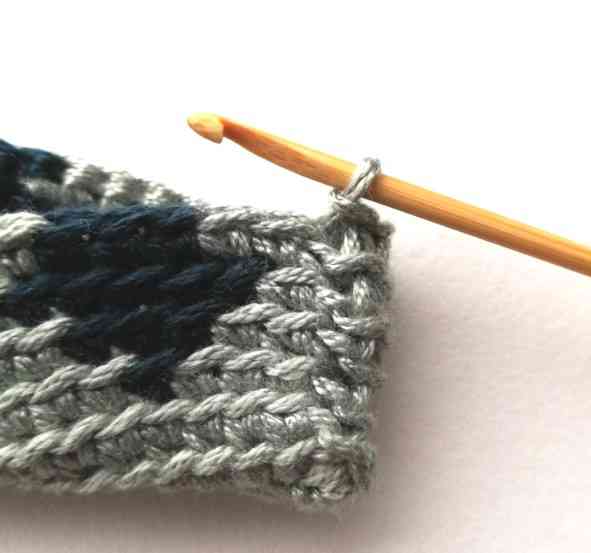

24. Then pull the yarn through. Then chain one with the gray yarn as you would usually do.
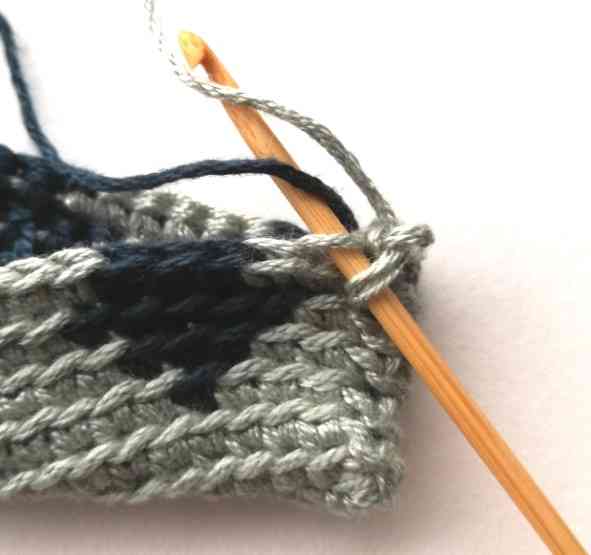

25. For the next stitch, work as it was shown before: the blue yarn should be wrapped around with the gray yarn.
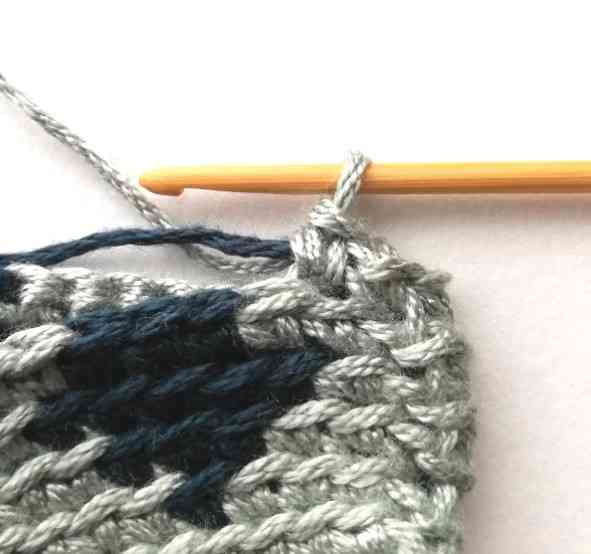

26. Continue working in the same way and follow the color chart.
Finished tapestry crochet zipper pouch
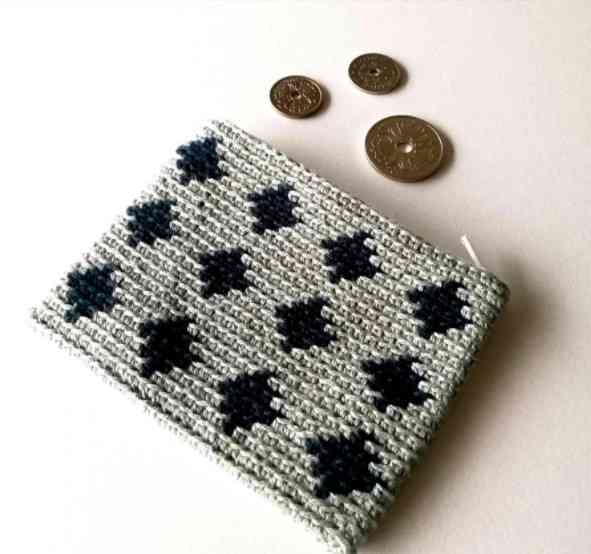

27. Done!
You can find a tutorial on how to sew in a zipper in your crochet zipper pouch and attach lining here.
Enjoy your tapestry crochet zipper pouch!
PDF: If you prefer a printable PDF pattern without ads, you can buy it here.
Save this pattern to your crochet Pinterest board here.


